Part 2 - Conguration
47
– Factory Reset : Resets the NVR to all its initial
factory settings. It is supported by DirectIP cameras
only.
● Mode: Select a resolution mode. This is supported by
video encoders only.
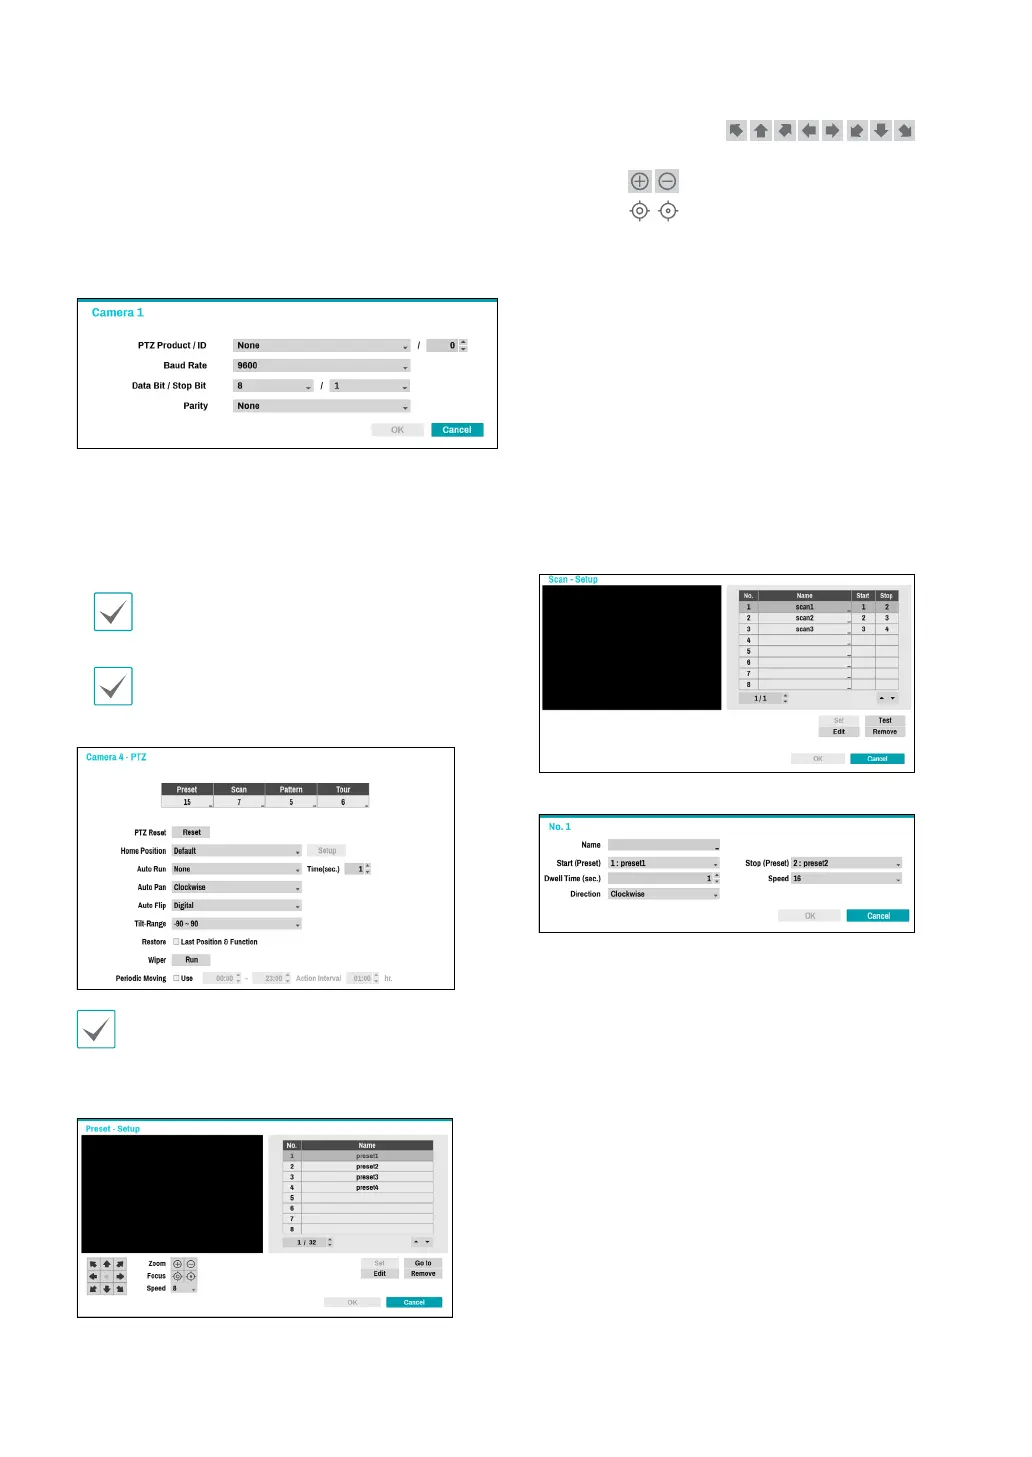
● PTZ: If using an RS-485-compliant camera, congure
it for use in PTZ Mode.
– PTZ Product: Choose to select the model of
installed PTZ device.
– ID: Choose to assign an ID to each PTZ device.
– Choose to set up Baud Rate, Data Bit, Stop Bit
and Parity of the connected device.
Refer to the PTZ device manufacturer’s instructions
for the proper settings.
Types of conguration options shown vary
depending on the PTZ functions supported by the
camera.
1
2 3 4
5
6
7
8
9
0
!
@
#
Numbers shown below Preset, Scan, Pattern, and Tour
indicate the numbers of congured functions.
1 Preset
Use the buttons below to choose a preset position.
– Directional Buttons (
):
Used to tilt and pan the camera.
– Zoom (
): Zoom in and out.
– Focus (
): Adjust camera focus to far or near.
– Speed: Specify the camera’s panning and tilting
speed.
● Set: Choose a preset number and then enter a name.
This saves the current preset under the specied
preset number and name.
● Go to: Select a preset from the list and then click Go
to to move the camera to the selected preset position.
● Edit: Used to change the selected preset’s name.
● Remove: Used to remove the selected preset.
2 Scan
Used to set up a prole for moving the camera between
two points. At least two presets must be available in
order to use the scan feature.
Set: Used to set up a scan prole.
– Name: Enter a name for the scan prole.
– Start/Stop: Specify which presets to use as start
and stop points.
– Dwell Time (sec.): Specify how long the camera will
dwell at start and stop positions.
– Speed/Direction: Specify scanning speed and
direction.
● Test: Select a scan prole and then click Test to test it.
● Edit: Used to edit the selected scan prole.
● Remove: Used to remove the selected scan prole.
3 Pattern
Used to set up a pattern prole for the camera to follow
along.


 To Next Page