PNG3XX INSTALLATION MANUAL
NAM-PNG3xx-TM-EN-C.doc
The information contained in this document is the property of Automatic
Systems and is confidential. The recipient shall refrain from using it for any
urpose other than the use of the products or the execution of the project to
which it refers and from communicating it to third parties without written prior
agreement of Automatic Systems. Document subject to change without notice.
7
1.1 Direction Names and Conventions
• Direction A: is the direction a pedestrian is traveling as one enters the premises from uncontrolled
to secure areas
• Direction B: is the direction a pedestrian travels when exiting the secure space to leave the
premises.
• A Master unit is on the right side of a lane when traveling in direction A.
• A Slave unit is on the left side of the lane when traveling from direction A
• Intermediate units contain both master and slave in a single housing. It is a master for one side
(left corridor) and slave for the other (right corridor) when traveling in direction A.
• Crossing Request is the same as R.T.E (request to enter/exit) or “open to allow 1 person”.
1.2 Before You Begin – Required Objects
In order to successfully complete the optical portal installation it is essential that you have a proper plan in
place on how to proceed. Before you can actually install any PNG unit, you must first have properly and
legibly marked the area and exact position where the PNG are to be installed. You should also have
already run your electric and control conduits and have the baseplates positioned on the floor, with the
anchor bolts set through the baseplate into a firm foundation. All baseplates come with marked areas
where you are permitted to punch holes for conduit entry. THE BASEPLATES ARE NOT PRE-PUNCHED.
The only holes of the baseplates made in factory are those to allow the anchor bolts to pass through. This
is the only part of all installations that are identical.
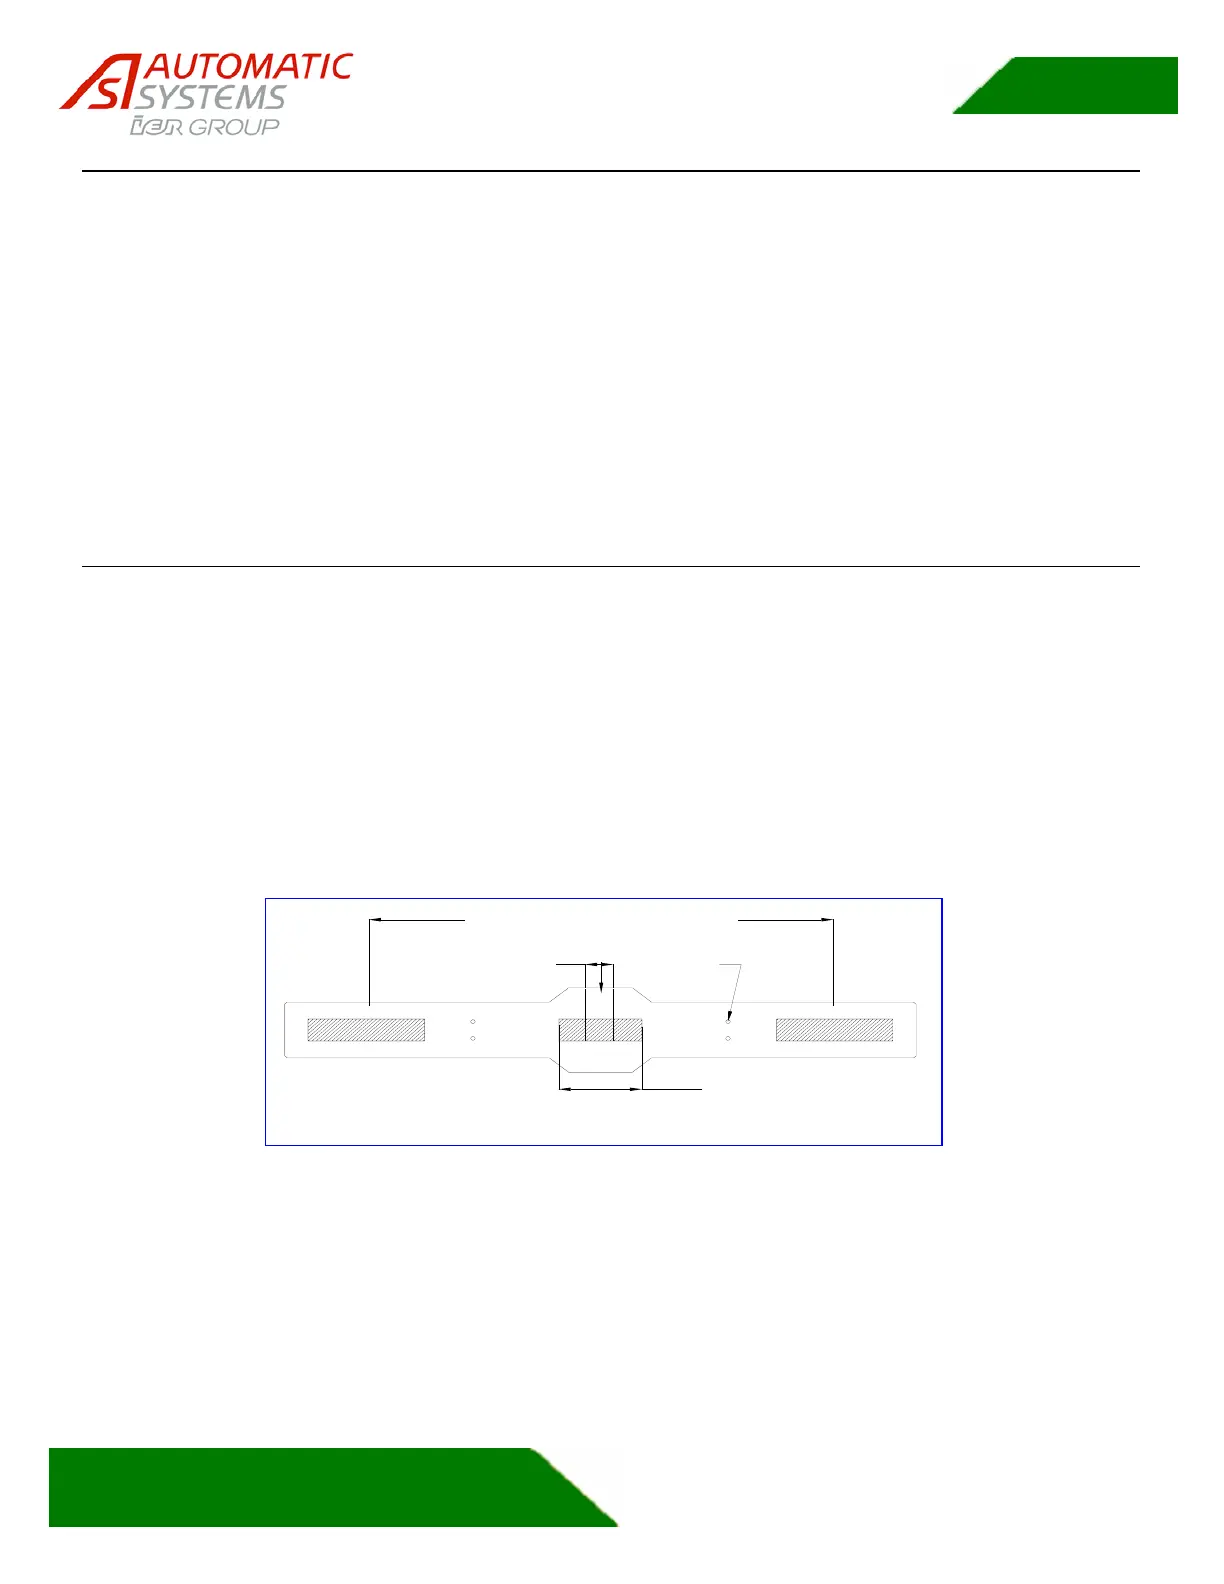
Center area
preferred zone
Sides are the preferred area of entry
Cable conduit maximum
height above ground
is 2" in this area
The only drilled holes are the four anchors holes.
Cable conduits holes must be cut by the contractor.
Holes
(typ)
Figure 1: Baseplate Important Areas
You will need the following items when you are ready to begin the PNG installation:
1. Architectural plans including details of final placement for devices
2. This installation manual
3. Copies of wiring diagrams included with the PNG and in the manuals
4. A hand truck, lift, or other means of moving the PNG
5. Full set of hand tools including a bullet level and 1 meter (1 yard) level
 Loading...