14
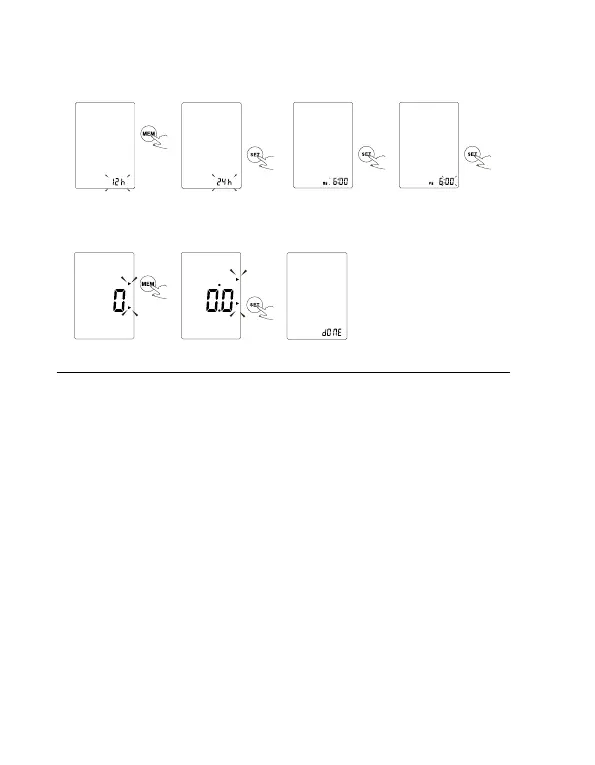
4. Repeat steps 2 and 3 to conrm the time format [12H] and [24h].
5. Repeat steps 2 and 3 to set the [HOUR] and [MINUTE].
6. Repeat steps 2 and 3 to set the [UNIT].
7. After the unit is set,the LCD will display “donE”rst,then display all the
settings you have done and then it will turn o.
MEASUREMENT PROCEDURE
ATTENTION
• Find time to relax by sitting in a quiet atmosphere for some time before
measurement.
• Be seated with your feet at on the oor, and don’t cross your legs.
Place palm upside in front of you on a at surface such as desk or
table. The middle of the cu should be at the level of the right atrium
of the heart.
• Eorts by the patient to support the arm can increase the blood pres-
sure. Make sure you are in a comfortable, relaxed position and do not
activate any muscles in the arm during measurement.
• Always measure on the same arm (normally left).
• Remove any garment that ts closely to your upper arm. Do not roll the
sleeve since it can squeeze your hand and this can lead to false results.
• Use only clinically approved original cu.
• If you want to follow the results of your blood pressure measurements,
always perform measurements at the same time of day, since blood
pressure changes during the course of the day.
• Measurements should be done after a 5 minute rest to ensure accuracy.
 Loading...