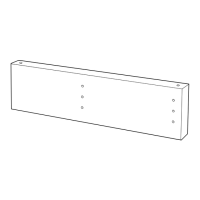
2. Attach toe-kick edging
Cover the cut edge of the toe-
kicks with the enclosed edging
strip. Press it on with a warm
iron, then cut it to the right
length.
1. Saw toe-kicks
Carefully measure and mark toe-
kicks so that they cover the open
area below your base cabinets.
Saw toe-kicks to the correct
length using a fine-toothed saw.
Step 7. Add the finishing touches
When you’ve completed Step 7, your new IKEA kitchen is ready to use!
© Inter IKEA Systems B.V. 2004.
4. Attach light valances
Measure, cut and fit the light
valances beneath the wall cabi-
nets. Instructions for installation
and placement are included with
the valances. Remember to
attach sealing strips.
6. Attach the hinge plate
Screw the door hinge base plate
into the second and third predrilled
holes at the top and bottom.
(IMPORTANT: If you choose
ULRIKSDAL door, you must screw
the hinge base plate into the third
and fourth predrilled holes.)
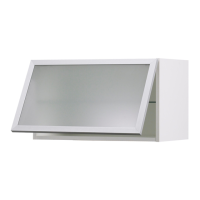
8. Hang the doors
Snap the hinge body onto the
base plate and adjust the door to
the correct position, using the
adjustment screws. Instructions
for doing this are included with
the hinges.
7. Fit the hinge to the door
Insert the hinge body into the
predrilled hole in the door and
press as shown. No screws are
needed.
9. Attach door handles
Select and measure the position
of the door handles. Make a
reversible wood template with
the correct drilling points so that
you can place handles in the
same position on all doors. Be
sure to check on which side the
door opens before you mark and
drill the holes. Hold a block of
wood behind each door so that
the surface doesn’t splinter when
the drill bit goes through.
Congratulations!
You’ve done it! Time to step back
and admire your work: a practical,
attractive kitchen full of ingenious features that
will make your life easier for years to come.
And best of all – you got more for
your money at IKEA because you
did most of the work yourself!
10. Attach protective tabs
These self-adhesive tabs will
reduce the sound when you close
cabinet doors. You’ll find them in
the package with the hinges.
Peel and stick to the upper and
lower corners of the doors or cab-
inets, opposite
the hinge side.
2. Install lighting
If cabinet lighting is included in
your kitchen plan, we suggest
that you install it now. Use a
qualified electrician for profes-
sional results.
5. Attach drawer fronts
Using the hardware provided,
mount each drawer front to the
drawer box through the pre-
drilled, prealigned holes. These
holes and the hardware allow
easy adjustment for perfect
drawer front alignment.
The cabinets have predrilled holes for quick and
easy installation of shelving, drawers and
interior accessories. This also makes it simple to
make adjustments or add accessories later on.
If you need to attach cover panels to the cabi-
net frames, put them on before doing anything
else, since they’re screwed on from the inside.
Step 6. Install shelves, drawers & more
When you’ve completed Step 6, all interior cabinet accessories will be in place.
Hang these
instructions on
the wall so you’ll
have your
hands free
It’s almost time to celebrate—you only have a few more
things left to do! But they’re important, so be sure to take
your time.
Remember to install any child safety devices you’ve cho-
sen. Drawer and cabinet safety catches help you protect your
children from dangerous household chemicals and other
items that could bring them harm.
1. Install cover panels
Temporarily secure the cover
panel into place using a clamp.
Drill pilot holes through the cab-
inet frame from the inside of the
cabinets, being careful not to
drill through the cover panel.
Screw the cover panel into place.
3. Install shelves
Insert four supports per shelf
into the predrilled holes inside
each cabinet, then rest a shelf on
top of them. Think about what
you need to store, and place the
shelves to make best use of the
space.
4. Attach drawer
knobs/handles
On a 6” high drawer front,
attach knobs and handles to the
drawer front before it is mount-
ed to the drawer box.
5. Install cornices
Follow the installation instruc-
tions included with the cornice.
For best results, use a miter box
saw to cut the corners of each
cornice at a 45° angle. Measure
carefully so that cornices will be
the right length.
3. Clip toe-kicks into place
Follow the directions for attach-
ing the toe-kick clips. At corners
set one clip facing up and the
other down – this allows them
both to fit on the same leg. Snap
the toe-kicks into place.
RATIONELL interior fittings for
the drawers.
GRUNDTAL accessories in stain-
less steel.
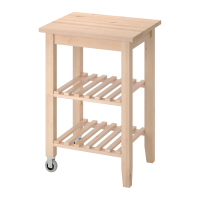
FÖRHÖJA series in clear lac-
quered solid birch/birch plywood.
UTSAGA accessories in black
lacquered steel.
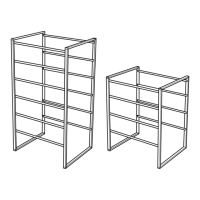
RATIONELL pull out baskets –
it´s all within reach.
Just some of the great storage ideas...
NYLED accessories on an
aluminium rail.
BYGEL accessories in powder
coated steel.
The drawers glide smoothly on
sturdy self-closing runners for
years of service. To set the drawer
in the open position, slide it out
until it stops, then tilt slightly
up so it clears the stop point on
the runner. To close the drawer
tilt it up again and roll it shut.

 Loading...
