This document is a user manual for the IKEA MATMÄSSIG gas hob. It provides detailed information on safety, installation, use, maintenance, technical specifications, and warranty.
Function Description
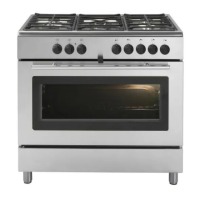
The IKEA MATMÄSSIG is a gas cooking appliance designed for household use. It features multiple burners for cooking, with individual control knobs to adjust the flame intensity. The hob is equipped with an electrical ignition system for easy lighting of the burners and a thermocouple safety device that cuts off the gas supply if the flame accidentally goes out. This appliance is intended for cooking purposes only and should not be used for other applications like room heating.
Important Technical Specifications
- Hob Dimensions:
- Width: 595 mm
- Depth: 510 mm
- Built-in height: 40 mm
- Burner Types and Sizes:
- Multi Crown burner
- Semi Rapid burners (x2)
- Auxiliary burner
- Gas Supply:
- Natural Gas (1.13 kPa test point pressure):
- Total Power: 37.4 MJ/h
- Multi Crown: Injector size 1.75 mm, Gas consumption 14.3 MJ/h, by-pass 57
- Semi-rapid (medium): Injector size 1.35 mm, Gas consumption 9.0 MJ/h, by-pass 35
- Auxiliary (small): Injector size 1.0 mm, Gas consumption 5.1 MJ/h, by-pass 32
- U-LPG (2.60 kPa test point pressure):
- Total Power: 27.9 MJ/h
- Multi Crown: Injector size 0.96 mm, Gas consumption 12.0 MJ/h, by-pass 57
- Semi-rapid (medium): Injector size 0.71 mm, Gas consumption 6.4 MJ/h, by-pass 35
- Auxiliary (small): Injector size 0.50 mm, Gas consumption 3.1 MJ/h, by-pass 32
- Gas Connection: R 1/2"
- Electrical Supply: 220-240 V ~ 50/60 Hz, Max Power = 6W
- Appliance Class: 3
- Appliance Category: - (not specified)
- Minimum Cookware Diameters:
- Auxiliary: 80 mm
- Semi-rapid: 120 mm
- Multi Crown: 180 mm
- Maximum Cookware Diameters:
- Auxiliary: 180 mm
- Semi-rapid: 240 mm
- Multi Crown: 260 mm
Usage Features
- Ignition: To ignite a burner, push and turn the control knob anticlockwise to the maximum position (marked with a flame symbol). Keep the knob pushed for approximately 5 seconds after ignition to allow the thermocouple to heat up and activate the safety device. If the burner does not light after a few attempts, check the crown and cap positions. If it doesn't light after 15 seconds, release the knob, turn it off, and wait at least 1 minute before trying again.
- Flame Adjustment: The hob is equipped with progressive valves for precise flame regulation. Once lit, the flame can be adjusted by turning the control knob.
- Turning Off: To extinguish the flame, turn the relevant control knob to the "off" position (marked with a dot).
- Energy Saving Tips: Always use lids on cookware when possible. Once liquid starts to boil, reduce the flame to a simmer.
- Cookware Selection: Use stable cookware with a flat bottom and a diameter appropriate for the burner size. Ensure cookware is centrally positioned on the burners.
Maintenance Features
- General Cleaning:
- Always switch off the appliance and allow it to cool down before cleaning.
- Disconnect the appliance from the electrical supply before maintenance.
- Clean the appliance with a moist soft cloth and neutral detergents.
- Do not use abrasive products, steel wool pads, solvents, metal objects, steam cleaners, or high-pressure cleaners.
- Wash enamelled elements, caps, and crowns with warm soapy water.
- Wash stainless steel elements with water and dry with a soft cloth.
- Keep the ceramic "candle" with the electrode clean to prevent ignition problems.
- Do not clean burners in the dishwasher.
- Pan Supports: Pan supports can be removed for easier cleaning. Wash them manually and dry with a soft cloth. Ensure they are placed back in the correct position and order after cleaning. Do not put pan supports in a dishwasher.
- Troubleshooting: The manual includes a troubleshooting guide for common issues like no spark, flame extinguishing, or uneven gas rings, with suggested remedies.
- Injector Replacement (Gas Setting Conversion): This process involves removing pan supports, burner caps and crowns, unscrewing old injectors, and replacing them with new ones suitable for the desired gas type (e.g., converting from Natural Gas to LPG). This procedure must be performed by an authorized technician.
- Adjusting Flame Level: After installation, the minimum flame setting needs to be checked and adjusted if necessary. This involves turning the gas tap to maximum, then minimum, and adjusting a screw under the control knob until the flame is steady. This procedure must be repeated for all burners.
- Gas Supply Check: The gas supply pressure should be checked by an authorized installer using a manometer connected to the cooktop pressure point on the regulator. The outlet pressure should remain within specified tolerances.