EasyManua.ls Logo

IKEA MATMASSIG - User Manual

IKEA MATMASSIG
28 pages
Print Icon
To Next Page IconTo Next Page
Loading...
MATMÄSSIG
AU
AU NZ

Questions and Answers

  • A
    amandahillAug 25, 2025
    Why I cannot switch on or operate my IKEA MATMASSIG Hob?
    • M
      Michele FritzAug 26, 2025
      If your IKEA hob won't switch on or operate, here's what to check: * Ensure the hob is correctly connected to the electrical supply, referring to the connection diagram. * Verify the fuse isn't blown; if it repeatedly blows, contact an authorised installer. * Make sure to set the power setting within 10 seconds of switching on the hob. * Avoid touching multiple symbols simultaneously; touch only one at a time. * Clean the control panel of any water or fat stains and wait a few seconds before reactivating.
  • M
    Morgan WilliamsAug 26, 2025
    Why is my IKEA Cooktop not turning on?
    • R
      Rebecca DavisAug 26, 2025
      Your IKEA Cooktop might not be activating due to several reasons. First, check if the cooktop is correctly connected to the electrical supply, and ensure proper installation by an authorized installer. It's also possible that more than 10 seconds have passed since you last tried to activate it, so try activating it again. The Child Safety Device or Lock might be enabled, so deactivate them. Finally, ensure you are only touching one symbol at a time.
  • J
    joehowardAug 27, 2025
    What to do if my IKEA Hob won't switch on?
    • J
      Jacqueline MasonAug 27, 2025
      If your IKEA hob won't switch on, several factors could be the cause. First, verify that the hob is properly connected to the electrical supply, consulting the connection diagram if necessary. Check your fuse to ensure it hasn't blown; if it repeatedly blows, contact an authorized installer. Also, make sure to set the power setting within 10 seconds of switching on the hob. Avoid touching multiple symbols simultaneously. Lastly, ensure the control panel is clean and dry before attempting to use it.
  • S
    Shane ChapmanAug 27, 2025
    What to do if no cookware on the cooking zone of IKEA MATMASSIG Hob?
    • J
      Jacqueline SchneiderAug 28, 2025
      Place cookware on the cooking zone of your IKEA hob.
  • D
    derrickmiddletonAug 28, 2025
    What to do if the diameter of the bottom of the cookware is too small for the cooking zone on IKEA MATMASSIG Hob?
    • D
      Dan HamiltonAug 28, 2025
      Move the cookware to a smaller cooking zone on your IKEA hob.
  • S
    Scott RamseyAug 29, 2025
    How to troubleshoot an IKEA MATMASSIG Hob that won't turn on?
    • A
      Angel ParkAug 29, 2025
      If your IKEA Hob cannot be activated or isn't operating, consider the following: * Check that the appliance is correctly connected to the electrical supply. If unsure, call an authorized installer. * If more than 10 seconds have passed since you tried to activate the appliance, try activating it again. * If the Child Safety Device or the Lock is enabled, deactivate it. See the section “Child Safety Device" or "Lock" for instructions. * Ensure you are only touching one symbol at a time.
  • A
    Albert Roberts DDSAug 30, 2025
    What to do if a number comes on my IKEA Hob?
    • W
      wrightchristopherAug 30, 2025
      If you see a number displayed on your IKEA hob, it indicates an error. To resolve this: 1. Disconnect the hob from the electrical supply for a short period. 2. Disconnect the fuse from the house's electrical system. 3. Reconnect the fuse. If the error persists, contact an authorised installer.
  • C
    Caitlin Kane MDAug 23, 2025
    How to fix IKEA Hob if it won't switch on?
    • D
      Danielle WebbAug 23, 2025
      If your IKEA hob is not switching on or operating, first ensure it's correctly connected to the electrical supply. If the installation seems incorrect, it's best to call an authorized installer to check it. Also, avoid touching multiple symbols at once and ensure the control panel is clean and dry. If the Child Lock is active, deactivate it.
  • E
    Eddie CordovaSep 1, 2025
    How to fix no signal when touching panel symbols on IKEA Cooktop?
    • T
      Toni WilliamsSep 1, 2025
      If there is no signal when you touch the panel symbols on your IKEA Cooktop, the signals may be deactivated. You should activate the signals.
  • R
    Renee ReyesSep 2, 2025
    Why is the residual heat indicator not displaying on my IKEA Cooktop?
    • X
      xparsonsSep 2, 2025
      The residual heat indicator on your IKEA Cooktop may not be displaying anything because the cooking zone was only on for a short time and is therefore not hot. If you believe the cooking zone should be hot, contact After Sales Service.

Summary

Safety Information

Children and Vulnerable People Safety

Safety measures for children and vulnerable individuals.

General Safety

Conditions of Use

Safety Instructions

Use

Care and Cleaning

Service

Disposal

Product Description

Cooking Surface Layout

Diagram of the cooking surface components.

Burner Control Knob

Explanation of control knob symbols.

Daily Use

Ignition of the Burner

Steps for igniting the burners.

Turning the Burner Off

How to extinguish the burner flame.

Hints and Tips

Energy Saving

Tips for efficient energy consumption.

Diameters of Cookware

Recommended pot and pan sizes for burners.

Troubleshooting

What to do if...

Technical Data

Hob Dimensions

Physical measurements of the hob.

Other Technical Data

Additional technical specifications and compliance.

Installation

Clearances to Combustible Surfaces

Electrical Connection

Electrical Requirements

Replacement of the Connection Cable

Gas Connection

Supply Pipe Sizing

Regulator

Assembly of Regulator

Checking the Gas Supply

Checking the Regulator

Gas Setting Conversion

Adjusting Flame Level

Environmental Concerns

IKEA Guarantee

How long is the IKEA guarantee valid?

Duration and terms of the guarantee.

Who will execute the service?

Information on service providers.

What does this guarantee cover?

Details on what the guarantee protects.

What will IKEA do to correct the problem?

IKEA's process for handling claims.

What is not covered under this guarantee?

Exclusions from the guarantee coverage.

How country law applies

How Australian Consumer Law affects the guarantee.

Area of validity

Geographical scope of the guarantee.

What you must do to make a claim under the guarantee:

Steps to initiate a guarantee claim.

How to reach us if you need our service

Contact information for service requests.

Overview

This document is a user manual for the IKEA MATMÄSSIG gas hob. It provides detailed information on safety, installation, use, maintenance, technical specifications, and warranty.

Function Description

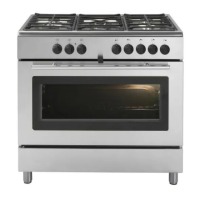
The IKEA MATMÄSSIG is a gas cooking appliance designed for household use. It features multiple burners for cooking, with individual control knobs to adjust the flame intensity. The hob is equipped with an electrical ignition system for easy lighting of the burners and a thermocouple safety device that cuts off the gas supply if the flame accidentally goes out. This appliance is intended for cooking purposes only and should not be used for other applications like room heating.

Important Technical Specifications

  • Hob Dimensions:
    • Width: 595 mm
    • Depth: 510 mm
    • Built-in height: 40 mm
  • Burner Types and Sizes:
    • Multi Crown burner
    • Semi Rapid burners (x2)
    • Auxiliary burner
  • Gas Supply:
    • Natural Gas (1.13 kPa test point pressure):
      • Total Power: 37.4 MJ/h
      • Multi Crown: Injector size 1.75 mm, Gas consumption 14.3 MJ/h, by-pass 57
      • Semi-rapid (medium): Injector size 1.35 mm, Gas consumption 9.0 MJ/h, by-pass 35
      • Auxiliary (small): Injector size 1.0 mm, Gas consumption 5.1 MJ/h, by-pass 32
    • U-LPG (2.60 kPa test point pressure):
      • Total Power: 27.9 MJ/h
      • Multi Crown: Injector size 0.96 mm, Gas consumption 12.0 MJ/h, by-pass 57
      • Semi-rapid (medium): Injector size 0.71 mm, Gas consumption 6.4 MJ/h, by-pass 35
      • Auxiliary (small): Injector size 0.50 mm, Gas consumption 3.1 MJ/h, by-pass 32
  • Gas Connection: R 1/2"
  • Electrical Supply: 220-240 V ~ 50/60 Hz, Max Power = 6W
  • Appliance Class: 3
  • Appliance Category: - (not specified)
  • Minimum Cookware Diameters:
    • Auxiliary: 80 mm
    • Semi-rapid: 120 mm
    • Multi Crown: 180 mm
  • Maximum Cookware Diameters:
    • Auxiliary: 180 mm
    • Semi-rapid: 240 mm
    • Multi Crown: 260 mm

Usage Features

  • Ignition: To ignite a burner, push and turn the control knob anticlockwise to the maximum position (marked with a flame symbol). Keep the knob pushed for approximately 5 seconds after ignition to allow the thermocouple to heat up and activate the safety device. If the burner does not light after a few attempts, check the crown and cap positions. If it doesn't light after 15 seconds, release the knob, turn it off, and wait at least 1 minute before trying again.
  • Flame Adjustment: The hob is equipped with progressive valves for precise flame regulation. Once lit, the flame can be adjusted by turning the control knob.
  • Turning Off: To extinguish the flame, turn the relevant control knob to the "off" position (marked with a dot).
  • Energy Saving Tips: Always use lids on cookware when possible. Once liquid starts to boil, reduce the flame to a simmer.
  • Cookware Selection: Use stable cookware with a flat bottom and a diameter appropriate for the burner size. Ensure cookware is centrally positioned on the burners.

Maintenance Features

  • General Cleaning:
    • Always switch off the appliance and allow it to cool down before cleaning.
    • Disconnect the appliance from the electrical supply before maintenance.
    • Clean the appliance with a moist soft cloth and neutral detergents.
    • Do not use abrasive products, steel wool pads, solvents, metal objects, steam cleaners, or high-pressure cleaners.
    • Wash enamelled elements, caps, and crowns with warm soapy water.
    • Wash stainless steel elements with water and dry with a soft cloth.
    • Keep the ceramic "candle" with the electrode clean to prevent ignition problems.
    • Do not clean burners in the dishwasher.
  • Pan Supports: Pan supports can be removed for easier cleaning. Wash them manually and dry with a soft cloth. Ensure they are placed back in the correct position and order after cleaning. Do not put pan supports in a dishwasher.
  • Troubleshooting: The manual includes a troubleshooting guide for common issues like no spark, flame extinguishing, or uneven gas rings, with suggested remedies.
  • Injector Replacement (Gas Setting Conversion): This process involves removing pan supports, burner caps and crowns, unscrewing old injectors, and replacing them with new ones suitable for the desired gas type (e.g., converting from Natural Gas to LPG). This procedure must be performed by an authorized technician.
  • Adjusting Flame Level: After installation, the minimum flame setting needs to be checked and adjusted if necessary. This involves turning the gas tap to maximum, then minimum, and adjusting a screw under the control knob until the flame is steady. This procedure must be repeated for all burners.
  • Gas Supply Check: The gas supply pressure should be checked by an authorized installer using a manometer connected to the cooktop pressure point on the regulator. The outlet pressure should remain within specified tolerances.

IKEA MATMASSIG Specifications

General IconGeneral
BrandIKEA
ModelMATMASSIG
CategoryHob
LanguageEnglish

Related product manuals