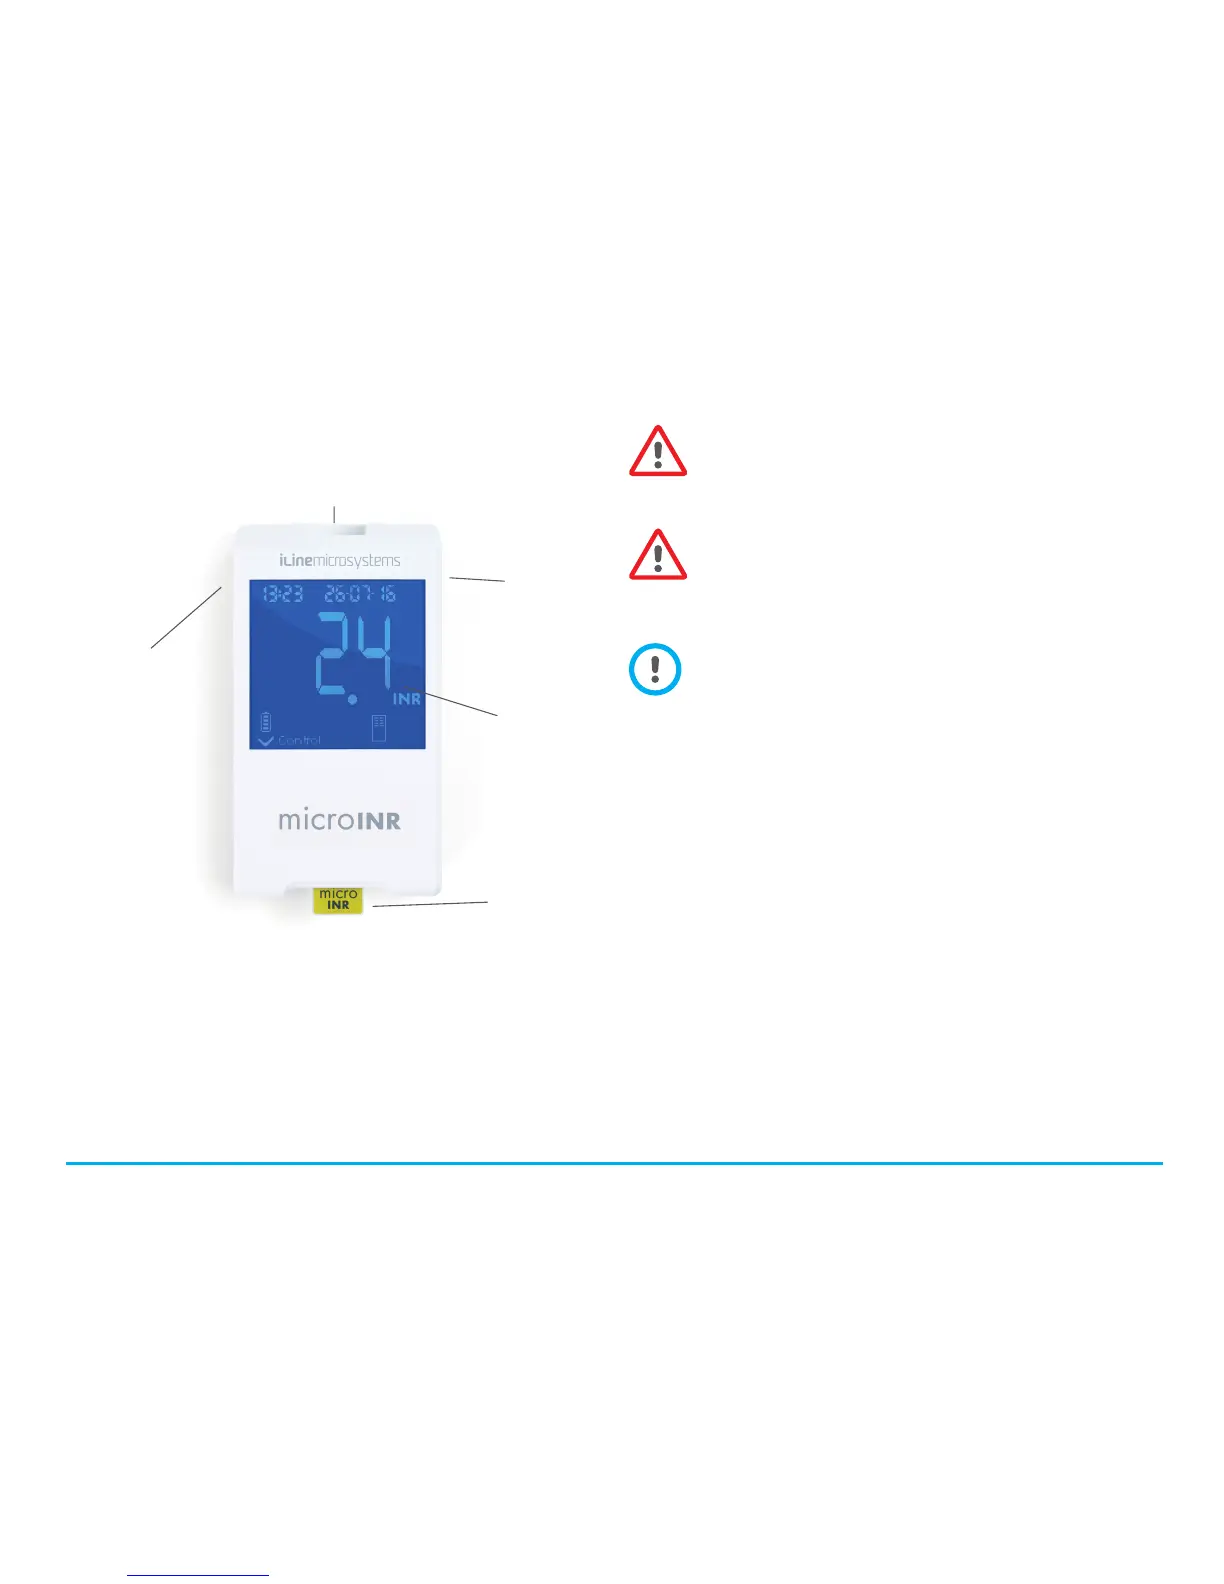
2.2 PARTS OF THE microINR® METER
2.3 CHARGING THE microINR® METER
The Meter uses a lithium battery that can be recharged
through the mini USB connection on the top of the Meter.
Do not place the device in a way that handling the
disconnection element is made difficult.
The recommended charging time is approximately 3 hours.
06
Charge the battery completely before using the Meter
for the first time.
Do not open or manipulate the Meter.
Do not pierce or burn the battery.
Do not change the battery. The manufacturer will not
warranty Meters that have been opened.
If opening the Meter is necessary, the equipment must
be sent to the manufacturer.
Use only the supplied USB cable and wall power
adapter provided by the manufacturer or you may
damage the Meter.
2.4 SETTING THE TIME AND DATE
• Date format: DD/MM/YY; Time format: 24 hours.
• Press and hold the left and right buttons (E and M) at the
same time for 10 seconds until the time fields flash.
• Press the left button (E) to set the hour.
• After selecting the right time, press the right button (M) and
set the minutes.
• After selecting the minutes, press the right button (M) again
and the date fields will start flashing.
• Use the left button (E) to select the correct day.
• When you reach the correct day, press the right button (M) to
set the month. Use the left button (E) to select the correct month.
• When you reach the correct month, press the right button (M) to
MINI USB CONNECTION
EXIT (E) BUTTON
BOTÓN
MEMORY (M)
CHIP
INSERTION
AREA
DISPLAY