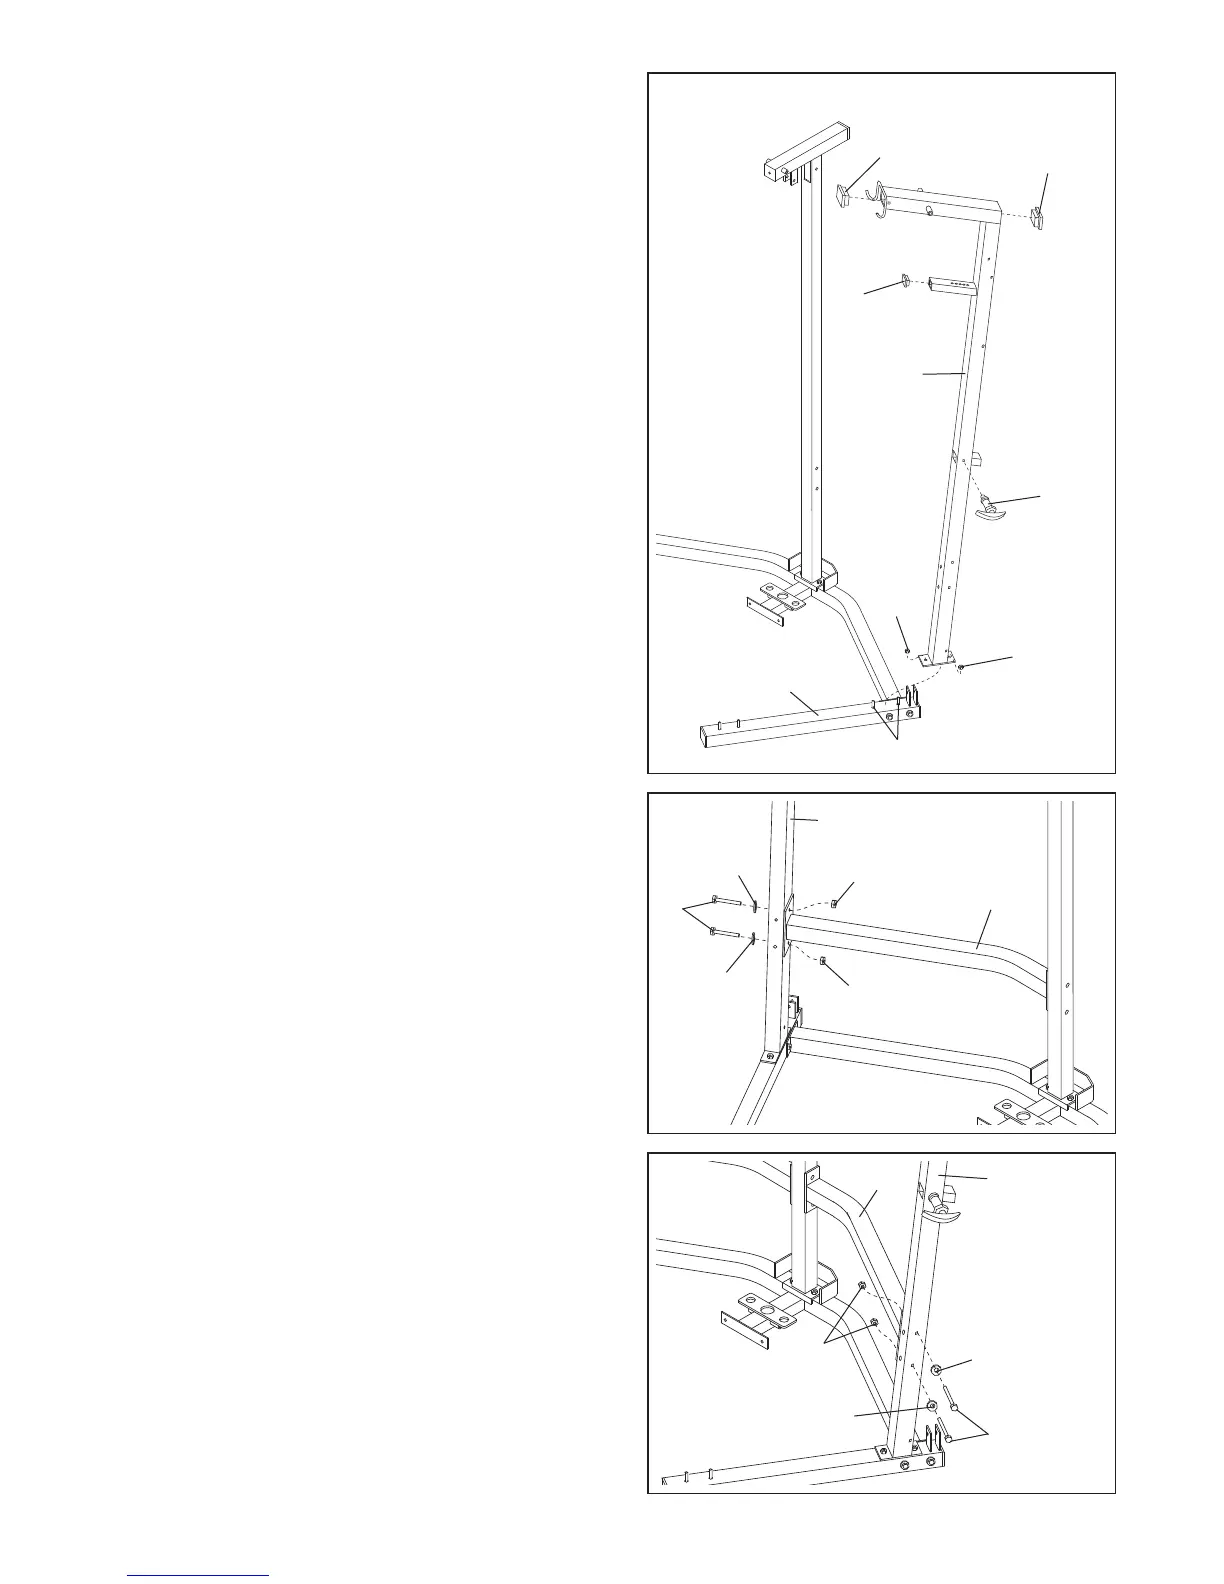
5. Press two 2” Square Inner Caps (28) into the Press
Upright (2). Press a 1 3/4” Square Inner Cap (35) into
the welded tube on the Press Upright.
Place the bracket on the lower end of the Press
U
pright (2) onto the indicated 5/16” x 2 1/2” Carriage
Bolts (92) and secure it with two 5/16” Nylon Locknuts
(64).
Thread an Adjustment Handle (85) into the indicated
hole in the Press Upright (2).
5
7
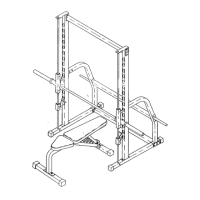
6. With a second person holding the Right Support
Frame (33) in position, attach the Right Support
Frame to the Butterfly Upright (1) with two 5/16” x 2
3/4” Bolts (89), two 5/16” Washers (36), and two 5/16”
Nylon Locknuts (64). Do not tighten the Nylon
Locknuts yet.
6
92
6
1
33
89
36
36
64
2
2
8
28
35
64
85
64
64
7. While a second person holds the Left Support Frame
(97) in position, attach the Left Support Frame to the
Press Upright (2) with two 5/16” x 2 3/4” Bolts (89),
two 5/16” Washers (36), and two 5/16” Nylon
Locknuts (64). Do not tighten the Nylon Locknuts
yet.
7
64
89
36
36
97
2