24
DISASSEMBLY AND ASSEMBLY PROCEDURES (PACKING PUMPS)
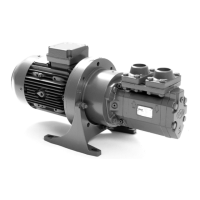
Disassembly Procedures (Figures 23 and 24)
NOTE: Refer to pump assembly drawings, Figures 23 and 24, during pump disassembly. Disassembly
procedures for Figures 23 and 24 packing pumps are identical.
1. Close off suction and discharge piping to pump and disconnect piping. Remove tubing (031) from
pump, ensuring that tubing (031) is not bent or flattened. Remove drain plugs (003). Remove pump
from driver, coupling and mounting bracket. Remove coupling hub and key (027).
2. Remove bolts or capscrews (011) and inlet head (026) and gasket (008).
3. Remove bolts (024) with lockwashers (025), thrust plate (022) and spacers (023).
4. Remove idler cups (021), where applicable. *
5. Remove idler rotors (020) by unscrewing idlers (020) from housing (002) bores.
6. Loosen packing gland nuts (038) or capscrews (018) to relieve pressure on packing gland (017).
7. Remove capscrews or bolts (011). Pull assembled power rotor (012) from case (001).
NOTE: Removal of assembled power rotor will remove packing gland (017), packing (016), inboard cover
(009), balance piston housing (014), tube (004) with 0-rings (005), spacer (015) and 0-ring (007).
8. Remove gland nuts (038) or screws (018), washers (019) and packing gland (017) from power rotor
(012).
9. Using a "packing puller" or sharp pointed brass or copper rod, remove packing (016)
10. Remove capscrews (010) and remove inboard cover (009) with O-ring (007) from power rotor (012).
11. Remove balance piston housing (014) with tube (004) and spacer (015) from power rotor (012).
Remove spacer (015) from tube (004) and remove tube (004) with O-rings (005) from balance piston
housing (014). Remove 0-rings (005) from tube (004).
NOTE: If tube (004) is not removed with power rotor assembly (012), it will be removed from housing (002).
NOTE: Balance piston (013) furnished as part of power rotor (012) and not serviced separately.
12. Remove housing (002) with 0-ring (006) from inlet end of case (001). Remove O-ring (006) from
housing (002).
Assembly Procedures (Figures 23 and 24)
NOTE: Prior to assembly of pump, all parts should be cleaned and inspected for nicks and burrs. Replace
all worn or damaged parts. Imo Pump recommends automatic replacement of 0-rings, gasket, and
packing when these parts are disturbed from their previously installed position. Refer to pump
assembly drawings, Figures 23 and 24, and List of Material, Table 7, during pump assembly. Coat
all parts with SAE-30 oil to assist in assembly. Assembly procedures for Figures 23 and 24 pumps
are identical.
1. Install O-ring (006) on housing (002). Install housing (002), 0-ring end first, in inlet end of case (001)
until housing (002) is flush with inlet end of case (001).
2. Install O-rings (005) on tube (004) and install tube (004) in housing (002). Install spacer (015) on tube
(004).