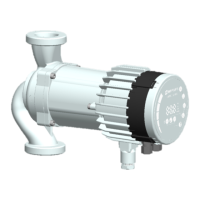
4.3. MODULE MODE SELECTION
Before performing any work on the module, make sure that the pump and module electricity
supply has been switched off and that it cannot be accidently switched on.
There is a mode selection rotary switch in the terminal box. It can be rotated by gently inserting a screwdriver
into the arrow mark on top and rotating the switch to desired value.
switch
Function Description
Terminal functions are configured over Ethernet interface.
SET2 = MAX input
SET3 = FB (10.5 V) output, used to supply RUN and MAX inputs. External
voltage source can also be used.
RS-485 = Modbus interface.
See section “4.4 Mode 1”.
SET2 = SPEED input
SET3 = FB (10.5 V) output, used to supply RUN and MAX inputs. External
5-24 V voltage source can also be used.
RS-485 = Modbus interface
See section “4.5 Mode 2”.
Reserved for future or customer specific use.
LED1 and LED2 will show relay configuration.
See section “5 Relay output”.
configuration
Relay configuration will be increased (0->1, 1->2, 2->0) when electricity
is turned on.
LED1 and LED2 will show current relay configuration.
See section “5 Relay output”.
Same as Mode 9, with exception of:
module IP address is set to 192.168.0.246
Twin IP address is set to 192.168.0.245
This mode will set communication interface to default values. Main
purpose is to restore default settings.
NOTE:
• Disconnect any SET1, SET2 and SET3 connections when using
this mode to prevent possible harm to controller. SET1, SET2,
SET3 will output test voltages of 10 V, 7 V and 5 V respectively.
RS-485 port is actively driven. Relay will cycle. This is used for
testing purposes.
• It is recommended that all module wires are disconnected to
prevent possible harm to external controllers.