24 GHz radar tools and development environment
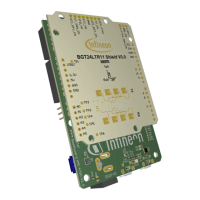
XENSIV™ 24 GHz radar demo boards
2 Running radar applications
The Radar Sense2GoL software package comes with a GUI based on a µC/Probe™ project from Micrium, which
helps the user process collected raw data.
Here below an example, on how to run this Micrium-based GUI project, for the Sense2GoL device:
• Go to the /Firmware_Software/GUI folder inside the locally installed S2GL-HW-SW package.
• Double-click the µC/Probe™ S2GL_GUI.wspx project, to open the GUI.
• S2GL_GUI.wspx can be opened in Windows Explorer, or in S2GL_Doppler DAVE™ project explorer, as shown
in Figure 19.
Figure 19 Open Sense2GoL Micrium GUI project
The µC/Probe™ needs to be provided by the XMC™ compiling and linking process output file (ELF file). This file
containing the name, data type and address of all firmware global variables is parsed by the µC/Probe™ project.
A precompiled .elf file is already available in a /Firmware_Software/GUI folder called S2GL_Doppler.elf.
Note: After building a project, object files and an application binary file (typically in ELF format) exist in
the Debug folder in the Project Explorer view file tree. Please ensure you have imported the
S2GL_Doppler.elf file into your Micrium project each time you modify and build your
S2GL_Doppler project.
Once the GUI project has opened, the following steps need to be executed:
• Connect your DEMO SENSE2GOL board via USB (please ensure the USB port on the debugger board is
connected).
• Start the GUI by clicking on the Run button.
Figure 20 Run Micrium GUI workspace
 Loading...