16
◆
Kappa Series Powered Subwoofer – Owner’s Manual
Each of the following test tracks is about one minute long. This is normally much
longer than required. Press Pause II or advance to the next test as soon as you are
ready.
This step will set the subwoofer levels for measurement purposes. The objective is to
scale the subwoofers’ output to make full use of the RSLM indicator range. Scaling is
optimum when a 0 dB reading is observed on the highest peak without triggering the
over-range indication. Later, you will rebalance the subwoofers to the main speakers.
The Kappa Subwoofers should be shipped with the three R.A.B.O.S. controls, set
to fully clockwise positions, and all measurements should be conducted with their level
controls in this position. Confirm this setting before you begin this test. The level
control should be set to the mid position (5).
Cue Track 3 and Pause II. Track 3 continuously steps through all subwoofer test tones
for approximately 1 minute. Each tone will play just long enough for the RSLM to give
a stable reading.
To get accurate measurements, it is necessary to play the woofers quite loud.
The 0 dB indication is about 94 dB. At this level, frequencies below 100 Hz can cause
doors, windows, furnishings and other objects in the room to vibrate. This frequently
results in clearly audible buzzes and/or rattles that come and go as each test tone
plays. Strong buzzes not only sound bad, they can cause measurement errors.
If you hear a buzz or rattle during this test, it is highly recommended that you locate
the source and eliminate its effects. This is actually a valuable room-diagnostic tool.
Press Play
G
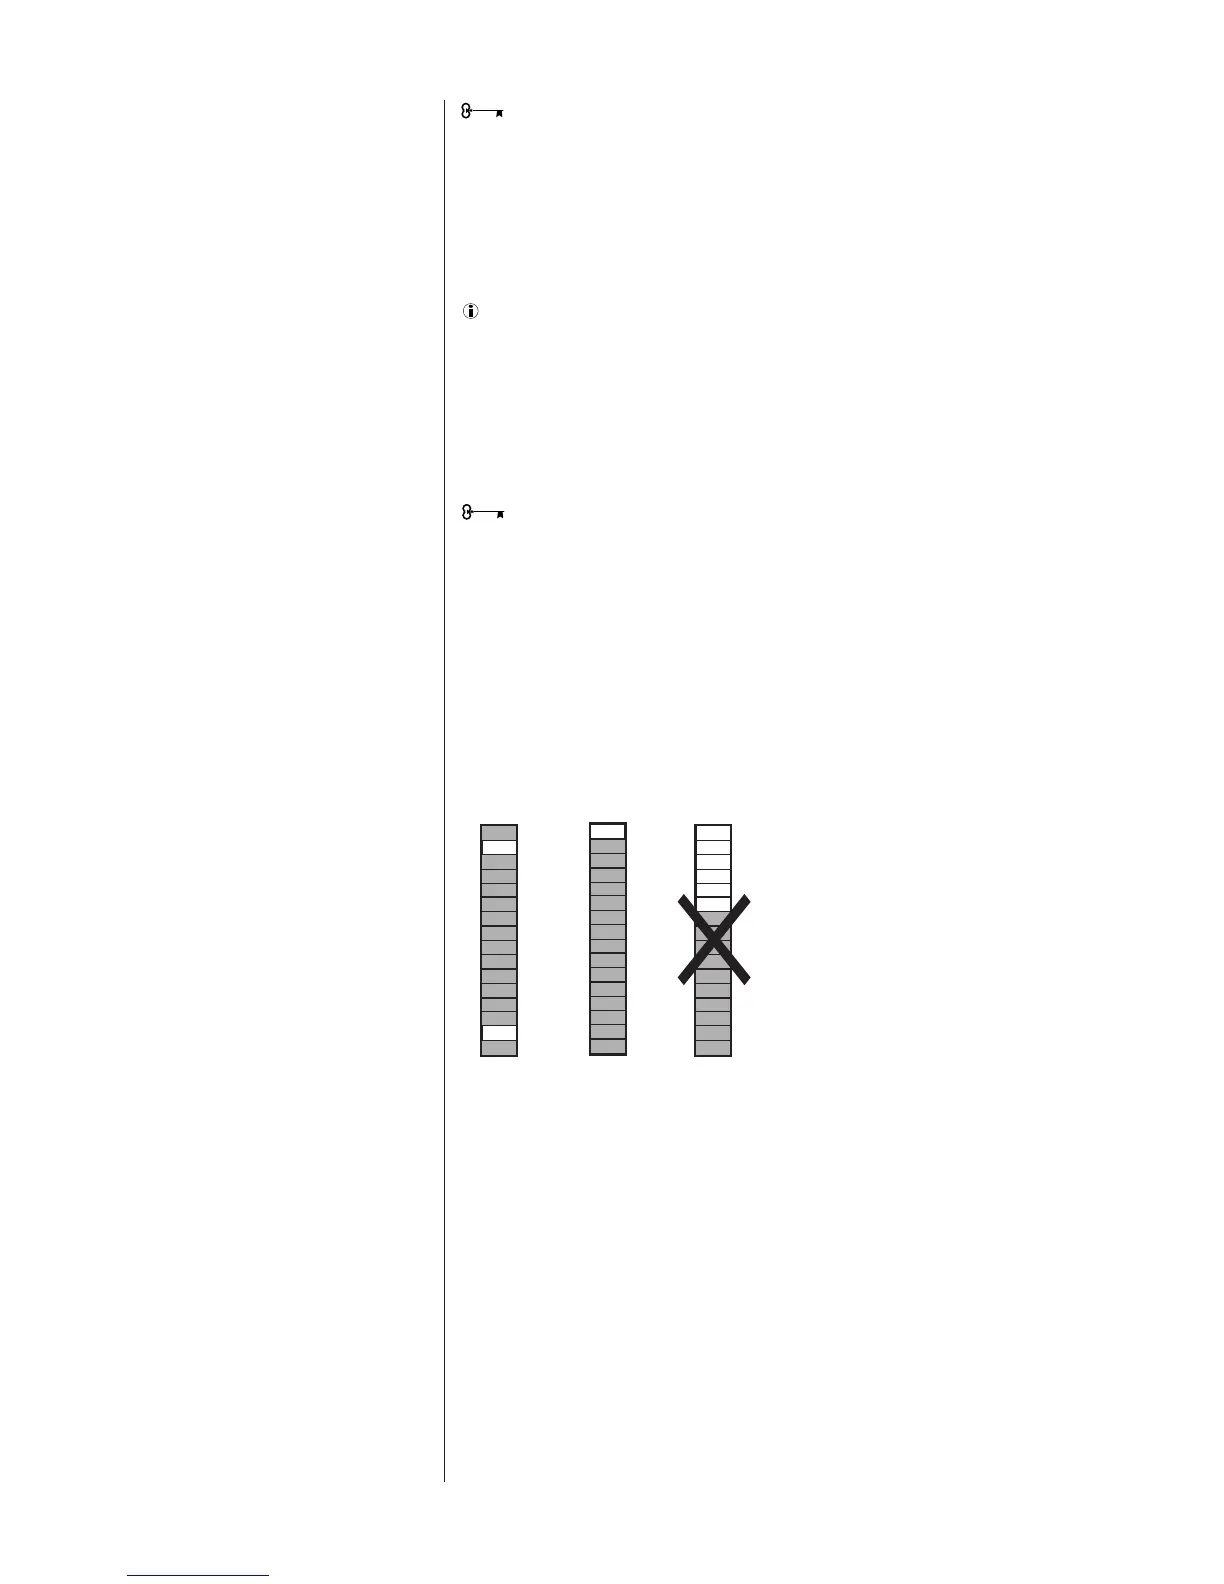
. As Track 3 plays, watch the RSLM carefully. Watch for peak readings.
The peak reading may be no more than a brief flash. Readjust the subwoofers’ level
control until the peak level observed is 0 dB without triggering the over-range
indication. See Figure 7.
When finished, press Pause II.