This is to reduce the background noise in a low luminance environment with 2D+3Dfiltering •
system.
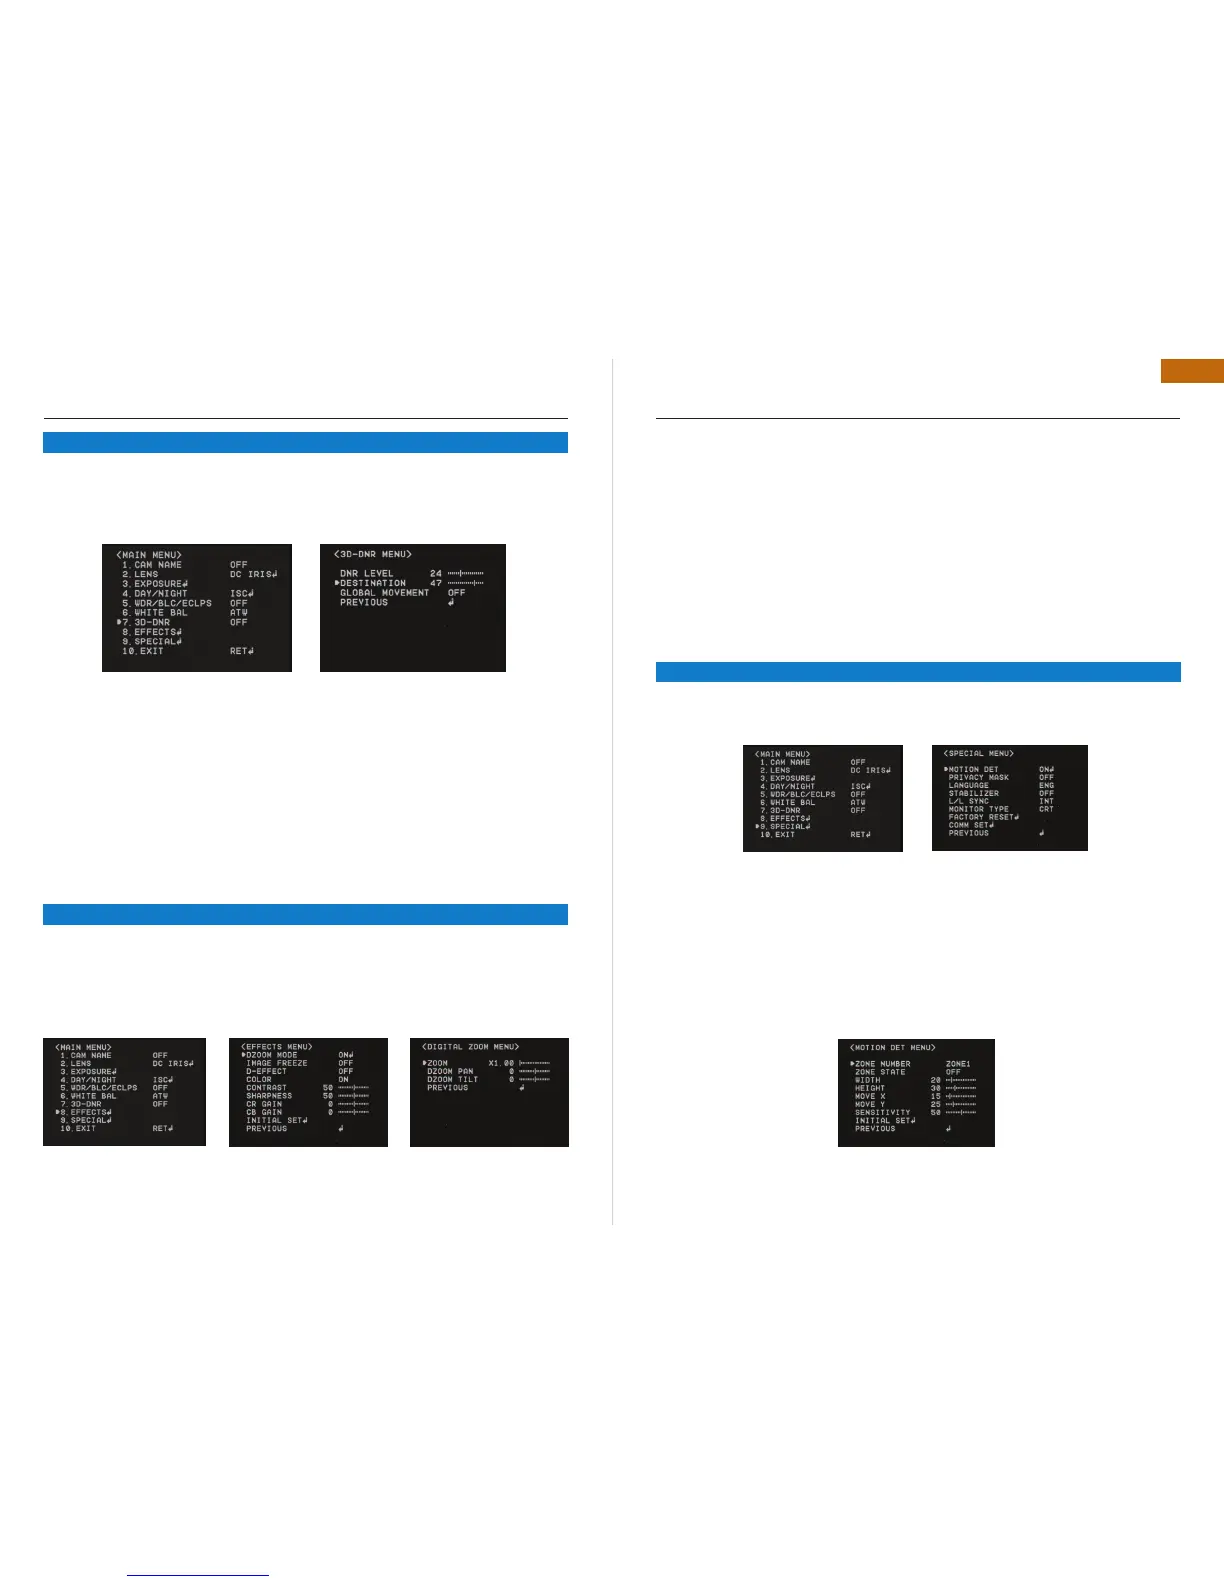
Select “3D-DNR” by using Joystick S/W with Up / Down Direction.•
Press “ Set Button” to enter “3D-DNR. ” Select the desired mode for your purpose.•
Off : Deactivates DNR. Noise is not reduced.•
On : Activate DNR so that noise is reduced.•
Set “DNR” mode to ON and press “SET Button” for adjusting the noise reduction level.•
Destination (Option): • Set the desired brightness at low-light situation. It overrides the general
brightness slider. If 3D-DNR level and the Destination Level is high, an after-image symptom
(“Ghost Effect”) will be occurred.
Global movement (option) : • Operates the feature that detects the camera global motion, upon
which it prompt reacts to the camera movement by reducing significantly the 3D-DNR tempo-
ral filter. Pls, check whether your camera can support this feature.
Remark : If AGC is OFF mode, 3D-DNR will not be activated.
Select “EFFECTS” by using Joystick S/W with Up / Down Direction.•
Press “ Set Button” to enter “EFFECTS. ” Select the desired mode for your purpose.•
DZOOM : Digital Zoom. Select this and set a desired zoom level to obtain an extended focal •
length.
OSD INSTRUCTION
5.7 3D DNR
5.8 EFFECTS
Image Freeze : To hold the image to analyze precisely.•
D-Effect : Change the video direction. Vertical Flip, Mirror, Rotate are supported.•
Color : Set the video mode color or B/W.•
Contrast : Adjust Contrast Level that you desired.•
Sharpness : Adjust Sharpness Level. Increasing this value, the picture outline becomes stron-•
ger and clear.
CR Gain : Adjust “Red Color Portion” in the video•
CB Gain : Adjust “Blue Color Portion” in the Video•
Initial Set : To return the default setting , which is defined in “EFFECT” Menu•
Previous : Go back to “Main Menu”.•
Remark: The picture may be distorted or noise may appear if SHARPNESS level is increased too
high. If the V-FLIP or MIRROR mode is enabled, the text on the screen does not flip.
Select “SPECIAL” by using Joystick S/W with Up / Down Direction.•
Press “ Set Button” to enter “SPECIAL. ” Select the desired mode for your purpose.•
MOTION DET.
A signal is generated by the camera whenever motion is detected.
Zone Number : Select MD area to activate. 8 Areas can be programmable.•
Zone STAT : Determine MD area selected.•
Width / Height : Set the size of MD•
Move X/Y : Determine the coordinate of Horizontal / Vertical Axis for MD Position•
Sensitivity : 8 areas can be activated. When Sensitivity number is high, motion detection sen-•
sitivity is increased to recognize even small movement.
Initial Set : To return the default setting , which is defined in “Motion DET” Menu•
Previous : Go back to “Main Menu”.•
OSD INSTRUCTION
5.9 SPECIAL
 Loading...