Do you have a question about the Infopia Finetest Auto-coding and is the answer not in the manual?
Insert the test strip into the meter
Lever to remove used test strips from the meter.
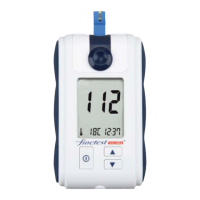
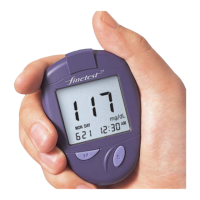
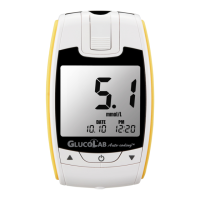
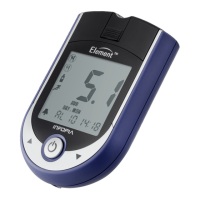
Displays test results and important information.
Powers meter on/off, recalls results, sets time/date.
Adjusts settings, scrolls results, data deletion.
Contains meter information and manufacturer details.
Access point for replacing the meter's batteries.
Indicates test performed before meal.
Indicates test performed after meal.
Indicates test performed after taking medication.
Indicates test performed after physical activity.
Indicates meter is ready for blood sample application.
Shows the measured blood glucose level.
Alerts user when battery power is low.
Indicates a control solution test is being performed.
Displays ambient temperature and current date.
Indicates the unit of measurement (mg/dL or mmol/L).
Shows the average of stored test results.
Displays the current time.
The entry point for applying the blood sample.
Indicates when enough blood has been applied.
Connects the strip to the meter for data transfer.
Instructions for proper storage and handling of test strips.
Procedure to turn the meter on.
Option to turn the User Activity feature on/off.
Option to turn the User ID feature on/off.
Set the year for the meter's internal clock.
Set the current date and time on the meter.
Select the measurement unit (mg/dL or mmol/L).
Set the number of days for calculating average results.
Enable or disable the meter's alarm function.
Set the time for the meter's alarms.
Program the number of desired alarms.
Important notes regarding meter setup and usage.
Precautions for automatic code recognition and strip handling.
Safety precautions to reduce the risk of infection during blood testing.
Insert test strip, power on, and prepare for blood application.
Visual guide for correct blood sample application on the test strip.
Visual guide for incorrect blood sample application.
Apply blood to the test strip and wait for the beep.
Notes on countdown, test timeout, and sample volume.
Wait for results to appear after blood application.
Notes on out-of-range results and discarding used materials.
Select activity correlating with result if User Activity option is enabled.
Select the correct User ID if User ID option is enabled.
Notes on User Activity/ID option activation and result storage.
Precautions for using the test strip ejector function.
Shows the most recent test results and averages.
Displays average results for 7, 14, and 21 day periods.
Procedure to delete a single test result from memory.
Procedure to delete all stored test results from memory.
Warnings about deleting individual and all test results.
Instructions for cleaning and maintaining the glucose meter.
Specifies the range for measuring blood glucose levels.
Explains the chemical reaction and measurement process.
Details the plasma-calibration method used.
States that results compare well with laboratory methods.
Details precision studies based on ISO 15197 standards.
Specifies the type of sample used (capillary whole blood).
Indicates the required blood sample volume (1.5μl).
Defines the measurable range of blood glucose levels.
Specifies the time taken to get a test result (9 seconds).
States calibration is Plasma-Equivalent.
Specifies the recommended operating temperature range.
Specifies the recommended operating humidity range.
Specifies the recommended storage temperature for test strips.
Identifies the type of display used (LCD).
Provides the physical dimensions of the meter.
States the weight of the meter including battery.
Specifies the type of batteries used (3V Li Battery).
Indicates the expected battery life (5,000 tests).
Specifies the number of test results that can be stored.
Indicates communication capability with a computer.
| Brand | Infopia |
|---|---|
| Model | Finetest Auto-coding |
| Category | Blood Glucose Meter |
| Language | English |