4) Install Front Panel
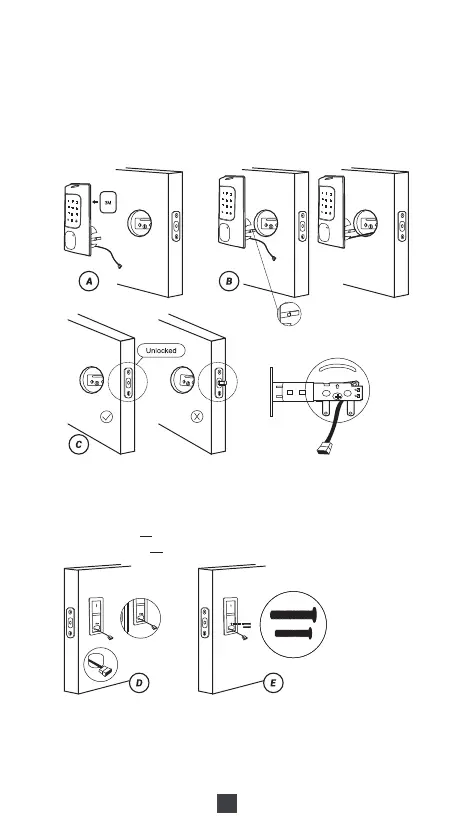
A.If you want to secure the door lock, please stick the 3M stickers on the
front panel. (Optional)
B.Let the cable and the [torque blade] go through the holes on the latch,
as in the picture.
C.IMPORTANT: Latch must be in unlock position, and place the cable
under the latch.
D.Pass the Cable and the [torque blade] to mounting plate as in the picture.
E.Use the 2 long screws to attach the mounting plate to the front panel.
Notes:
The long screw set has two sizes of screws, one for door thickness
1-3/4" (45mm) M:Long & Short Screw Set and the longest screws fit
for 2.17" (55mm) J:Long Screw Set .
Torque blade
5) Install Back Panel
A.Remove the battery cover and back cover (use the sharp object to
push the back cover up first)
B.Connect the cable and ensure a tight cable connection.
C.Rotate the Thumb turn in a vertical position and insert the [torque blade]
into the interior assembly lock switch.
05
45mm
55mm