www.insigniaproducts.com
19
NS-DWH2BS8 / NS-DWH2SS8 / NS-DWR2BS8 / NS-DWR2WH8
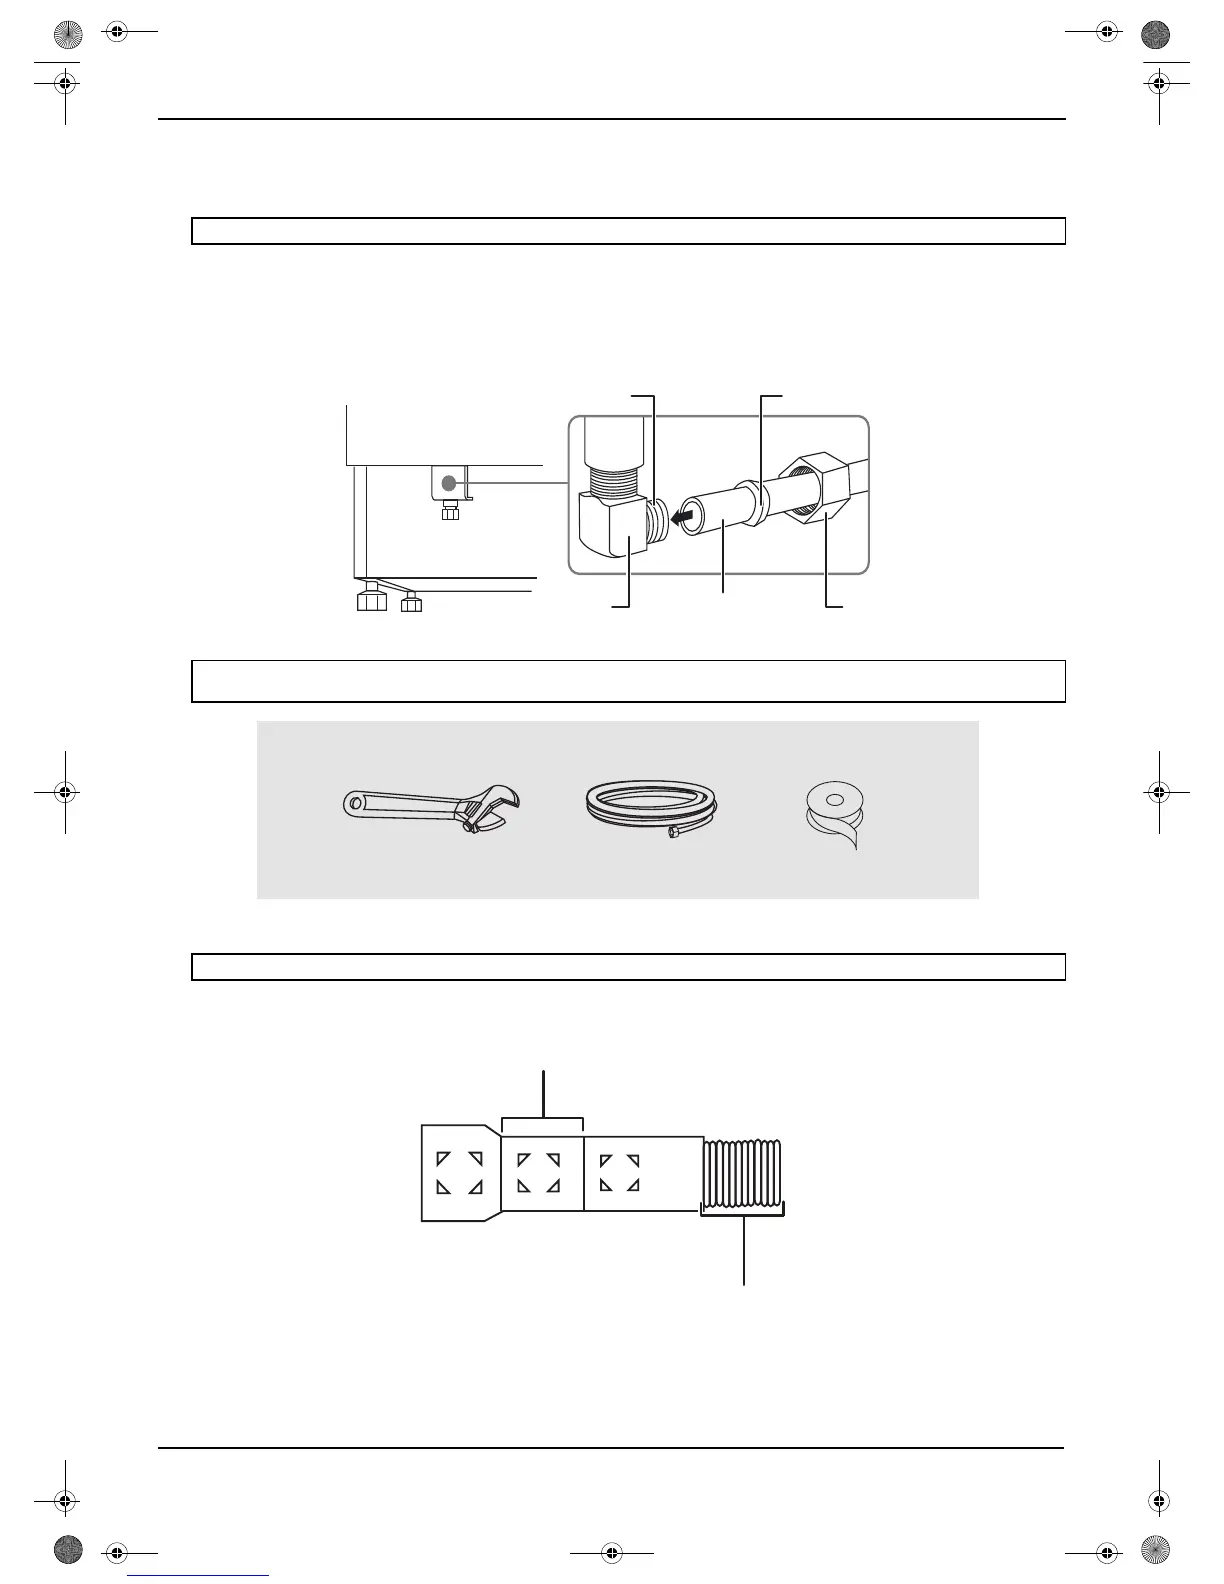
Step 12: Connecting the water supply line
1 Make sure that you wrapped the 90° elbow with Teflon thread seal tape twice.
2 Slide the compression nut, then the ferrule over the end of the water supply line.
3 Insert the water supply line into the 90° elbow.
4 Slide the ferrule against the 90° elbow and secure it with the compression nut.
Step 13: Connecting the drain hose
1 Cut on the marked line as required for your installation. The drain hose’s molded end will fit 5/8”, 3/4” or 1" diameter
connections on the air gap, waste tee, or garbage disposal.
Note:
If you have a steel-grated line, you do not need a ferrule or compression nut.
IMPORTANT: Make sure that the door spring does not rub or contact the water supply line or drain hose. Test by opening and
closing the door. Reroute the lines if interference occurs.
You’ll need:
IMPORTANT: Follow all local codes and ordinances.
NS-DWH2_BS8_SS8_NS-DWR2_BS8_WH8_SS8_17-0939_Install MAN_V5_ENG.fm Page 19 Wednesday, January 24, 2018 2:49 PM
 Loading...