17
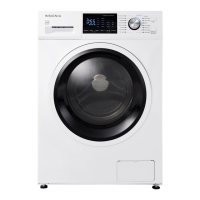
NS-FWM45W3
www.insigniaproducts.com
INSTALLATION INSTRUCTIONS
Installing your washer
Tools you need
Step 1: Selecting a location
Before you install your washer, make sure that the location:
• Is a hard, level surface without carpeting or soft flooring that can obstruct
ventilation.
• Is away from direct sunlight, water, and weather.
• Has adequate ventilation.
• Isn’t exposed to freezing temperatures (32° F or 0° C).
• The temperature is above 60° F or 15.5° C
• Is away from heat sources such as oil or gas.
• Has enough space so that your washer doesn’t rest on its power cord.
See Features
on page 6.
Step 2: Connecting the water hoses
1 Before connecting the hoses, make sure that there is a rubber washer in both
of the hoses.
2 Install the screen washers (included) by inserting them into the free ends of
the inlet hoses with the protruded side facing the faucet.
Note: The illustrations in this section may not accurately show your actual washing
machine, but are only intended to convey a general instruction or concept.
CAUTIONS:
• Use new water supply hoses. Using old hoses can result in leakage or overflow
that can damage your property.
• Replace hoses every five years.
• Don’t connect multiple water supply hoses together to increase the length of the
hose. Hoses connected this way can leak and cause electrical shock. If a hose is too
short, replace the hose with a longer, high-pressure hose.
• Run some water from the cold faucet to flush the water lines and remove particles
that might clog up the inlet hose.
• Do not cross-thread or over-tighten these connections.
• Do not apply tape or sealant to the faucets or water supply intakes. This can
damage the fittings.
• Make sure that the water supply hoses aren’t twisted or bent. A bent or twisted
hose can leak and cause an electric shock because of water leakage.
Channel-lock pliers
Carpenter’s level
Adjustable wrench or 1/2"
(12.7 mm) socket with ratchet
Adjustable wrench or
9/16" (14.3 mm) open-end
wrench

 Loading...