10
2. Check whether all parts on the lid are assembled properly
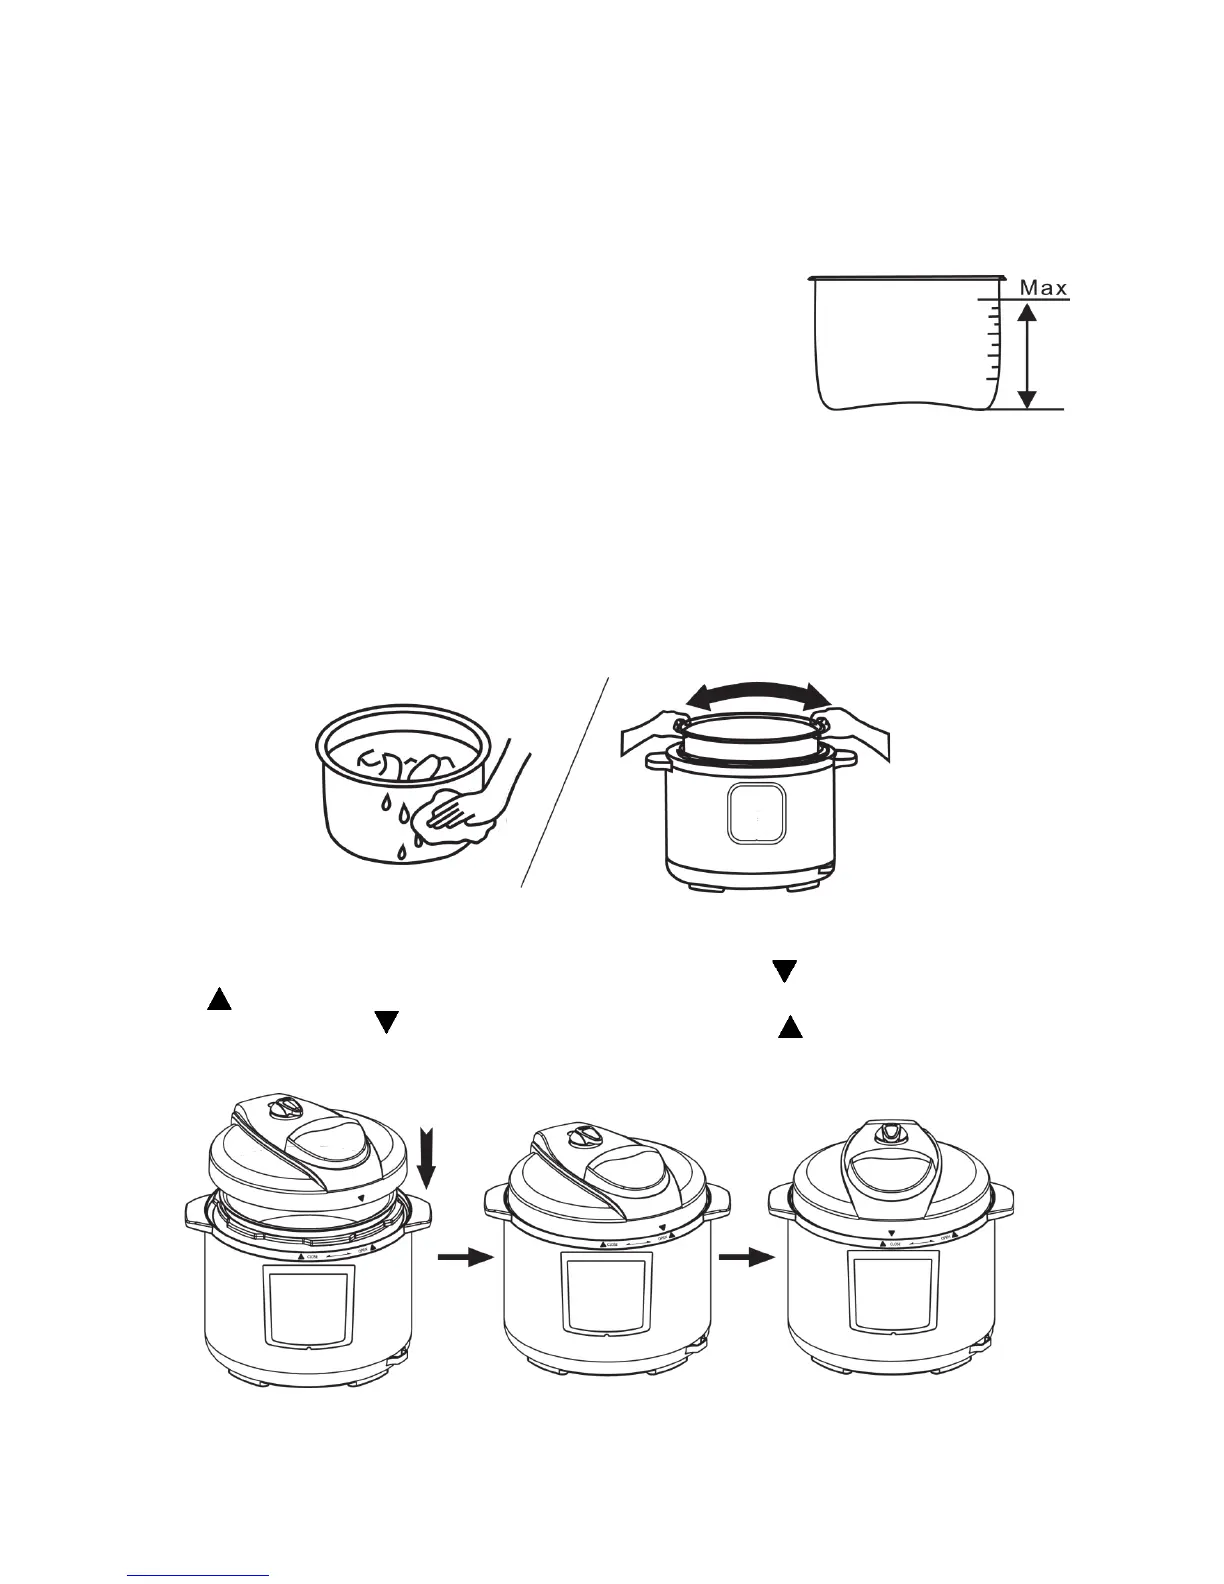
Check the oat valve and pressure release valve for obstrucons. Make sure that the sealing
ring is well seated inside its holding rack. The an-block shield is installed properly and the
oat valve can move up and down easily.
3. Remove the inner pot, and put in food and liquid
The total amount of food and water should NEVER exceed the
maximum level marking of the inner pot. It is recommended
that you do not ll the unit to over 2/3 full. When cooking food
that expands during cooking such as rice, beans or dried
vegetables, do not ll the unit to over 1/2 full. Over lling may
risk clogging the pressure release and developing excess
pressure. This may also cause leakage or damage to the unit.
4. Place the inner pot inside the cooker base
Be sure to remove any foreign objects. Wipe dry the outside of the inner pot and the heang
plate inside the cooker base.
Aer pung the inner pot inside the cooker base, rotate the inner pot slightly to ensure
good contact between the inner pot and the heang element.
5. Close the lid completely
Hold the lid handle and put the lid on the cooker, with the “ “ mark on the lid and the
“ “ OPEN mark on the cooker base rim aligned. Rotate the lid clockwise approximately 30
degrees unl the “ “ mark on the lid is aligned with the “ “ CLOSE mark on the cooker
base rim.
Instant Pot® has a safety feature to disable the cooker and the display will ash "Lid" if the lid
is not posioned correctly. When using "Soup/Broth", "Meat/Stew", "Steam", "Egg", "Rice",
 Loading...