3332
Depressurizing the Cooker (Venting Methods) Initial Test Run (Water Test)
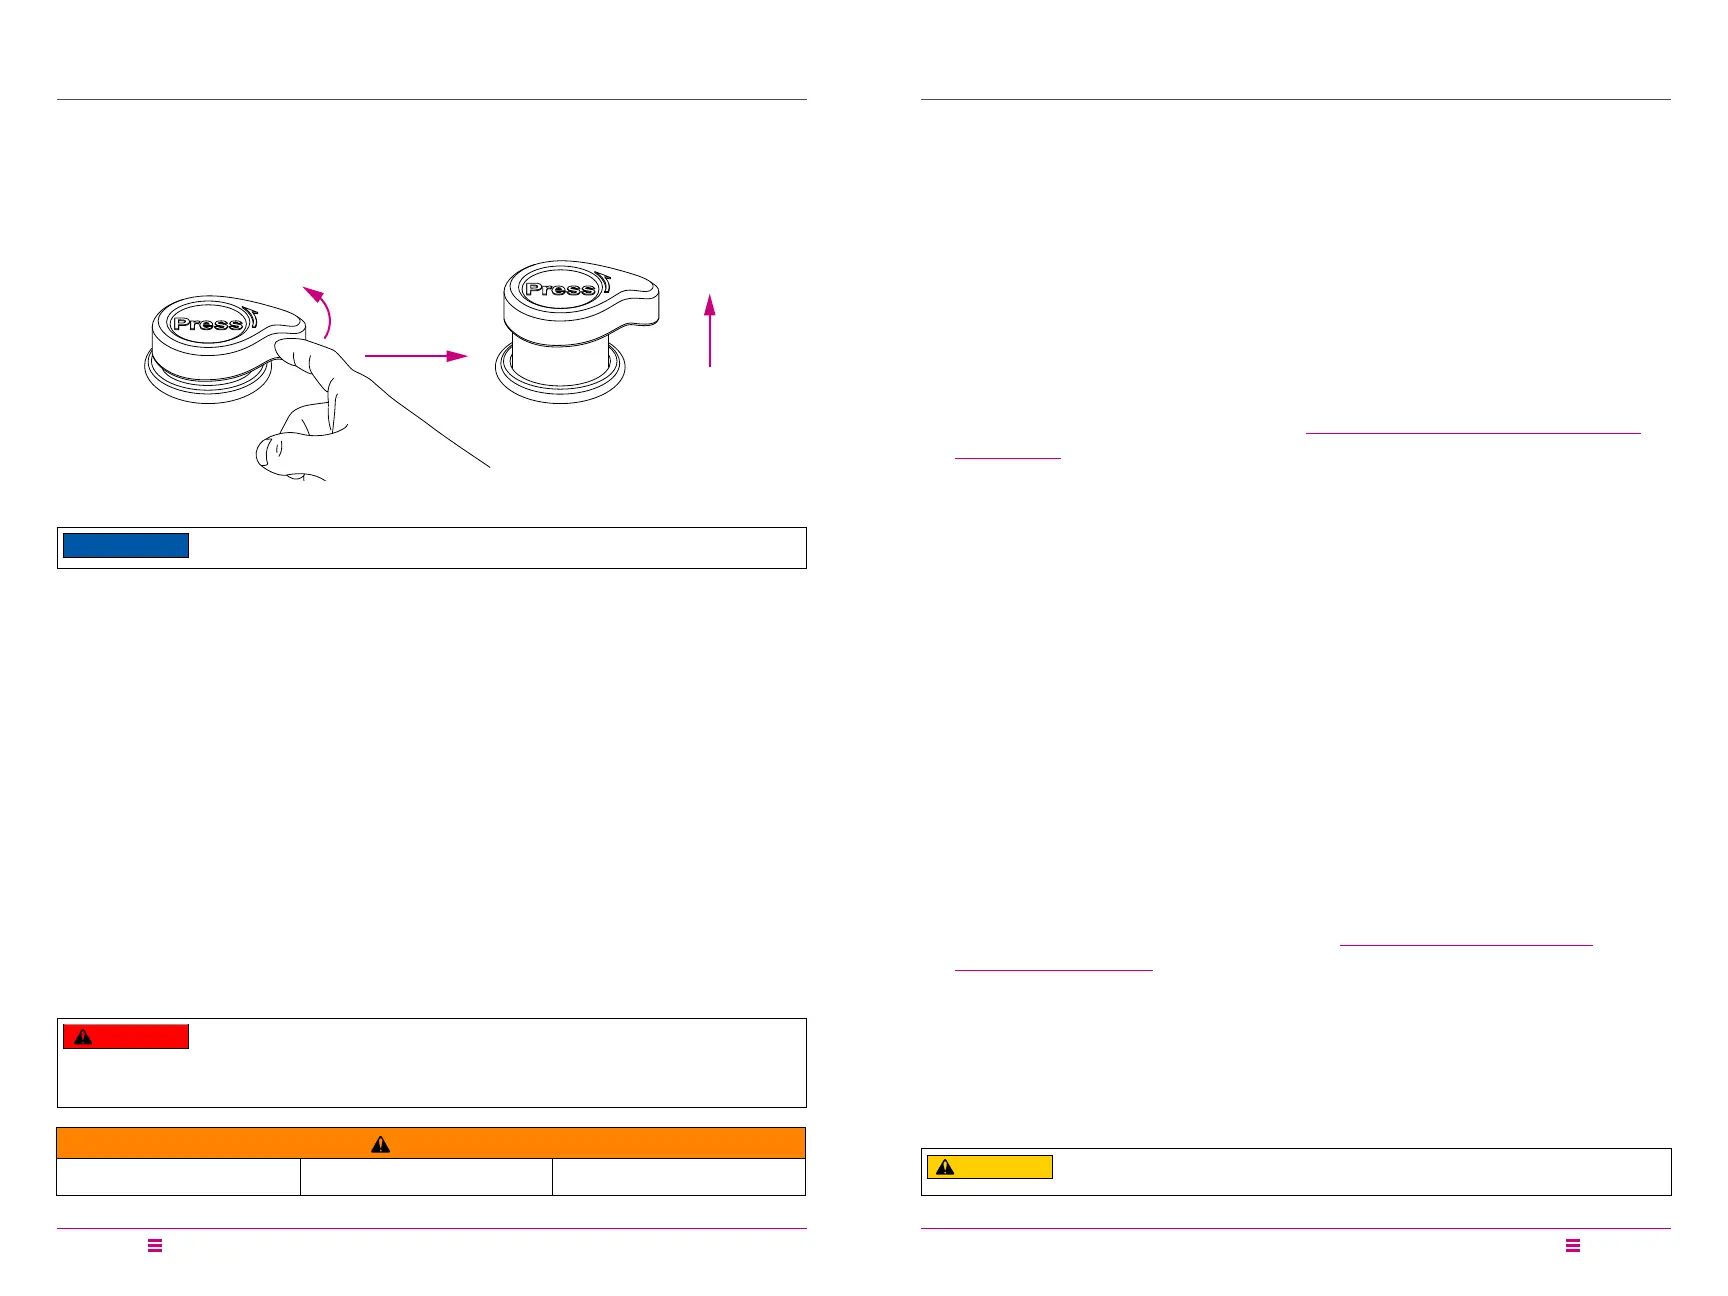
If continuous spatter occurs while venting, set the cooker back to Seal by icking
the quick release button. The button pops back up to indicate that it is sealed and
stops the depressurization process. Wait a few minutes before trying to QR again.
If spatter continues, use NR to safely release remaining pressure.
10-Minute NR
Leave the quick release button in the popped-up Seal position for 10 minutes
after cooking has completed, then press the quick release button down until
it clicks and locks into the Vent position. When depressed, a stream of steam
releases through the top of the steam release valve.
If continuous spatter occurs while venting, set the cooker back to Seal by icking
the quick release button. Wait an additional 5 minutes before trying to QR again. If
spatter continues, use NR to safely release remaining pressure.
NOTICE
Do not use QR when cooking high-starch foods (e.g., stews, chilis, pasta and
congee) or when cooking foods that expand when cooked (e.g., beans and grains).
DANGER
While the oat valve is up, contents of cooker are under extreme pressure. Do not
attempt to remove the lid while the oat valve is still up. All pressure must be
released, and oat valve must be down before attempting to remove the lid. Never
attempt to force the lid open. Failure to follow the instructions may result in
property damage and/or personal injury.
WARNING
Do not lean over or touch the steam
release valve.
Do not place unprotected skin over the
steam release valve.
Do not cover or obstruct the steam
release valve.
Follow these steps to familiarize yourself with your Instant Pot® Viva™.
Total test time: Approximately 20 minutes.
1. Remove the inner pot from the cooker base.
2. Add 3 cups (24 oz / 750 mL) of water to the inner pot.
3. Insert the inner pot into the cooker base.
4. 6 Quart only: Secure the power cord to the base power socket at the back of
the cooker base. Ensure the connection is tight.
Connect the power cord to a 120 V power source.
The display indicates OFF.
5. Place and close the lid as described in Pressure Control Features–Pressure
Locking Lid.
The lid automatically seals for pressure cooking.
6. Press Pressure Cook to select the Pressure Cook Smart Program.
7. Use the − / + buttons to adjust the cooking time to 00:05 minutes.
Note: Cooking temperature adjustments are saved to the Smart Program when cooking
begins.
8. Press Keep Warm to deactivate the automatic Keep Warm setting.
After 10 seconds, the display reads On to indicate that the Pre-heating cycle
has begun.
9. The oat valve rises when the cooker has pressurized.
After a few minutes the cooker reaches the target pressure level and
Cooking begins.
The display changes from On to the cook time countdown.
10. When the Smart Program is complete, the display indicates End.
11. Press the quick release button down until it clicks into the Vent position.
Pressurized steam releases through the top of the steam release valve.
12. The oat valve drops when the pressure has been fully released.
13. Open and remove the lid as described in “Pressure Control Features—
Pressure Cooking Lid”.
14. Carefully remove the inner pot from the cooker base, discard the water and
thoroughly dry the inner pot.
You’re ready to start cooking!
CAUTION
The inner pot will be hot after cooking. Always use appropriate heat protection when
handling a hot inner pot.
 Loading...