EasyManuals Logo

Intel NUC7i3BNH User Manual

Intel NUC7i3BNH
10 pages
To Next Page IconTo Next Page
To Previous Page IconTo Previous Page
Page #6 background imageLoading...
Page #6 background image
Intel NUC Kit NUC7i7BNH, NUC7i5BNH & NUC7i3BNH User Guide
6
For a list of tested 2.5” hard drives, go to the Tested Peripherals page on the Support site.
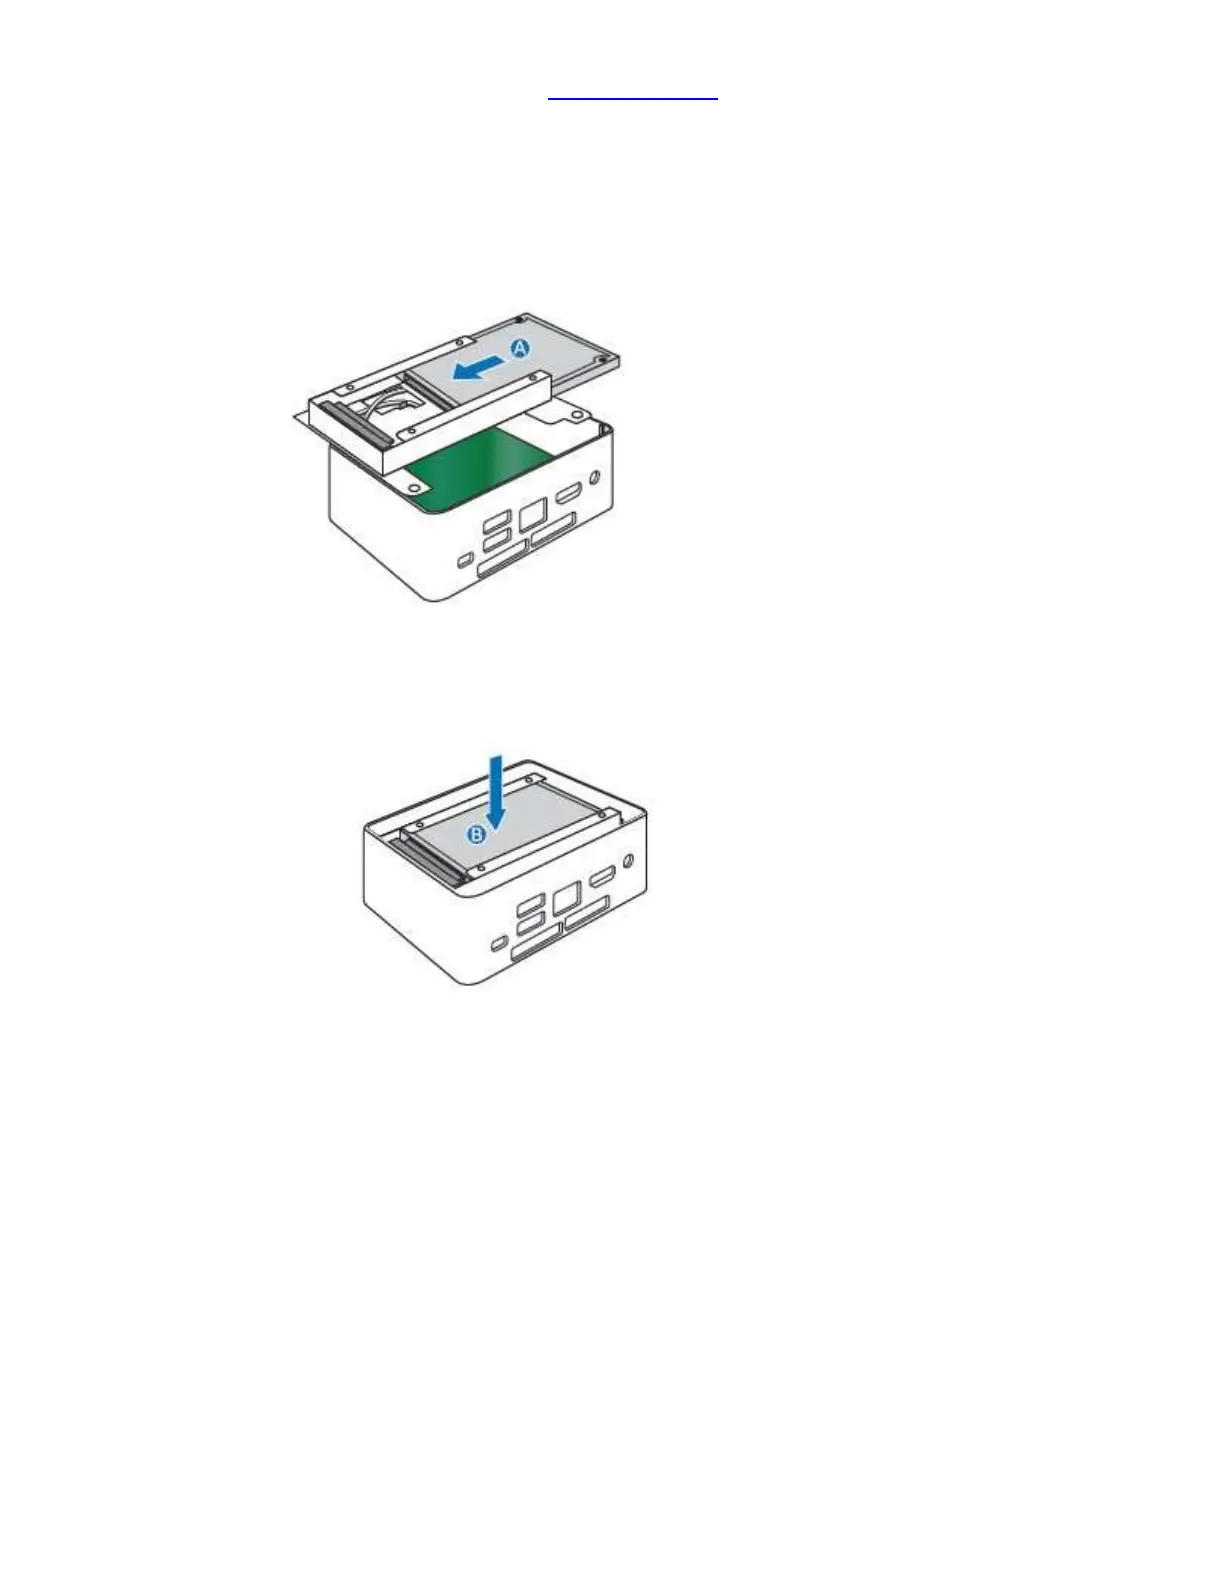
Follow these instructions to install a 2.5” Solid State Drive (SSD) or Hard Disk Drive (HDD):
1. Observe the precautions in "Before You Begin" on page 2.
2. Slide the 2.5” drive into the drive bay, ensuring the SATA connectors are fully seated into the
connectors of the SATA daughter card (A).
3. Secure the drive into the drive bay with the two small silver screws that were included in the box.
4. Set the drive bay bracket down inside the chassis (B).
Close the Chassis
After all components have been installed, close the Intel NUC chassis. Intel recommends this be done by
hand with a screwdriver to avoid over-tightening and possibly damaging the screws.

Questions and Answers:

Question and Answer IconNeed help?

Do you have a question about the Intel NUC7i3BNH and is the answer not in the manual?

Intel NUC7i3BNH Specifications

General IconGeneral
ProcessorIntel Core i3-7100U
Processor Cores2
Processor Threads4
Processor Base Frequency2.4 GHz
GraphicsIntel HD Graphics 620
Graphics Base Frequency300 MHz
Graphics Max Dynamic Frequency1.0 GHz
Max Memory Size32 GB
Number of Memory Slots2
Storage InterfaceSATA 6.0 Gb/s
SATA Ports1
Ethernet10/100/1000 Mbps
Dimensions115 x 111 x 51 mm
Operating System SupportWindows 10, Linux
Processor Cache3 MB
Memory TypeDDR4-2133
M.2 SlotM.2 22x42/80
USB Ports4 x USB 3.0
HDMI Ports1
Audio3.5mm Headphone/Microphone Jack
Power Supply65W external power adapter
Thunderbolt Ports1 (USB-C Thunderbolt 3)

Related product manuals