I N S T A L L A T I O N M A N U A L X - S T R E A M 2 ™ S L I D E
14
XS2-IM Rev. 10/14 (SBK-XS2 INSTALL)
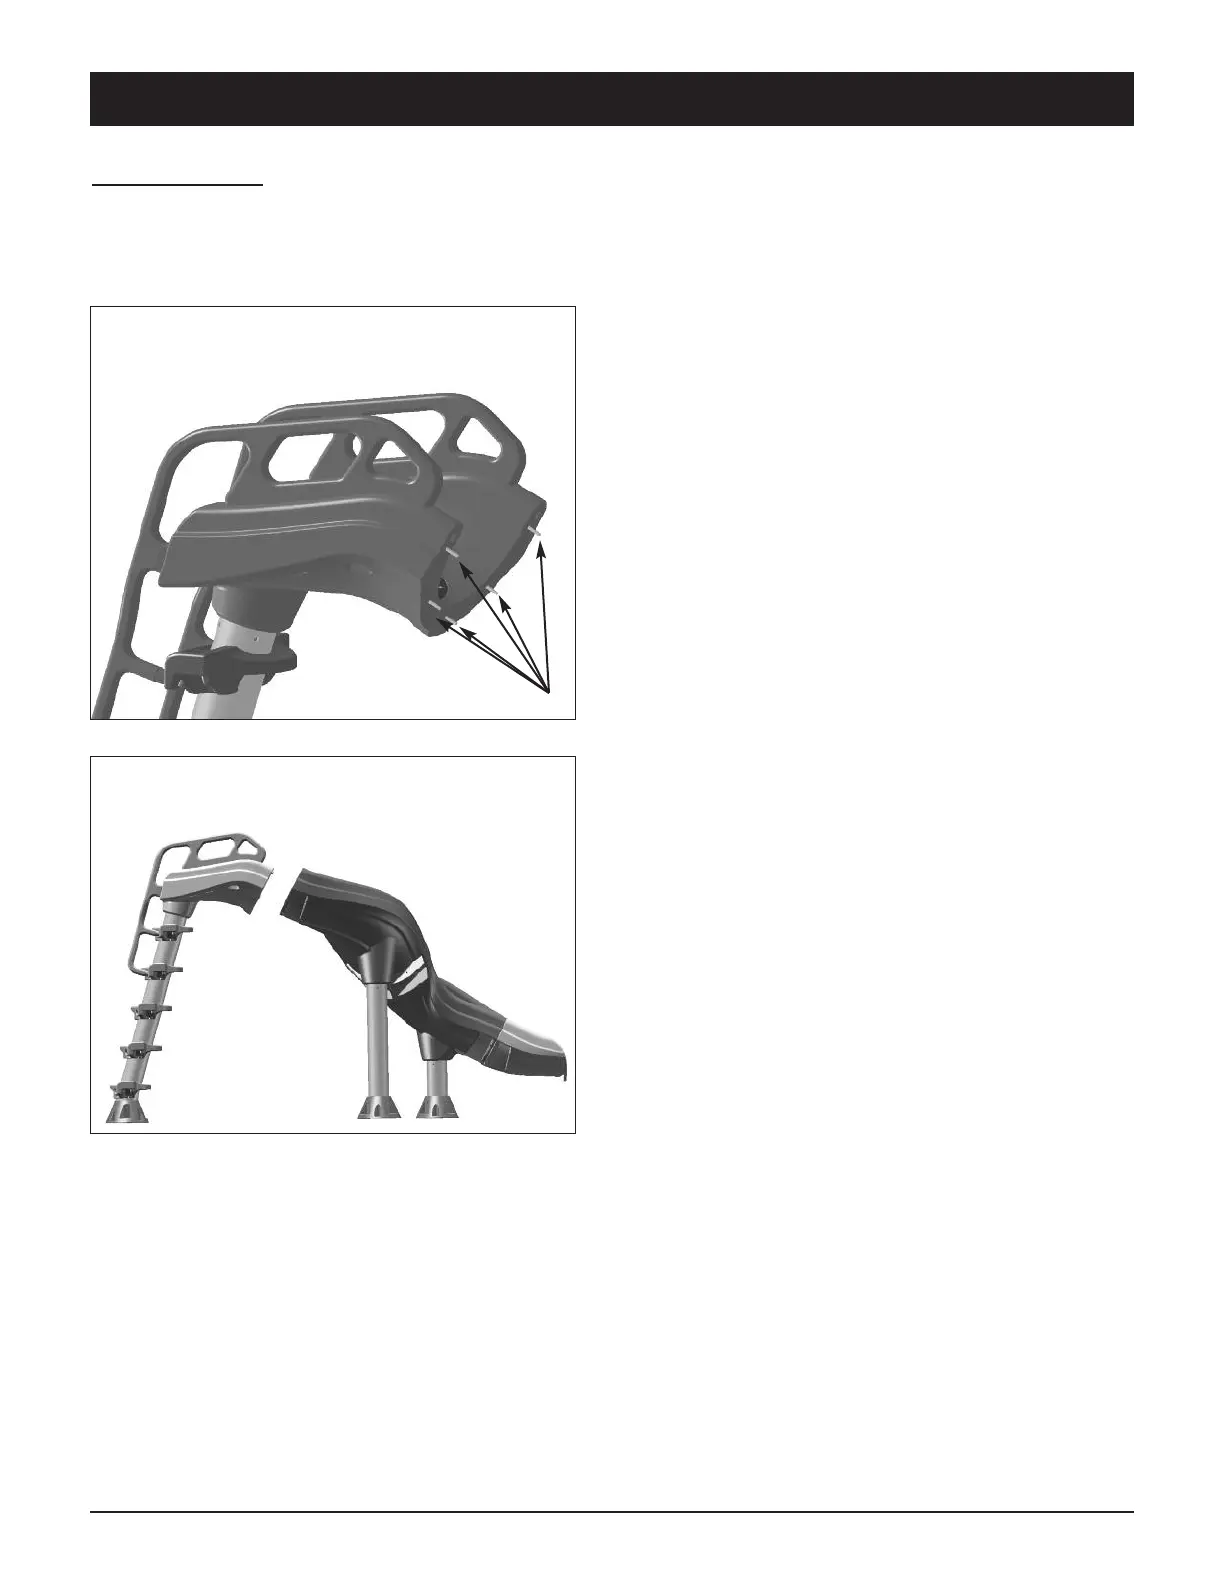
TIP: Hand tighten the all-threads into the
entry section flange only. Do not use any
mechanical means such as a wrench or
pliers to tighten the all-threads.
With two people, stand the assembled
Flumes/Exit Assembly upright and balance
on the two legs. Lean the Ladder & Entry
Section against the Upper Flume Section.
Align the 5 all-threads in the entry section
with the 5 holes in the Upper Flume Section
and gently push them through. Place a 3/8”
flat washer, then lock washer and then a
3/8” nut on each all-thread. Ensure a smooth
even alignment of the sliding surface and
tighten the nuts in an alternating pattern
until all the nuts are uniformly tight.
Do not over tighten.
STEP SEVEN: Attach the Entry Section & Ladder to the Flume
Utilizing hardware kit XS2-102-SS, thread the (5) 3/8” x 2.5” all-threads into the embedded
nuts in the entry section flange. The all-threads will thread in about 3/4” with approximate-
ly 1-3/4” protruding. (See Fig. 12)
Fig. 12
Fig. 13