Commercial Refrigeration Parts
| 11
For friendly service and advice in New Zealand visit your local Heatcraft branch or call 0800 653 330
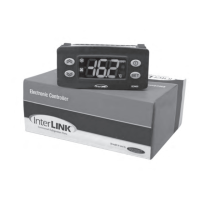
ECM20/ECL60 Installation and Operation Manual
ALARMS (folder with “AL” label)
Att Allow you to select if the parameters HAL and LAL will have absolute (Att=0) or relative (Att=1) value.
AFd Alarm Fan differential. Alarm differential.
HAL Higher ALarm. Maximum temperature alarm. Temperature value (in relative value) which if exceeded in an
upward direction triggers the activation of the alarm signal.
LAL Lower ALarm. Minimum temperature alarm. Temperature value (in relative value), which if exceeded in a
downward direction, triggers the activation of the alarm signal.
PAO Power-on Alarm Override. Alarm exclusion time after instrument switch on, after a power failure.
dAO defrost Alarm Override. Temperature alarm exclusion time after defrost.
OAO Alarm signaling delay after digital input disabling (door close). Alarm is only for high-low temperature alarms.
tdO time out door Open. Alarm activation delay time open door.
tAO temperature Alarm Override. Temperature alarm signal delay time.
EAL External Alarm Clock. External alarm to lock loads (n = don’t lock loads; y = lock loads).
DISPLAY (folder with “diS” label)
LOC LOCk. Basic Commands edit lock. However, you can enter parameter programming modify them along with
the status of this parameter in order to allow unlocking. y = yes; n = no
PA1 PAssword 1. When enabled (value other than 0) it constitutes the access key for level 1 parameters.
ndt number display type. View with decimal point. y = yes; n = no
CA1 CAlibration 1. Positive or negative temperature value added to the value read by probe 1.
CA2 CAlibration 2. Positive or negative temperature value added to the value read by probe 2.
ddL defrost display Lock. Viewing mode during defrosting.
0 = shows the temperature read by the room probe;
1 = locks the reading on the temperature value read by room probe when defrosting starts, and until the
next time the Setpoint value is reached;
2 = displays the label “dEF” during defrosting, and until the next time the Setpoint value is reached.
dro display read-out. Select °C or °F for displaying the temperature read by the thermostat probe. (0 = °C, 1 = °F).
PLEASE NOTE: the switch between °C and °F DO NOT modify setpoint, differential, etc. (for example
set=10°C become 10°F).
CONFIGURATION (folder with "CnF" label)
H00 (!) Probe type selection, PTC or NTC (Default). 0 = PTC; 1 = NTC.
H08 Stand-by operating mode. 0 = display switch off;
1 = display switch off, loads and alarms stopped;
2 = display with OFF label, loads and alarms stopped.
H11 Configurability digital inputs/polarity. 0 = disabled; ±1 = defrosting; ±2 = reduced set; ±3 = not used; ±4 = door
microswitch; ±5 = external alarm; ±6 = Stand-by (ON-OFF).
ATTENTION! Positive or negative values change the polarity.
H25 Enable/disable the buzzer.
0 = disabled; 4 = enabled; 1-2-3-5-6 = not used.
H42 Evaporator probe present. n = not present; y = present.
reL reLease firmware. Device version: read only parameter.
tAb tAble of parameters. Reserved: read only parameter.
COPY CARD (folder with “Fpr” label)
UL Up Load. Programming parameter transfer from instrument to Copy Card.
Fr Format. Erasing all data in the copy card.
PLEASE NOTE: using “Fr” parameter (copy card formatting) the data within the copy card will be lost permenently.
The operation cannot be cancelled.
(!) WARNING!
• If one or more of these parameters highlighted with (!) are modified, the controller must be switched off and switched
on again to ensure correct operation.
• In any case, it is strongly recommended that you switch the controller off and switch it on again any time parameters
have been changed to prevent malfunctioning on configuration and/or timing underway.
19
PLEASE NOTE: using “Fr” parameter (copy card formatting) the data within the copy card will be lost permenently.
The operation cannot be cancelled.
(!) WARNING!
• If one or more of these parameters highlighted with (!) are modied, the controller must be switched off and switched on again to ensure correct operation.
• In any case, it is strongly recommended that you switch the controller off and switch it on again any time parameters have been changed to prevent
malfunctioning on configuration and/or timing underway.
 Loading...