EasyManuals Logo

Intermatic FF5M User Manual

Intermatic FF5M
6 pages
To Next Page IconTo Next Page
To Previous Page IconTo Previous Page
Page #3 background imageLoading...
Page #3 background image
..
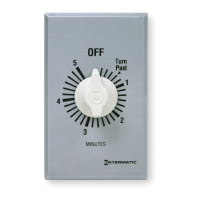
FD ..
Models
Only
(Illustration
81 and
82)
8.
Illustration
"B"
- Place
standard toggle or decorator plate
on timer. do
not over tighten.
NOTE:
If you are
using
a standard
toggle
switch
plate,
illustration
B
1,
it
is
not
necessary to use
the
two
screws provided
with
the
switch
plate.
The
nut
provided
with
the
timer
will
securely hold
the
switch
plate.
The screws,
if
used,
must
be
self-tapped
into
the
timer
body and
will
require a
gentle
inward
pressure
while
turning
the
screw
firmly
in order
to
self-tap
into
the
timer
body.
If
using a decorator style
wall
switch
plate,
illustration
82
threaded
holes
are provided in
the
metal
tabs at the opposite ends
of
the
timer. Fasten
the
decorator
style plate
using
the
two
screws provided
with
the
switch
plate,
but
do
not
over
tighten.
9.
Slip plastic
time
dial plate over threaded extension
with
..
OFF"
mark
of
time
dial plate
on top as marked on
front
of
timer
and fasten
securely
to
timer
with
nut
provided.
DO
NOT
OVER
TIGHTEN.
(See
illustration
"8").
ILLUSTRATION
B1
STANDARD
2
1/2
MIN
DEPTH
JUNCTION BOX
TIMER
NUT7
~
~~
~~:
KNOB~~
STANDARD
TOGGLE SWITCH
PLATE
'---SINGLE
GANG
(SHOWN)
OR
MULTI-GANG
LPLASTIC
TIME DIAL
PLATE
NOT
INCLUDED
WITH TIMER

Questions and Answers:

Question and Answer IconNeed help?

Do you have a question about the Intermatic FF5M and is the answer not in the manual?

Intermatic FF5M Specifications

General IconGeneral
BrandIntermatic
ModelFF5M
CategoryTimer
LanguageEnglish

Related product manuals