Interroll Drum motor series i, S, S/A, D
Assembly and installation
84
Version 4.1 (06/2015) en-US
Translation of original instruction manual
Warning notices concerning the electrical installation
WARNING
Electrocution from improper installation
4
All electrical work should only be performed by qualified and authorized persons.
4 Disconnect the power supply before installing, removing or rewiring the drum motor.
4 Always observe the connection instructions and ensure that the power and control circuits
of the motor are correctly connected.
4
Ensure that metal conveyor belt frames are sufficiently grounded.
NOTICE
Damage of the drum motor from incorrect power supply
4
Do not connect an AC drum motor to an excessively high DC voltage supply and a DC drum
motor to an AC voltage supply – this will lead to irreparable damages.
4
Do not connect drum motors of the D-series directly to the supply system. D-drum motors
must be operated via suitable frequency inverters or servo drive controllers.
Electrical connection of the drum motor
4 Ensure that the motor is connected to the correct supply voltage according to the motor type
plate.
4
Ensure that the drum motor is correctly grounded with the yellow-green cable.
4 Connect the drum motor according to the connection diagrams (See "Connection diagrams
for the i-series", page 29 or See "Connection diagrams for the S-series", page 44 or See
"
Connection diagrams for the S/A-series", page 50 or See "Connection diagrams for the
D-series", page 56).
NOTICE
Damage to the internal wiring due to changes to the terminal box
4
Do not disassemble, reassemble or modify the terminal box.
4 Remove the cover of the terminal box.
4 Ensure that the motor is connected to the correct supply voltage according to the motor type
plate.
4
Ensure that the terminal box of the drum motor is correctly grounded.
4 Connect the drum motor according to the connection diagrams (see the chapter "Connection
diagrams" of the respective series).
4
Replace cover and seals. Tighten the screws of the cover with 1.5 N to ensure that the
terminal box is sealed tight.
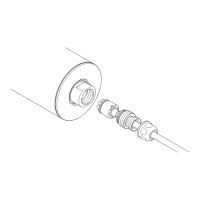
Connecting the drum
motor – with a cable
Connecting the drum
motor – with a
terminal box