120
A
SAVE THESE INSTRUCTIONS
(120IO) GRAPHITE GRAY PANEL™ POOL ENGLISH 7.5” X 10.3” PANTONE 295U 04/20/2022
English
Page 13
POOL ENCLOSURE SETUP (continued)
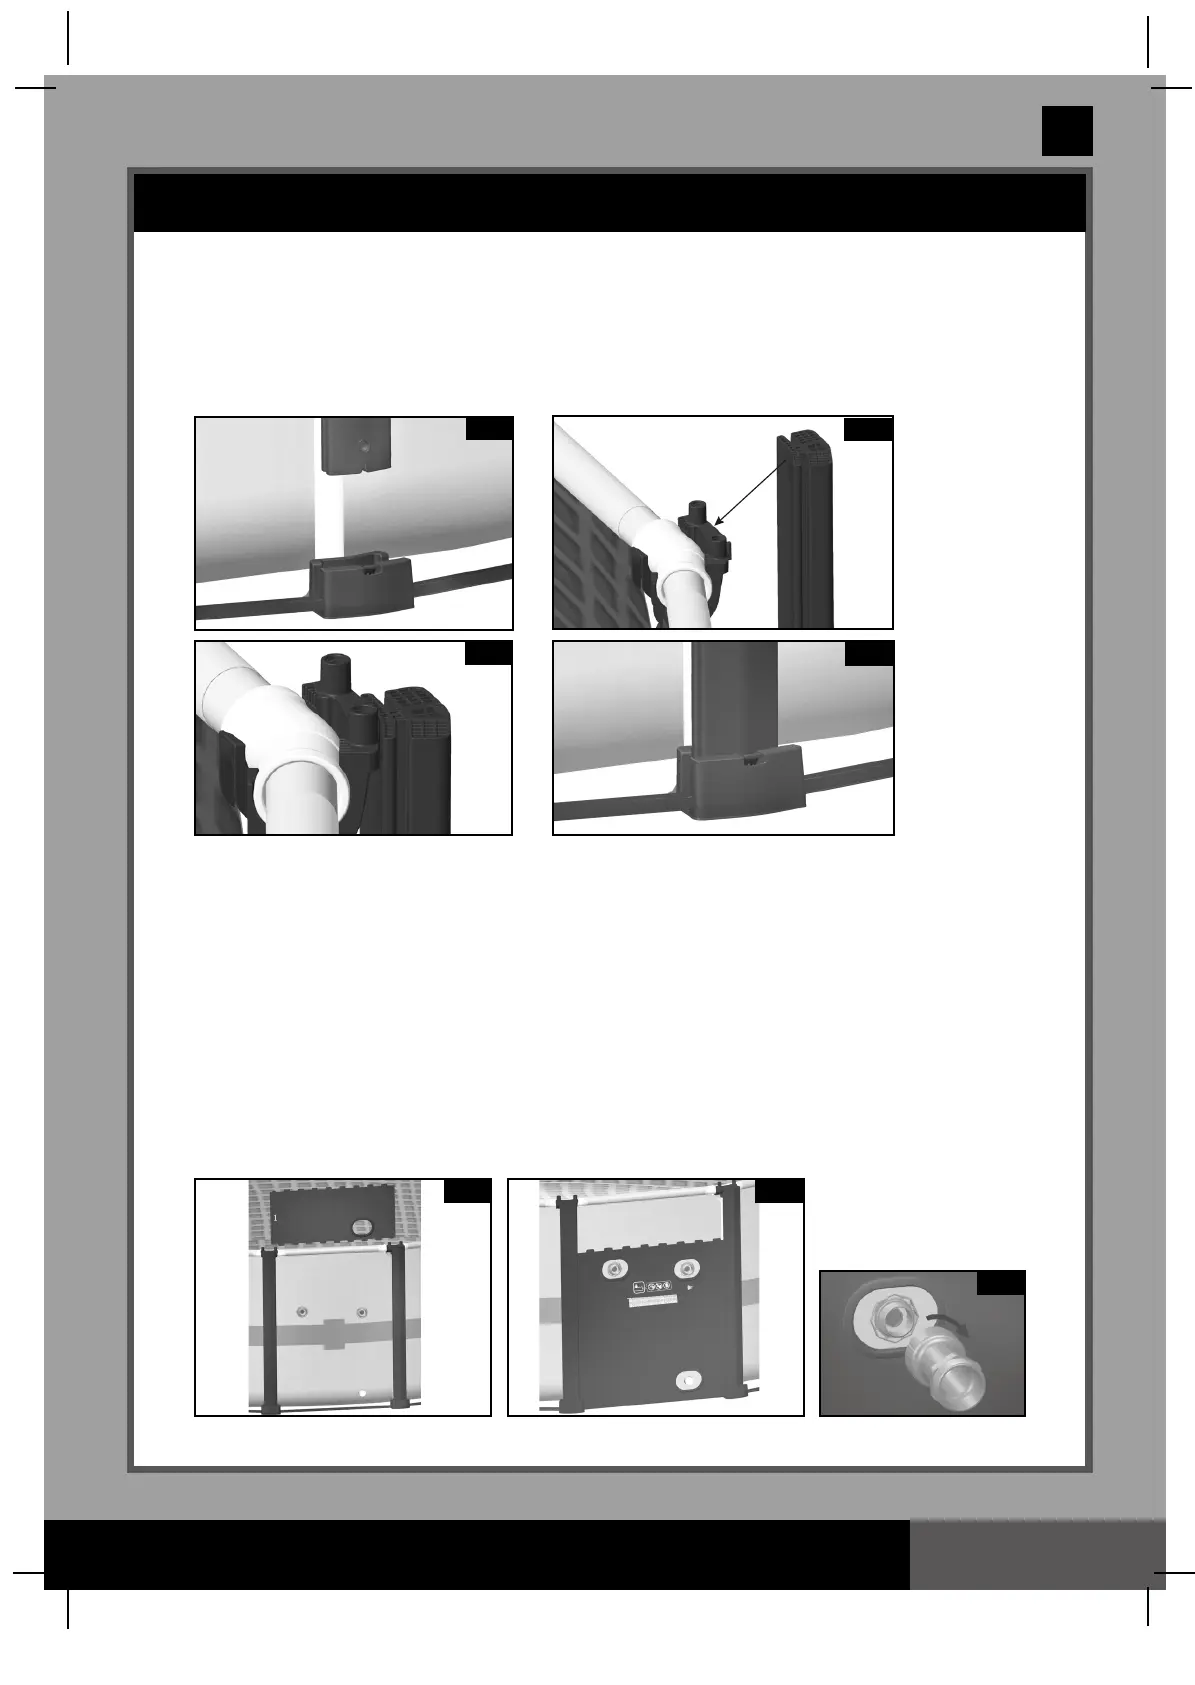
3. Support post installation
• Remove the cardboard inserts from both slides of each support post.
• Insert the support post (14) into the bottom cap (21). Lift up the support post slightly to let the slot on the
upper end of the support post hook onto the ridge of the top clamp. Push downward to ensure the support
post is connected firmly with the top clamp and inserted in the bottom cap (see drawings 10.1 - 10.3).
• Repeat these procedures until all the support posts are joined to the top clamps and bottom caps (see
drawing 10.4).
4. Side panel installation
The number of the side panels depends of the size of your pool. There are two side panels which need
special attention during installation: First, the side panel which needs to be installed outside the pool inlet
& outlet holes, and second, the side panel with the warning panel which needs to be installed in a location
that the warning display is easily seen by pool users before entering the pool. The side boards for these
two special panels are wrapped separately from others.
4a. Side panel with holes installation
• Locate the side with holes outside the pool liner where the inlet & outlet holes are located.
Unwrap the side boards from pack and slide the side board combination with one hole (19) first down
the support posts and insert onto the vertical edge of the bottom rail. Follow with the number sequence
from bottom to top. The groove of the board needs to be inserted fully onto the tongue of previous board.
The printing on the side boards needs to be facing outward. Then slide the side board combination with
two holes (18) marked with number “2” through the support posts and insert onto the tongue of side board
marked with number “1” (see drawings 11.1 & 11.2).
10.3
10.4
11.1
11.2
11.3
10.1
10.2
 Loading...