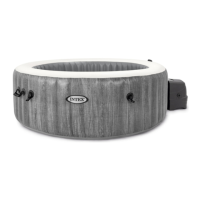
244
IO
(244IO) 7.5” X 10.3” ENGLISH 09/26/2016
READ BEFORE YOU START!
NOTE: This quick start guide provides important and useful tips before you start
the setup of your spa. However, it does not address all aspects of spa installation
and use, and you are still required to read, understand, and follow the owner’s
manual for proper installation, maintenance, and safe use of your spa.
• Power: This product requires a minimum of 13 AMPS. Most household circuits are 13 to 16 AMPS. If the
circuit breaker trips, please check that no other appliances or other large loads are on the same circuit as
the spa. Never use an extension cord.
• Water Heating: This heater when properly set up and running will raise the water temperature by 2ºC per
hour PROVIDED the spa cover is properly in place. Depending on the starting temperature of the Spa
water and external air temperature, it will take some time to heat up. If the starting temperature of your
tap water is 22ºC and you wanted to raise it by 16º C to 38ºC, the heating time would be 16ºC/2ºC per hour
= 8 hours. For subsequent use the heating time can be shortened by maintaining an idle temperature in the
spa (see HEATING AND WATER TEMPERATURE section). Be sure to keep the cover on the Spa when not
in use.
• RCD: This product is provided with a RCD located at the end of the power cord. The RCD must be tested
before each use. Do NOT use the Spa if the RCD does not function properly. (See page 5 for proper
testing of RCD instructions).
• Filter Cartridge: Keep the spa water properly sanitized to extend the life of the cartridge. Refer to the
owner’s manual for detailed information on spa water chemistry and balance.
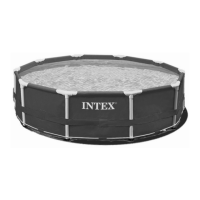
UNFOLDING AND INFLATING YOUR SPA:
• Whenyouunfoldtheinatablespatubyoumaynoticethesmellofthematerialthatisnormalfor
anewproductoutofthebox.Itisthereforerecommendedtoinatetheproductandleaveit
outdoorsforadaytoairandallowthenewproductsmelltodissipatesomewhatbeforellingthe
spa with water.
• Spread the ground cloth with the bubbles facing down over the cleared area where you intend to
setup your spa.
• Forspaination,familiarizeyourselfwiththespringloadedvalveonthespatubandtheination
outletonthecontrolboxunittoassurefastandproperination.
Ination outlet tips:
• Thelargerendoftheinationhoseattachestotheairoutletatthebackofthecontrolbaseunit(see
owner’s manual for drawings and further details).
• Toattachtheinationhosetotheairoutlet,unscrewthecapfromtheoutlet,insertthelargerend
of the hose (the end with the screw-on collar) all the way into the air outlet, and then turn the collar
clockwise to lock it in place.
• Wheninationiscomplete,unscrewthecollar,pullouttheinationhose,andscrewthecapbackonto
the outlet.
NOTE:Toavoidover-ination,someairwillescapethroughthebottomair-bubbleoutletofthecontrol
baseduringination.Thisisnormal.
Spring loaded valve tips:
• Uponremovingthevalvecap,notethespringloadedpininthecenterofthevalve.Forination,
the spring loaded pin should be in the up/raised position (closed position of the valve) as the air
pressureofthepumpwillpushtheairthroughthevalveduringination.Checkthevalvepinand
assureitisintheup/raisedpositionbeforestartingination.
• The pin can be pressed down and locked in the recessed position by pressing and turning it 90°
clockwisewithyournger–thisistheopenpositionofthevalvethatallowstheairtoowout
freelyandthatisusedfordeation.
SAVE THESE INSTRUCTIONS
244-*IO-R0-1709
 Loading...