SECTION 7—BATTERIES
Part No 1143150 53 TDX
®
Wheelchairs
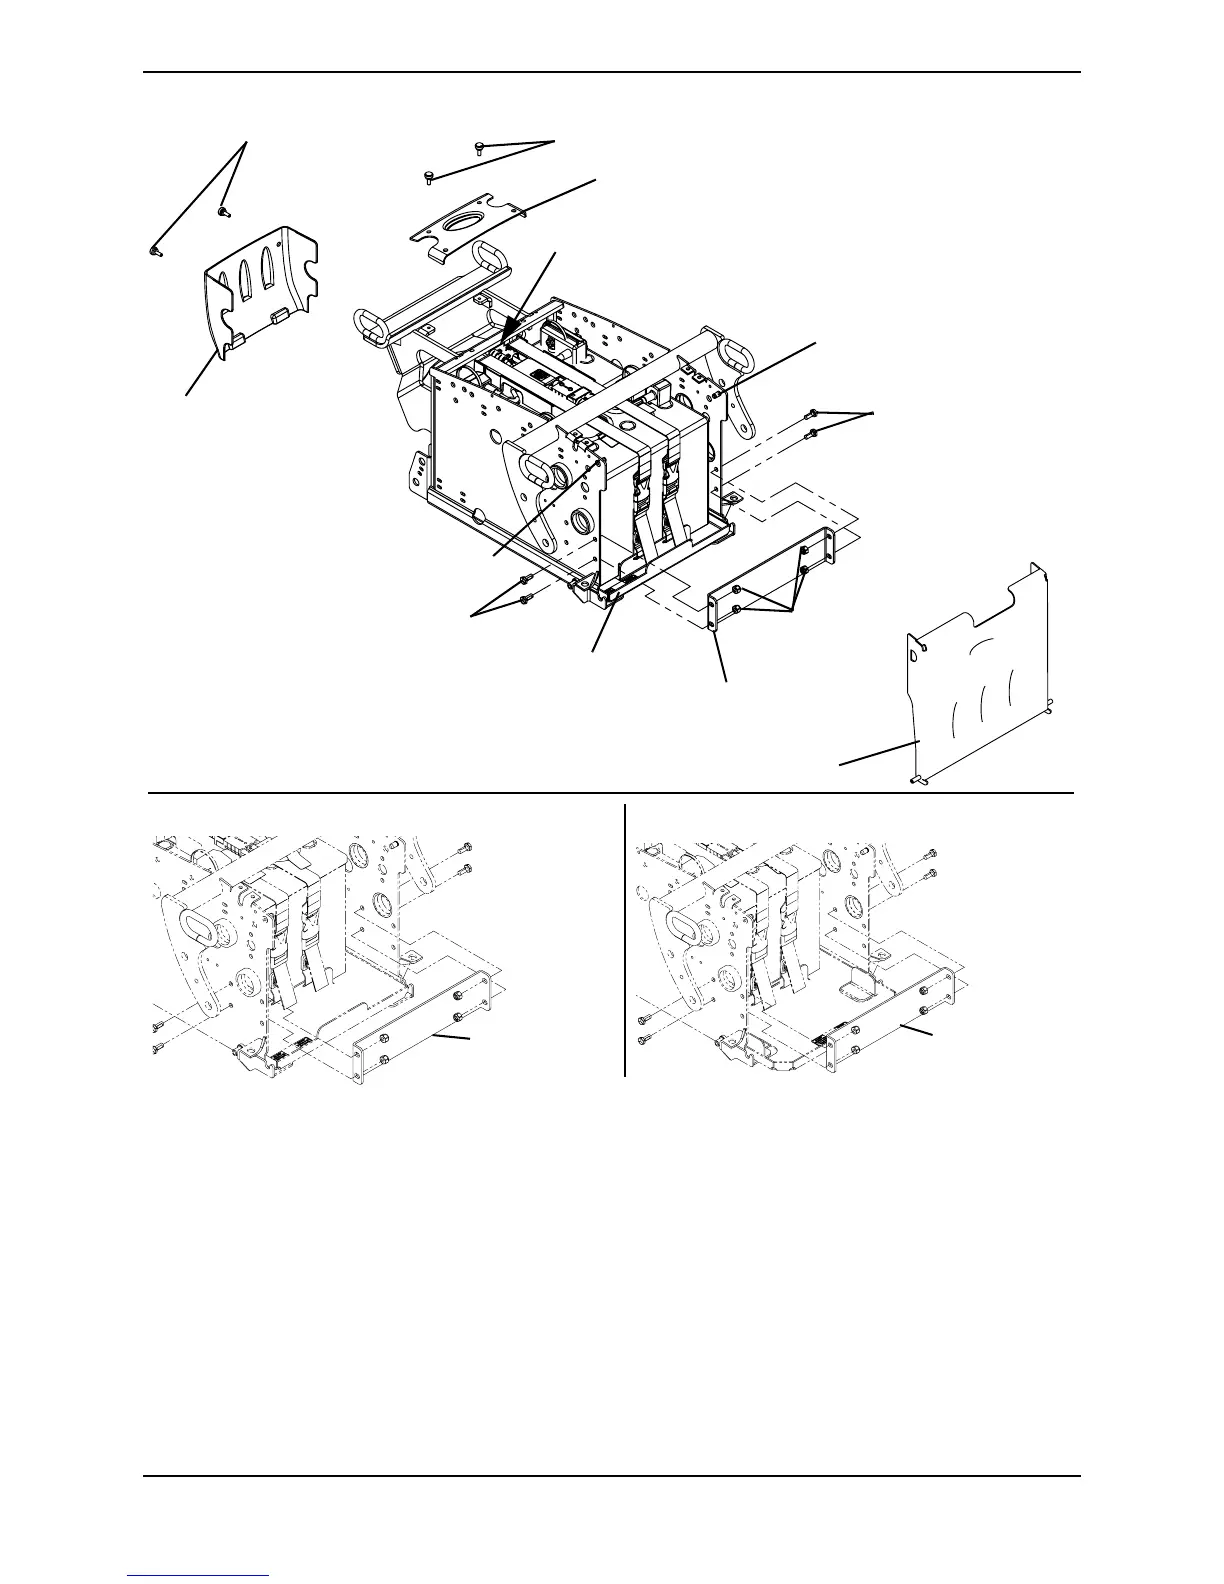
FIGURE 7.2 Removing the Battery Door and Rear Shrouds/Installing the Battery Door and
Rear Shroud - Wheelchairs with TRRO and TRBKTS
Removing the Batteries
NOTE: For this procedure, refer to FIGURE 7.3.
1. If wheelchair is equipped with ventilator tray, perform the following steps:
NOTE: Refer to DETAIL “A” in FIGURE 7.3.
A. Disconnect ventilator battery from wiring harness.
B. Disconnect the strap that secures the ventilator battery to the tray.
C. Remove the ventilator battery.
Wheelchairs with TRRO
or TRBKTS
Battery Door (STEP 7)
Mounting Screw (STEP 6)
GP24 Batteries with GP24 Battery
Tray (See below for other battery
configurations.)
Mounting Screw (STEP 6)
Disconnect Batteries from the controller here (STEP 9)
Thumb Screws
(STEP 2)
Rear Shroud
(STEP 3)
Top Controller Shroud (STEP 4)
Short Battery Support
Bracket (STEP 8)
Hex Screws (STEP 8)
Hex Screws (STEP 8)
Locknuts
(STEP 8)
Thumb Screws (STEP 4)
Non-Elevate 22NF Batteries
Short Battery
Support Bracket
Ventilator Tray Ready 22NF Batteries
Short Battery
Support Bracket







 To Next Page