EasyManua.ls Logo

Invacare Storm 3 User Manual

Invacare Storm 3
93 pages
To Next Page IconTo Next Page
Page #1 background imageLoading...
Page #1 background image
Storm³
SERVICE MANUAL
These instructions contain information
about:
Troubleshooting
Repair
Edition: 01.2002

Table of Contents

Other manuals for Invacare Storm 3

Question and Answer IconNeed help?

Do you have a question about the Invacare Storm 3 and is the answer not in the manual?

Invacare Storm 3 Specifications

General IconGeneral
TypePower Wheelchair
FoldingNo
Battery2 x 12V
Front Caster Size8 inches (20.3 cm)
Armrest StyleVarious options available
Legrest StyleVarious options available

Summary

9 Wheels

9.1.1 Replacing castor wheel / front wheel

Steps to replace the castor or front wheel.

9.1.3 Repairing / replacing tyres or inner tube

Procedure for tyre and inner tube repair/replacement.

9.1.7 Replacing the drive wheels

Steps to replace the drive wheels.

9.1.9 Repairing / replacing tyres or inner tube

Procedure for drive wheel tyre and inner tube repair/replacement.

9.1.10 Replacing wheel hubs, brake linings

Steps to replace wheel hubs and brake linings.

9.2.1 Replacing batteries

Step-by-step guide to replace the batteries.

11 Remote

11.1.1 Replacing joystick knob

Steps to replace the joystick knob.

11.1.4 Replacing the remote

Guide to replace the remote control.

11.2.4 Replacing the ACS operation box for attendant (switchable)

Guide to replace the attendant operation box.

11.2.5 Replacing the ACS joystick (switchable)

Steps to replace the ACS joystick.

11.2.7 Replacing the ACS chin control (complete)

Steps to replace the complete ACS chin control.

11.3 Troubleshooting the ACS control system

Troubleshooting steps for the ACS control system.

11.3.1 Error codes

Explains ACS system error codes and their meanings.

11.4.1 Replacing the equipment rack

Steps to replace the equipment rack.

11.4.2 Replacing electronic components

Guide to replace electronic components.

1 Safety and assembly instructions

1.1 Before any inspection or repair work

Precautions before starting inspection or repair.

1.2 During dismantling/reassembly

Safety guidelines during dismantling and reassembly.

1.3 Before operation / after completion of work:

Checks to perform before operation after work.

2 Tool list

2.1 Tightening torques and Loctite

Specifications for tightening torques and Loctite usage.

3 Layout of modules, components and displays and controls

4 Service plan (1x annually)

5 Operational faults

5.1 General

General procedure for handling operational faults.

5.2 Fault causes

Detailed breakdown of potential fault causes.

6 Joystick box error codes

8 RUNNING GEAR

8.2.1 Replacing motor for electrical seat tilting

Step-by-step guide to replace the seat tilting motor.

8.2.2 Replacing the electrical lifter motor

Step-by-step guide to replace the electrical lifter motor.

8.3.2 Replacing drive unit, pressure spring

Steps to replace the drive unit and pressure spring.

8.3.3 Replacing carbon brushes

Guide to replacing carbon brushes.

8.4.1 Replacing the disengage lever

Step-by-step instructions for replacing the disengage lever.

8.4.2 Function check for disengage lever

Procedure to check the function of the disengage lever.

8.5.1 Replacing wheel lock / Bowden cable

Steps to replace the wheel lock and Bowden cable.

12 Seat unit

12.1.1 Replacing the seat

Steps to replace the seat.

12.1.2 Replacing the seat plate

Guide to replace the seat plate.

12.3.1 Replacing armrest padding / changing its position

Steps to replace or adjust armrest padding.

12.3.2 Replacing the side panel

Guide to replace the side panel.
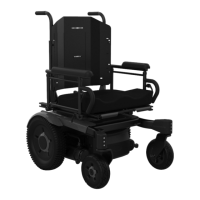
13 Backrest adjustment

14 FOOTREST HANGER

15 Footrest lower part

Related product manuals