Page 28
Instructions for Connecting Piping
to Outdoor Unit
USE SPANNER TO GRIP MAIN
BODY OF VALVE
Torque from tightening the are nut can snap
off other parts of valve.
1.
Unscrew the cover from the packed valve on
the side of the outdoor unit. (See Fig. 5.9)
2.
Remove protective caps from ends of valves.
3.
Align ared pipe end with each valve, and
tighten the are nut as tightly as possible by
hand.
4.
Using a spanner, grip the body of the valve.
Do not grip the nut that seals the service
valve. (See Fig. 5.10)
5.
While rmly gripping the body of the valve,
use a torque wrench to tighten the are nut
according to the correct torque values.
6.
Loosen the aring nut slightly, then tighten
again.
7.
Repeat Steps 3 to 6 for the remaining pipe.
Fig. 5.9
Fig. 5.10
Valve cove
Page 29
Air Evacuation
7
Preparations and Precautions
Air and foreign matter in the refrigerant circuit
can cause abnormal rises in pressure, which
can damage the air conditioner, reduce its
efficiency, and cause injury. Use a vacuum pump
and manifold gauge to evacuate the refrigerant
circuit, removing any non-condensable gas and
moisture from the system.
Evacuation should be performed upon initial
installation and when unit is relocated.
BEFORE PERFORMING EVACUATION
o
Check to make sure that both high-
pressure and low-pressure pipes between
the indoor and outdoor units are
connected properly in accordance with the
Refrigerant Piping Connection section of
this manual.
o
Check to make sure all wiring is connected
properly.
Evacuation Instructions
Before using the manifold gauge and vacuum
pump, read their operation manuals to familiarize
yourself with how to use them properly.
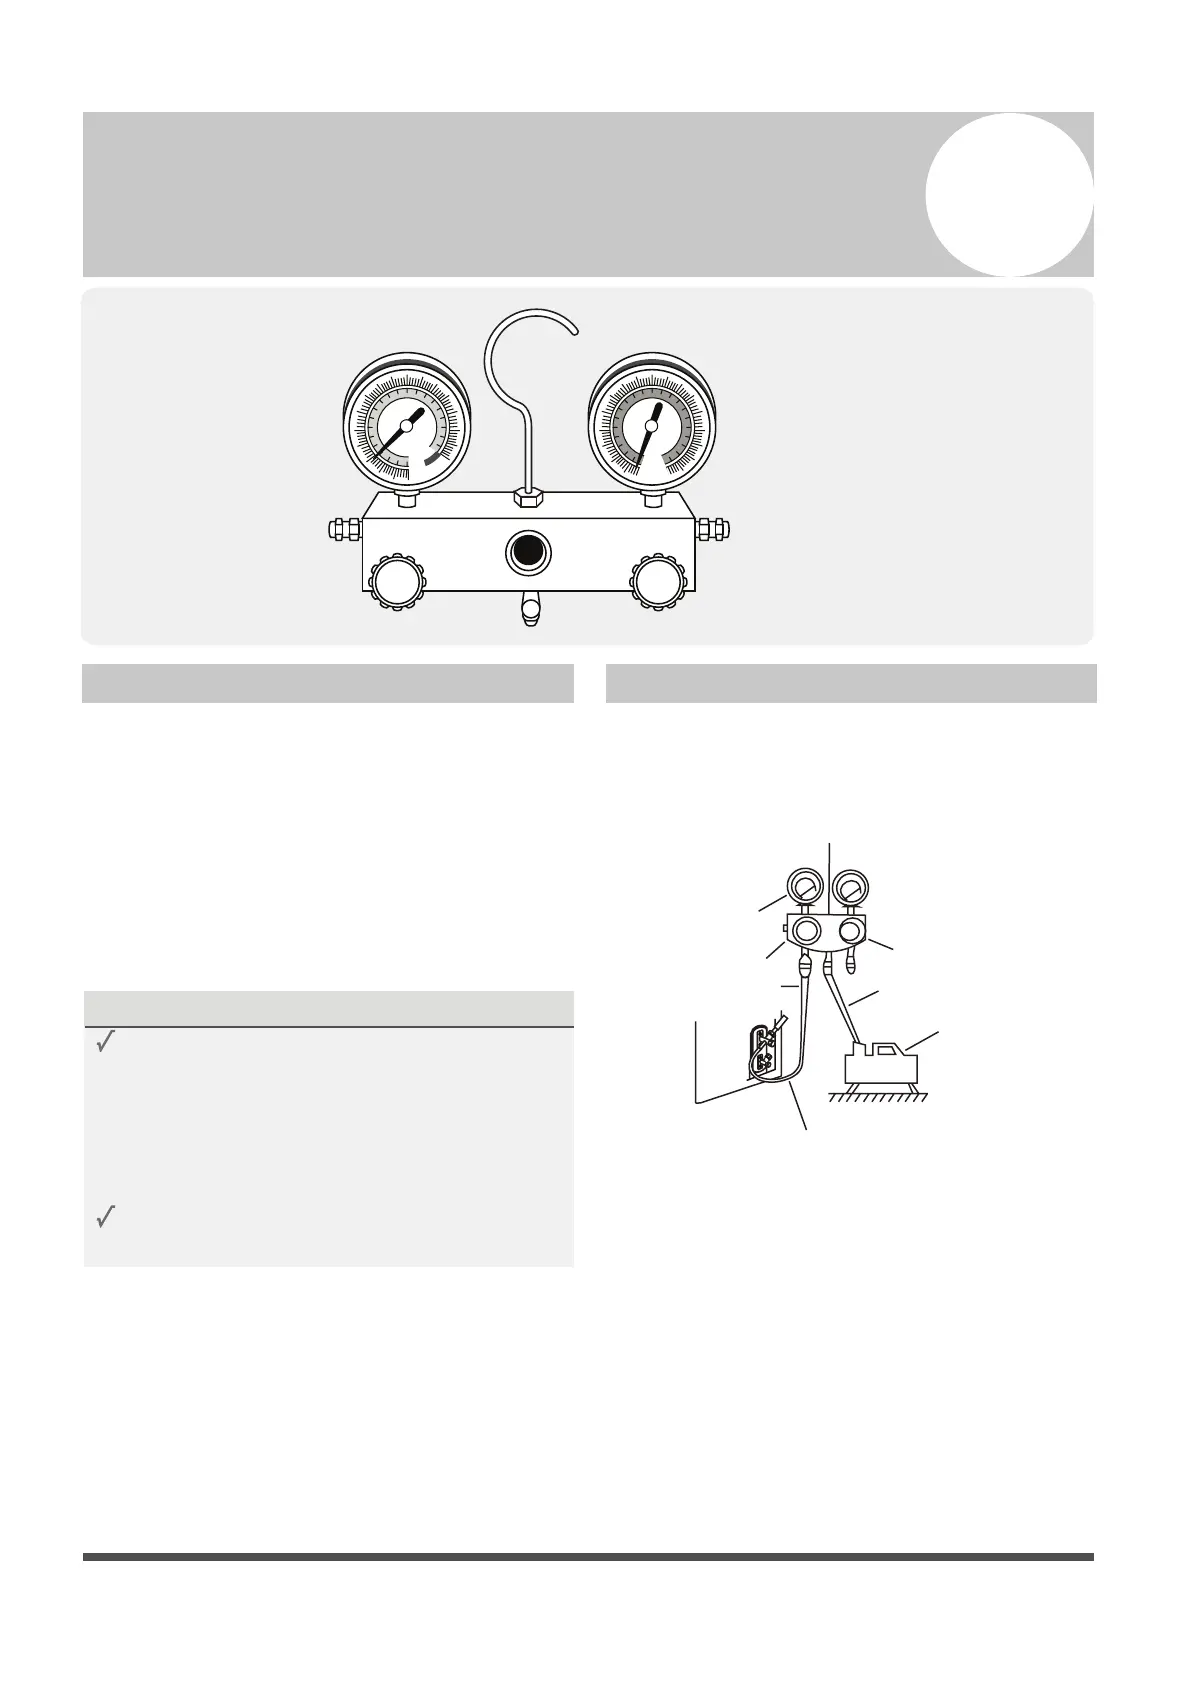
Manifold Gauge
Compound gauge
-76cmHg
Low pressure valve
High pressure
valve
Pressure hose /
Charge hose
Charge hose
Vacuum
pump
Pressure gauge
Low pressure valve
1.
Connect the charge hose of the manifold
gauge to service port on the outdoor unit’s
low pressure valve.
2.
Connect another charge hose from the
manifold gauge to the vacuum pump.
MC MC
Fig. 6.1
3.
Open the Low Pressure side of the manifold
gauge. Keep the High Pressure side closed.
4.
Turn on the vacuum pump to evacuate the
system.
5.
Run the vacuum for at least 15 minutes, or
until the Compound Meter reads -76cmHG
(-10 Pa).
5
 Loading...