EN
SAF-MI-LBK-SBV-multi-v2.0-print-26000041 |© 2020-2021 Inxpect SpA Installation instructions 23
Step See image
4. Direct the sensor up to the desired inclination.
L
5. Tighten the screws.
M
(only for LBK-S01 sensors) Connect the controller to the sensors and assign the IDs
1. Decide if the controller will be positioned at the end of the chain or inside of it (see Chain
examples).
2. Start the application.
3. For LBK System, click Login and Configuration. For LBK System BUS, click User and
Configuration.
4. Verify that the number of sensors in the configuration is the same of the sensors installed.
5. For LBK System, click Settings and Sensor ID Nodes. For LBK System BUS, click Settings and
Node IDAssignment.
6. Set the DIP switch of the controller based on its position in the chain.
7. Connect the desired sensor directly to the controller.
8. Insert the termination connector (product code 07000003) in the free connector of the sensor.
9. For LBK System, click ASSIGN ID NODES. For LBK System BUS, click ASSIGN NODE IDS and
follow the instructions displayed to assign a Node ID to the sensor.
10. To add a sensor, click ADDNEXTSENSOR.
11. Connect the new sensor directly to the controller or to the last sensor of the chain.
12. To insert the termination connector, perform the following steps:
If the sensor has been connected… Then…
to the controller insert a new termination connector into the
free connector of the sensor just connected.
to the last sensor of the chain move the termination connector of the
previous sensor and insert it into the free
connector of the sensor just connected.
13. Click PROCEED and follow the instructions displayed to assign a Node ID to the new sensor.
14. Repeat from step 8 to connect another sensor, or click TERMINATE to conclude the procedure.
Note: the maximum length of the CAN bus line from the controller to the last sensor of the chain is 30 m.
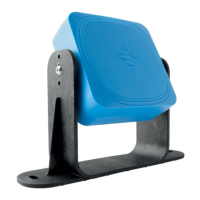
Install SBV-01 sensors
Step See image
1. Position the sensor as indicated in the configuration report and fasten the
bracket with two screws onto the floor or another support.
N
2. With an Allen key, loosen the screw at the bottom to pan the sensor.
O
3. Pan the sensor until it reaches the desired position.
Note: a notch is equal to 10° of rotation.
P
4. Tighten the screw.
Q
 Loading...