Figure 18. Connect DEC cable
Connect the Go2Nova
®
8409 Hand Controller to the HBX port on the RA unit. Plug in a 12V DC power
supply to the DC12V IN socket next to the HBX port (NOT the DC12V OUT on the other side).
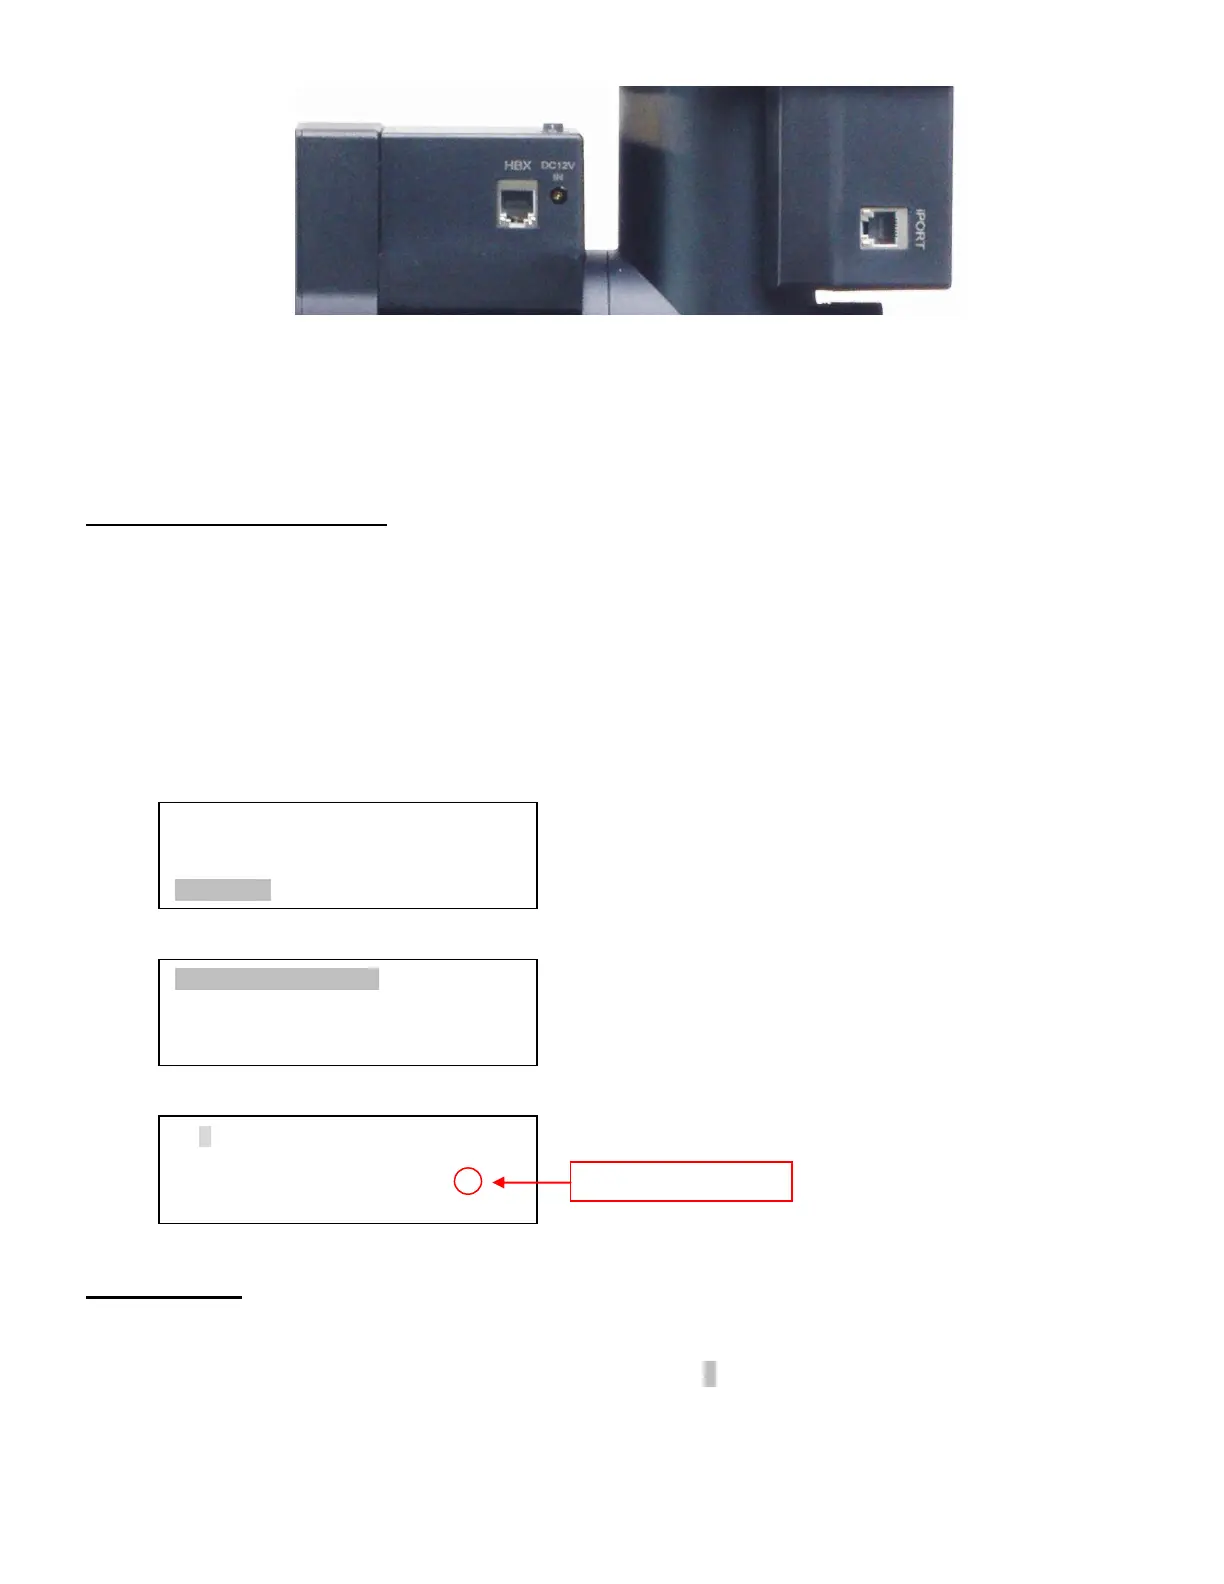
Figure 19. Ports for cables
Plug optional GPS module into the iPORT with a coiled cable. When powering on, GPS ON sign
should be displayed at the upper right corner of the hand controller. You may disconnect the GPS module
after it picks up satellites signals and displays GPS OK. (It takes a few minutes in normal conditions).
STEP 10. Set hand controller
If a GEM28 is equipped with a GPS receiver, it will receive the time, longitude and latitude
information from satellites after the link is established. However, there are still some parameters need to be
entered to reflect your location, such as time zone info (UTC offset) and daylight saving time (DST). The
information will be stored inside the hand controller memory along with longitude and latitude coordinates
until they need to be changed.
A clear sky and open space outside is needed for the GPS to establish its link with the satellites. The
GPS is installed on top of the R.A. motor control board. Do not leave the hand controller on GPS Status
submenu waiting for GPS ON tuning into GPS OK.
To set up the controller, turn the mount power ON. Press MENU=> “Settings”:
Press ENTER and select “Set Time and Site”
Select and Slew
Sync. to Target
Alignment
Settings