English (Translation of original instructions)
- 2 -
UNPACKING
Unpack your machine with great care, avoiding any manoeuvre that
could lead to damage.
Once you have unpacked it, make sure all parts are in a good
condition. If you notice any damage, DO NOT use the machine and
contact your retailer immediately.
For reasons concerning packaging and transport, some parts and
optional items may be supplied disassembled. To assemble them,
follow the instructions given in this handbook in the respective
sections.
Contents of the package
N° 1 Machine
N° 1 or 2 Side brush
N° 2 Keys for starting
N° 1 Use and maintenance handbook
N° 1 Declaration of conformity
N° 1 Warranty coupon
- - - - Batteries (if purchased)
N° 1 Battery connection kit
N° 1 Battery charger (if purchased)
The DP version also features the operating instructions of the
engine.
If you notice that any of the above are missing, contact your retailer
immediately.
NOTE To prevent it from getting lost during transport, the
keys have been put inside the envelope containing the technical
literature.
Make sure the packaging materials (bags – cartons – pallets – hooks
– etc.) are put
away, out of the reach of children.
Precautions to take before starting the machine:
To facilitate transport, the side brush (or brushes) is not mounted in
its expected working position.
To put it in place, read the – Preparing a new machine – section.
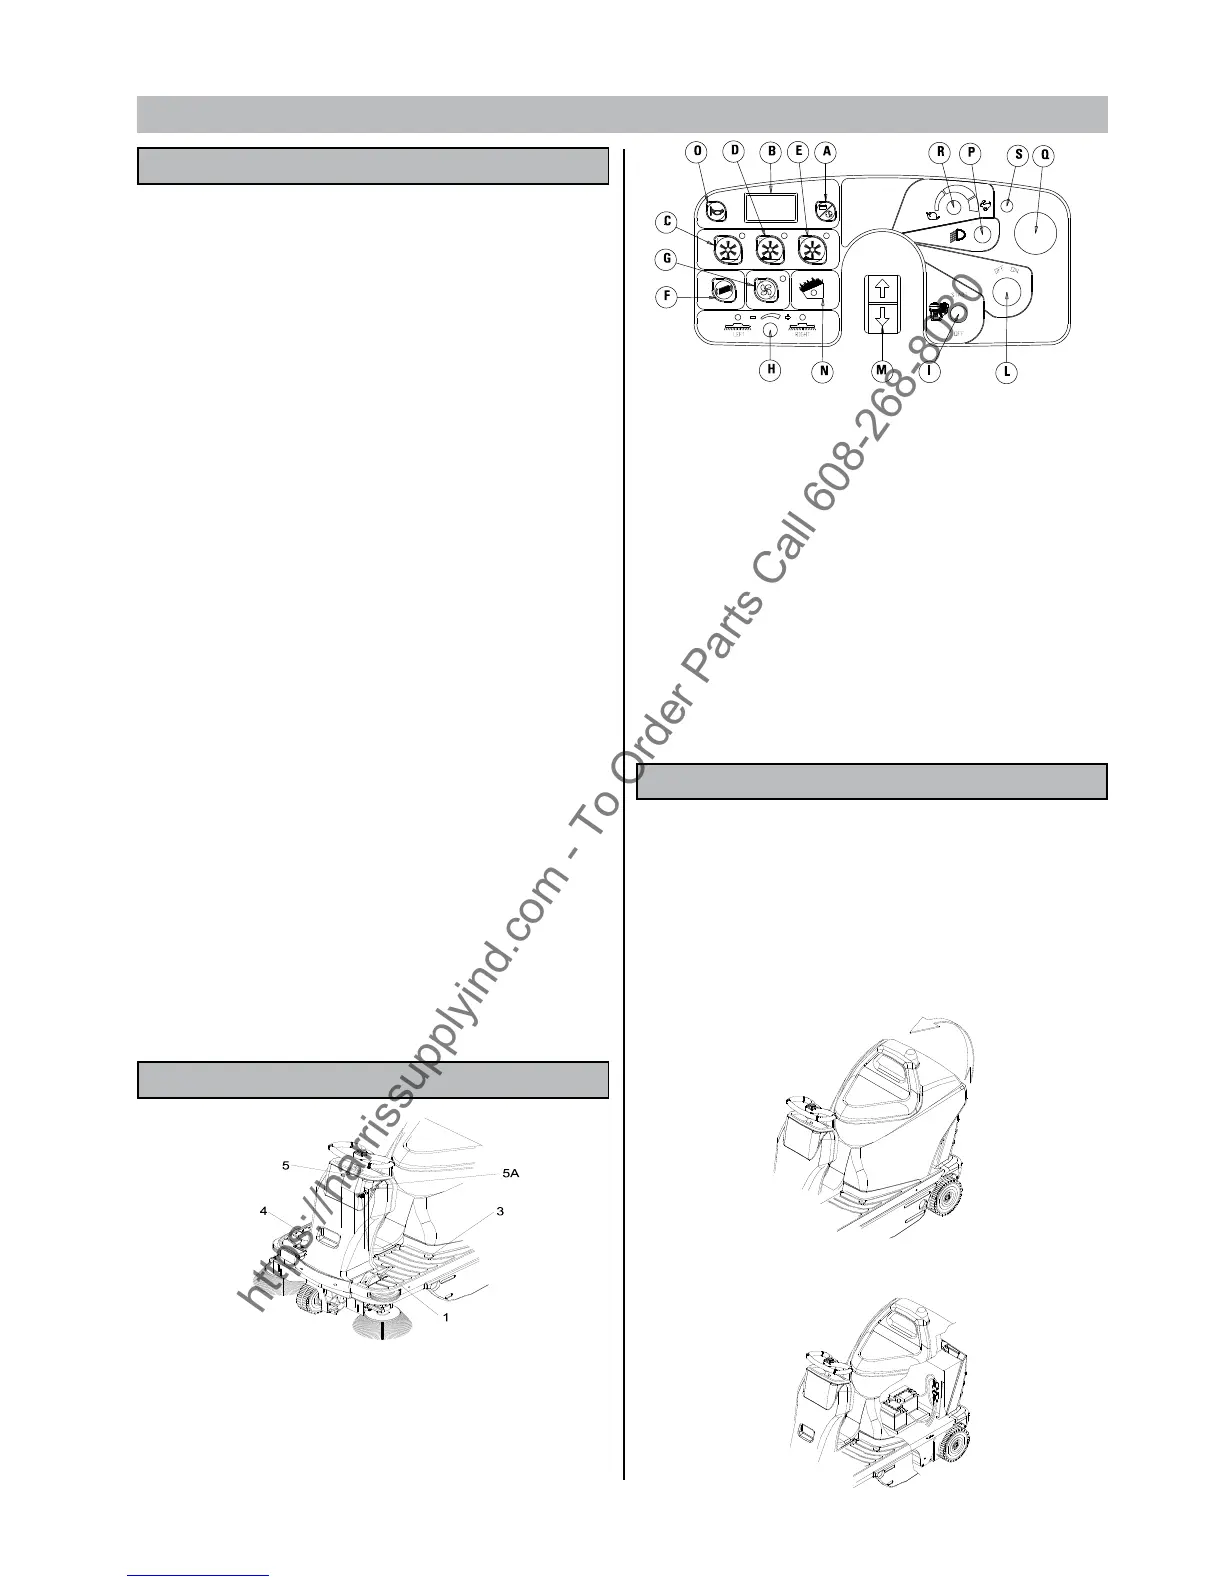
THE CONTROLS AND THE CONTROL PANEL
1) - Brake lock pedal and parking brake pedal
3) - Flap raising pedal
4) - Accelerator pedal
5) - Right hand side brush control lever
5A) - Left hand side brush control lever
A) - Selection of displayed data
B) - Display
C) - Key and indicator of work programme 1
D) - Key and indicator of work programme 2
E)
- Key and indicator of work programme 3
F) - Filter shaker ON button
G) - ON-OFF button and aspirator motor indicator
H) - Side brush speed adjustment knob
I) - Button to start/stop the engine (Dual Version)
L) - Ignition key
M)
- Forward/reverse button
N) - Waste bin “full” indicator (Optional)
O) - Claxon
P) - Light switch
Q) - Emergency
R) - Maximum speed adjustment knob
S) - Drive board alarm indicator, identies the error code on the board
according to the frequency with which the LED ashes.
In the absence of malfunctions, the status LED is steadily on while
the machine is in operation.
PREPARING THE MACHINE
Either in the petrol or in the DP version, the machine calls for a set
of 24 V batteries.
The machine can be supplied in three options:
1. Batteries supplied with the machine, tted and lled with acid,
ready for use.
2. Batteries supplied and tted dry (without the liquid electrolyte).
3. Batteries not supplied.
Raise the bonnet carrying the seat by pushing it forward towards the
steering wheel and check which option applies to your machine.
If the batteries are tted, open up one of the vent caps of each battery
and check if they are lled with electrolyte.