English (Translation of original instructions)
- 6 -
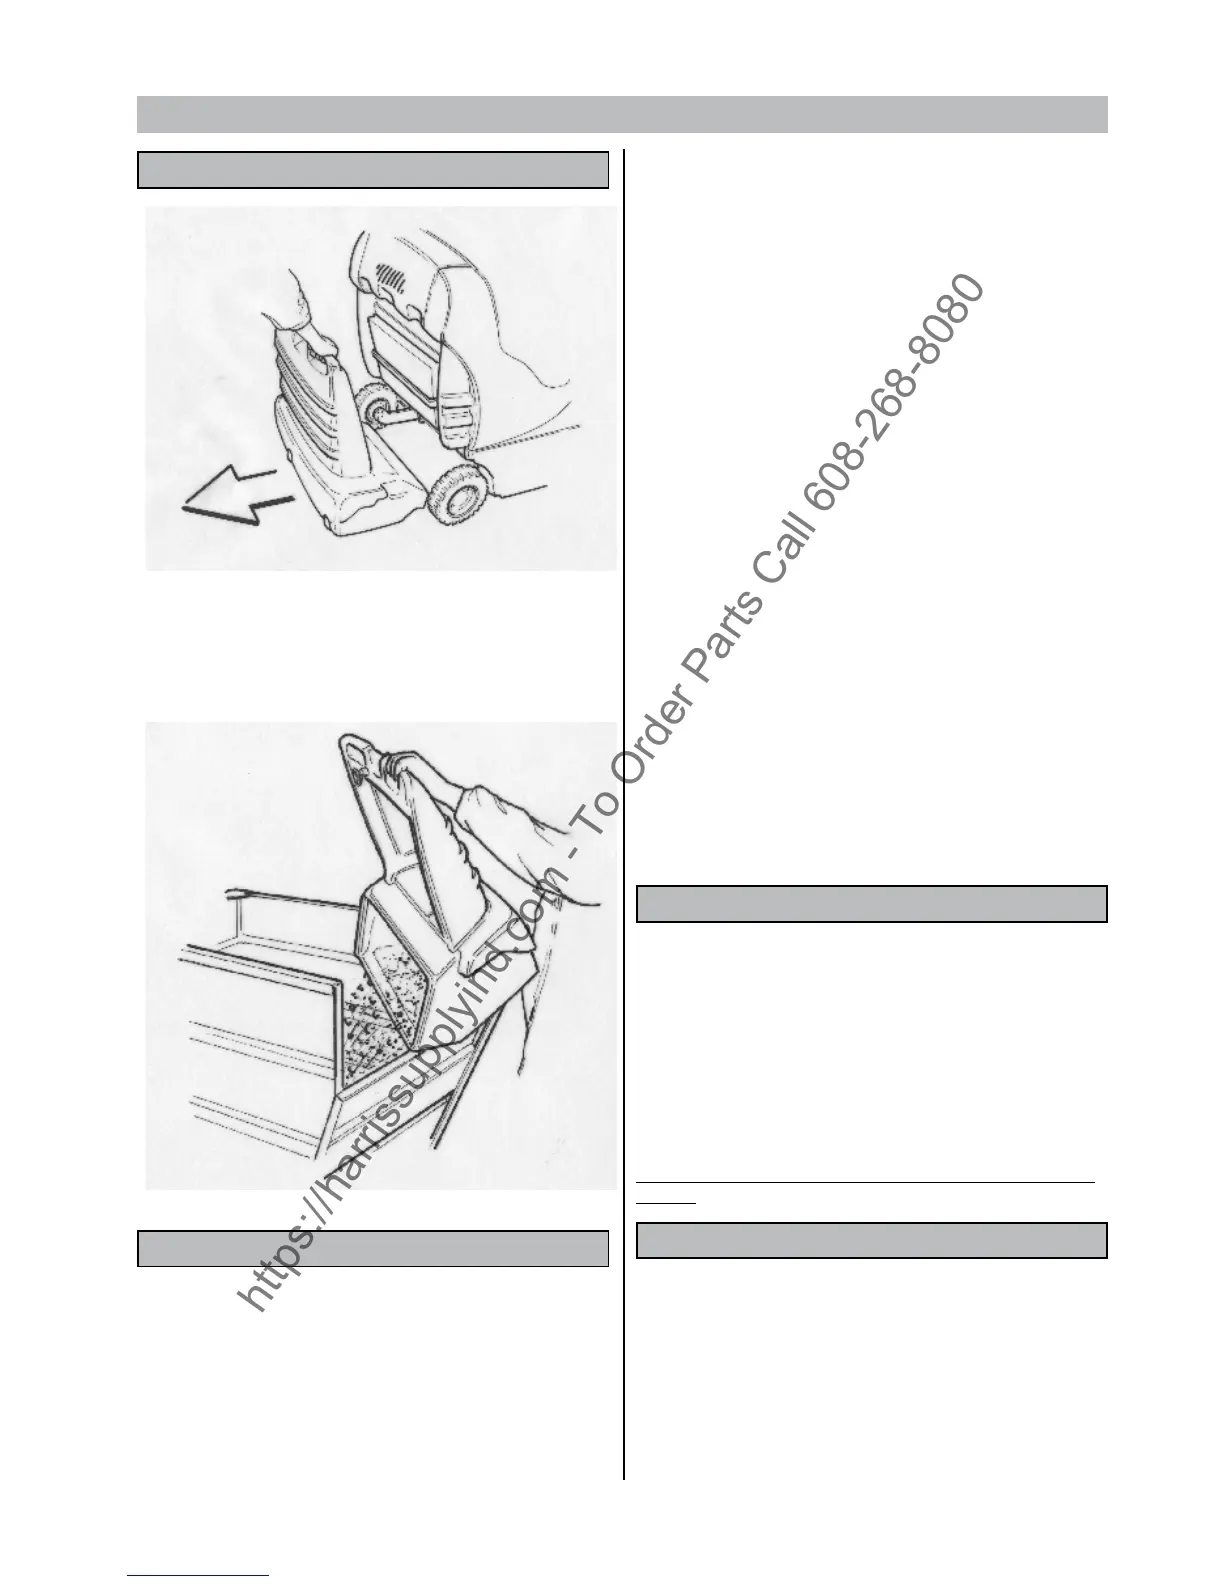
EMPTYING THE WASTE BIN
1-Move to the waste container.
2-Pull lever that locks/releases the bin.
3-Pull out the bin and empty it.
4-Ret the bin and lock it in place with lever
CLEANING AND SERVICING THE FILTER
The lter is a very important component of the machine and essential
for correct operation.
Proper filter maintenance will allow you to obtain the best
performance from your machine.
The lter can be cleaned in any of the following three ways:
1) by means of the automatic cleaning system
According to the chosen work programme, the machine is
programmed to automatically clean the filter at regular preset
intervals.
2) by means of an electric lter shaker that is manually started
Just a simple command is needed to keep the lter in perfect
working order: press the button marked ‘F’ and hold it down for a few
seconds. Repeat this operation 4 or 5 times.
Remember that the cleaner the lter, the better the results of your
cleaning session. It is recommended to carry this operation
out at the end of each work cycle.
NOTE: dusty environments
If you are using the machine in a dusty environment (e.g. sawmills
– warehouses where haulage vehicles pass, etc.), it is a good idea to
use the lter shaker more frequently.
3) by manually cleaning the lter
If operating the lter shaker is not enough to keep the lter clean
- and in any case every 20 hours of work - clean the lter manually.
Before carrying out any kind of intervention on the machine, make
sure it is turned o and that all functions are deactivated. To obtain
this condition, turn the switch marked ‘L’ to OFF.
1° Remove the rear box from the machine
2° Take the lter out of its seat by turning the two xing handles.
3° Blow compressed air onto the side of the filter featuring the
protective net (at a pressure of 6 bar at the most).
4° Ret the lters and the rear panel.
FITTING AND REPLACING THE SIDE BRUSHES
To facilitate transport, the side brush (or brushes) is not tted in its
expected working position.
To t the brush in its correct working position, proceed as follows:
1- Pull up the brush knob.
2- Loosen the screw on the shaft of the side brush motor.
3- Remove the key protection.
4- Place the brush with its ange on the shaft.
5- Tighten the xing screw.
To replace worn side brushes, carry out the operations listed above.
Important : raise and lower the side brushes while the machine is
running.
REPLACING LIGHT BULBS
To replace the front light bulb:
Remove the front cover by loosening the xing screws.
Replace the bulb, making sure that the new bulb has suitable electrical
features.
Ret the front cover.