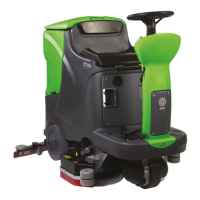
6.3. Moving the machine when not in operation
To move the machine, proceed as follows:
• raise the squeegee by pressing the suction button (fig. 5, ref. 3) (LED off);
• Raise the head by pressing the brush button (fig. 5, ref. 4) (LED off);
• use the selector (fig. 5, ref. 8) to set the direction of movement;
• operate the accelerator (fig. 6, ref. 1):
• speed can be varied by the potentiometer knob (fig. 5. ref. 10).
IMPORTANT
Do not leave the machine unattended or parked with the key inserted in the
emergency button and the parking brake off.
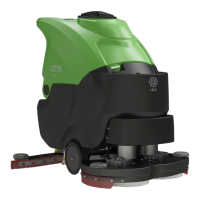
6.4. Mounting and changing the brush/drive disks
IMPORTANT
Never work without the brushes and drive disks perfectly installed.
MANUAL brush attachment (except ECS):
Place the brushes under the head drive disk.
Lift the right brush with your hands and turn it anticlockwise, locking it in position on the
drive disk. Lift the left brush with your hands and turn it clockwise, locking it in position on
the drive disk.
Use of abrasive disks: fit the abrasive disk on the drive disk and perform the operations
described for fitting the brush on the scrubber drier.
Automatic brush attachment (OPTIONAL): lift the head by pressing the brush button
(fig. 5, ref. 4) (LED off). Place the disks under the head (fig. 8, ref. 1), making sure they
rest against the stops to align them with the attachment device, then press the brush
button (fig. 5, ref. 4) (LED on). The machine performs the automatic attachment
manoeuvre.
Use of abrasive disks: fit the abrasive disk on the drive disk and perform the operations
described above.
Automatic brush release: stop brush rotation by pressing the brush button (fig. 5, ref. 4)
(LED off), stop the suction motor by pressing the suction button (fig. 5, ref. 3) (LED off),
then hold the brush button (fig. 5, ref. 4) down for at least 5 seconds. The machine
performs the automatic release manoeuvre.
Automatic brush attachment (MICRO SCRUB/ECS models): lift the head by pressing
the brush button (fig. 5, ref. 4) (LED off). Place the disks under the head (fig. 8, ref. 2),
making sure they rest against the stops to align them with the attachment device, then
press the brush button (fig. 5, ref. 4) (LED on). The machine performs the automatic
attachment manoeuvre.
Automatic brush release (MICRO SCRUB/ECS models):
stop brush rotation by pressing the brush button (fig. 5, ref. 4) (LED off), stop the suction
motor by pressing the suction button (fig. 5, ref. 3) (LED off), then hold the
brush/microfibre release button (fig. 5, ref. 11) (LED on) down for at least 5 seconds. The
machine performs the automatic release manoeuvre.
6.5. Detergents - Instructions
IMPORTANT
Always dilute the detergent according to the manufacturer's instructions. Do not
use sodium hypochlorite (bleach) or other oxidants, particularly in strong