Other
Information
|
Using
Windows
Media
Player
11
ifiver
Chapter5 Other Information
38
Using Windows Media
Player
11
|
Transferring Media to the iriver clix
|
1
. After connecting the product to the USB jack of our
PC using the USB cable, run Windows Media player 11
.
2. After selecting the file in your PC, drag & drop it
to
the right pane.
3. Click [Start Synchronizing] to start transferring file.
4. Now
you
can find the selected music in your library.
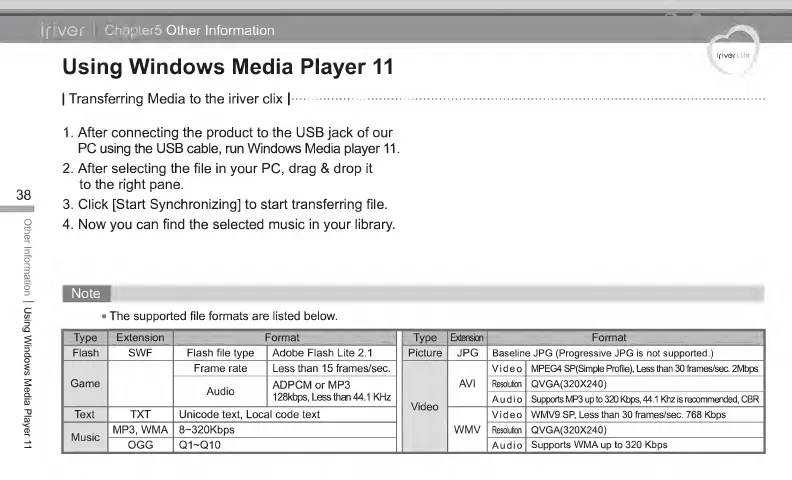
The supported file formats are listed below.
Type Extension Format Type Extension Format
Flash SWF Flash file type Adobe Flash Lite 2.1 Picture JPG Baseline JPG (Progressive JPG is not supported.)
Game
Frame rate Less than 1 5 frames/sec.
Video
AVI
Video MPEG4 SP(Simple Profile), Less than 30 frames/sec. 2Mbps
Audio
ADPCM or MP3
128kbps, Less than 44.1 KHz
Resolution QVGA(320X240)
Audio Supports MP3
up
to 320 Kbps, 44.1 Khz is recommended, CBR
Text TXT
Unicode text, Local
code
text
WMV
Video
WMV9 SP,
Less
than
30 frames/sec. 768 Kbps
Music
MP3, WMA 8~320Kbps Resolution
QVGA(320X240)
OGG
Q1-Q10
Audio
Supports WMA
up
to 320 Kbps