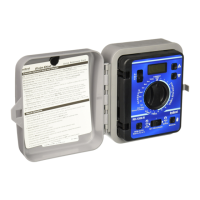
Outdoor Model
WARNING:
All electrical components must meet applicable
national and local electrical codes including installation by quali-
fied personnel. These codes may require a junction box installed
on controller’s 1/2" NPT nipple and a means in the fixed wiring of
disconnecting AC power having a contact separation of at least
0.120" (3mm) in the line and neutral poles. The connection wire
must have insulation rated @ 105° C min.
Verify that power has
been turned off at the power source by using an AC volt meter
prior to connecting controller wiring.
Caution: The controller must be connected to a grounded
power source. Do not connect to one phase of a 3-phase power
supply used by a pump or other electrical equipment.
Note: Electrical conduit and adapters are not supplied with the con-
troller but are generally required by electrical codes. Check local
codes and install accordingly.
Note: Australian controller models are equipped with a plug-in
power cord. For power connection, insert the plug into a grounded
240 VAC, 50 Hz outlet.
1. Install a 1/2" (13 mm) NPT threaded conduit body to the trans-
former assembly nipple. From the conduit body, install electrical
conduit to the AC power source as required.
2. Route the Hot, Neutral and Equipment Ground wires through the
conduit into the conduit body.
3. Using the proper size wire connectors, splice the mating wires as
shown in Figure 7.
4. Close and secure the conduit body cover.
5. Apply power to the controller and check controller operation. If the
controller is not operating, disconnect the power at the source
and have a qualified electrician check for possible short circuit.
CAUTION: Keep the outdoor cabinet closed and locked when
possible to protect electronic components. Store keys (2) in a
safe location. See Figure 8.
Connecting the Power Source
14
66767_RainDial 0428A 3/28/07 2:24 PM Page 14
 Loading...