Installing the 9V battery serves two important purposes: first, to
enable the Rain Dial to be fully programmed prior to installation,
and second, to keep the control module synchronized with current
time and date during a main power interruption lasting more than
24 hours.
The control module is designed to be easily removed for complete
programming in a more convenient setting, such as your favorite
armchair. To remove the control module, simply unplug the ribbon
cable connector from the printed circuit board, then carefully remove
the module from it’s snap-in hinges. The Rain Dial features non-
volatile memory, which keeps the programming information intact,
even if the battery dies or is disconnected.
Note: The battery is not capable of operating the sprinkler valves.
Main AC power must be applied to the controller to enable operation.
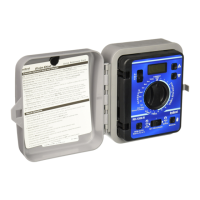
Installing the Battery
1. Open the controller door.
2. Pull the control module open by grasping it from the right edge
(press the module release tab on the outdoor model).
3. Locate the battery compartment at the top of the control module.
Press down and outward on top of the cover to remove.
4. Attach the battery clip to the supplied 9V alkaline battery.
5. Store the battery in the compartment and reinstall the cover.
6. The display will begin flashing 12:00 AM (press any button to halt).
Note: To begin setting up a watering Program, refer to
“Basic Programming Procedures” on page 20.
CAUTION: To avoid hazards from improper battery type
installation, always replace the battery with the same or
equivalent battery type.
Always dispose of used batteries properly, as recommended by
the battery manufacturer.
Battery Installation & Armchair Programming
O Getting Started
4
66767_RainDial 0428A 3/28/07 2:24 PM Page 4