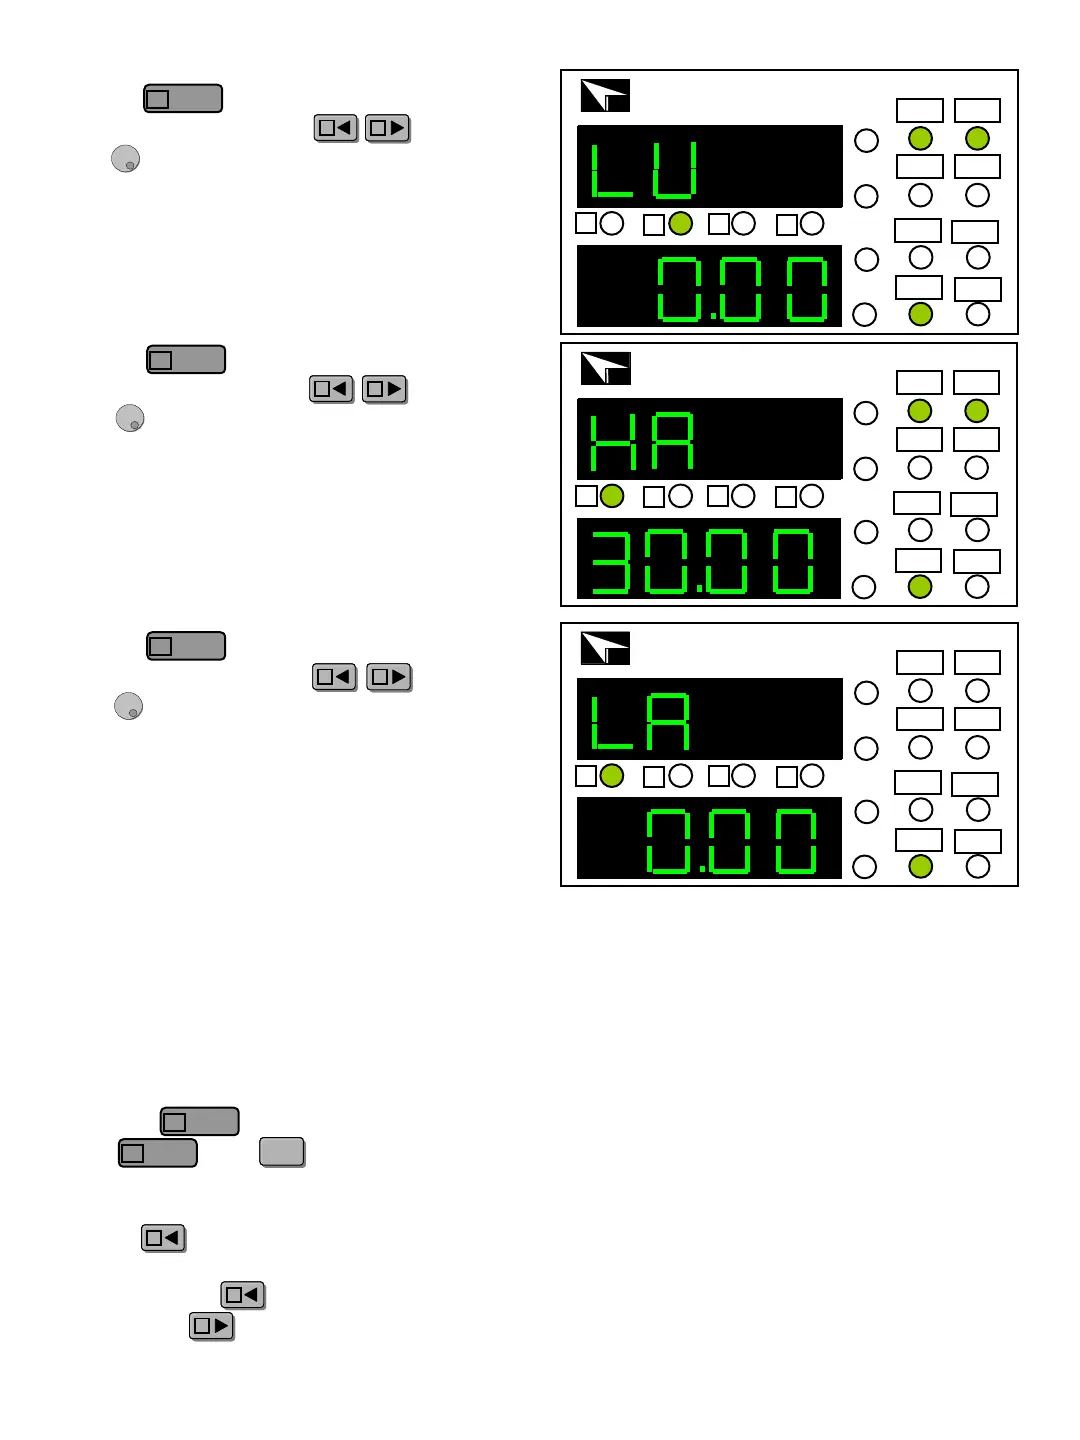
6) Press key to enter Low Voltage
setting. use cursor keys and the
knob to set the low limit of the input voltage.
Right figure set the Low Voltage as 0.00V.
7) Press key to enter High Current
setting, use cursor keys and the
knob to set the high limit of the input
current. Right figure set the High Current as
30.00A.
8) Press key to enter Low Current
setting, use cursor keys and the
knob to set the low limit of the input
current. Right figure set the Low Current as
0.00A.
9) Repeat step 1 settings, in turn set 5 steps:
1/2/2V/5S/60V/0V/30A/0A;
2/3/10Ω/5S/60V/0V/30A/0A;
3/1/2A/5S/60V/0V/30A/0A;
4/1/0A/5S/60V/0V/30A/0A (because the total
steps is less than 25 steps, so the last step
should be CC/0A.)
10) Press key to finish the setting, and
press and keys to exit the edit
menu, the instrument will save the setting
automatically.
Press key to run the list file.
NOTE: if the total steps is more than 25, e.g.
30 steps. press key to run the previous 25
steps, press key to run the last 5 steps.
SV
V
A
IT8211 60V/30A/150W
DC Electronic Load
Prog CC
Short CV
OFF
Shift
30A
CR
A
B
C
D
SV
W
SV
V
A
IT8211 60V/30A/150W
DC Electronic Load
Prog CC
Short CV
OFF
Shift
30A
CR
A
B
C
D
SV
W
SV
V
A
IT8211 60V/30A/150W
DC Electronic Load
Prog CC
Short CV
OFF
Shift
30A
CR
A
B
C
D
SV
W
View
C
View
C
View
C
View
C
View
C