3.1 Wiring the solar charge controller
When wiring the solar charge controller, please use flexible, multi-stranded copper
wire, with a current rating of at least 50Amps.
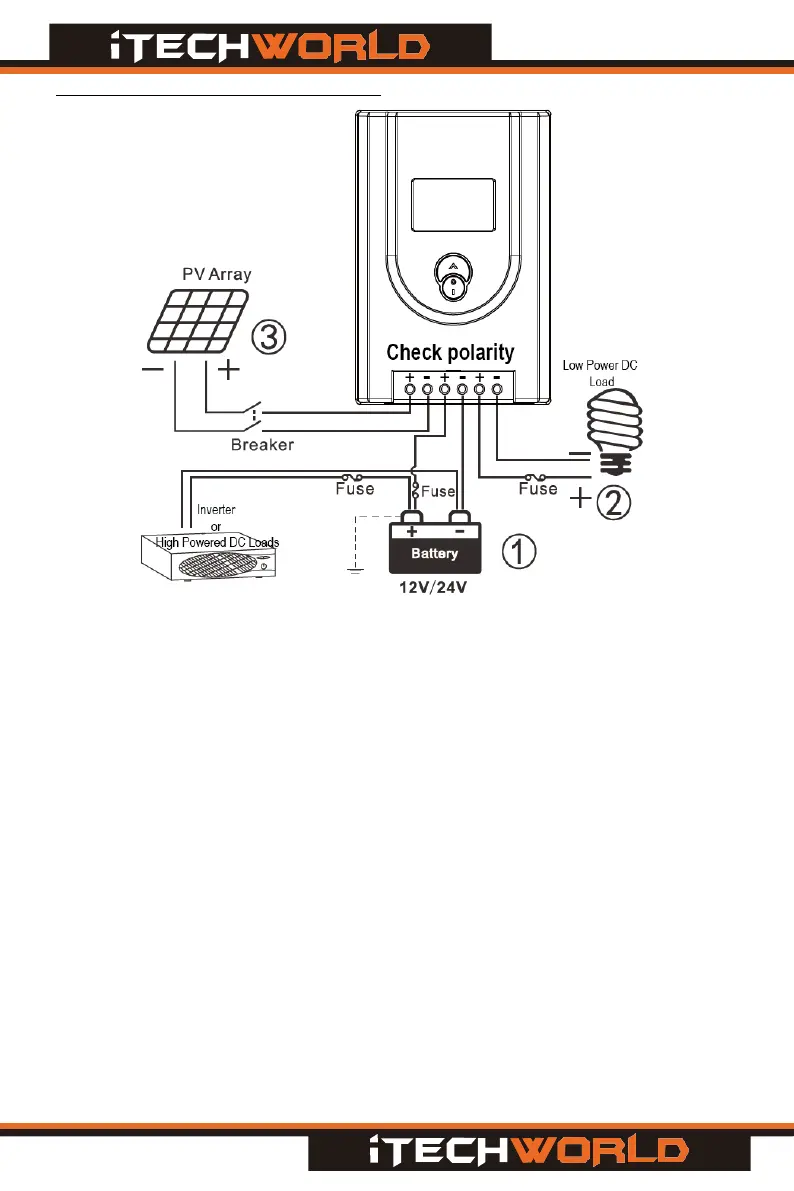
1. Connect your components to the solar charge controller in the sequence as
shown in figure 3(1,2,3) and make sure the polarity is correctly connected. Do
not insert fuses or turn on the breaker during the installation. When
disconnecting, the order will be reversed (3,2,1)
2. A battery fuse must be used, the battery fuse should be installed as close to
the battery as possible. The suggested distance is within 15cm of the battery.
Please refer to fuse specifications.
3. Always connect the battery first, as this allows the solar charge controller to
recognise the system voltage.
4. Power up the controller by installing the battery fuse first, then switching
on/connecting the solar array.
Warning: If using the load output on the solar charge controller, do not exceed
40Amps, large loads such as inverters should only be connected to the battery directly.
Warning: This solar charge controller is a common positive controller. Directly connect
the solar panel + & - connections to the solar charge controller only.
- 8 -
Figure 3 Connection Diagram