User instructions of JA-60 "Comfort" - 1 - MDY51410
User instructions of JA-60 „Comfort“
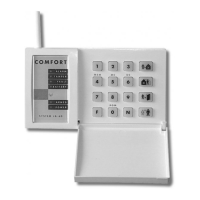
1. Indicators
Alarm alarm triggered by an intruder, smoke, gas etc.
Tamper opened cover, damaged detector, excessive number of attempts to enter code etc.
Fault
power loss, lost communication with a detector etc., (confirm pressing key N)
Battery battery of the device specified on the display is low. See battery replacement section.
Armed continues = armed, slow blinking = exit delay, fast blinking = entrance delay
Power continues = AC power & back-up battery are O.K., blinking = failure (AC power or back-up
battery), off = control panel is not powered
Two digits display
Specifies event source or mode of the control panel.
event sources:
1 to 16 zone input number
c1 to c8 wireless controller or keypad number
C control panel
A wireless siren
J sub system (other JA-60 or 65 system enrolled)
L telephone line
d digital line (PC interface, keypad JA-60E, …)
F wireless communication of the keypad lost (JA-60F only)
control panel modes:
P programming mode
U user mode (bypass setting, testing, battery replacement, voice dialer setting)
H home (partial) arming (inputs & wireless detectors addressed to B section are bypassed)
section A arming (split system)
section B arming (split system)
a zone is bypassed when arming
waiting for more data to complete entry
2. Access codes
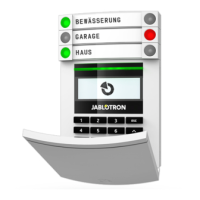
The control panel can be operated with the following codes (by JA-60E or JA-60F keypad or via connected
PC):
Master code is an extra user code, which can be used for arming, disarming but also for code changes, entering of user mode,
bypass setting, system testing, battery replacement, voice dialer programming (if enabled by installer) - factory default
Master code is 1234.
If the system is split, the use of MC will arm all sections if no section is armed or it will disarm all sections if any is
armed. If no code arming is disabled and the system is spilt then entering F1 MC will effect only section A and
entering F2 MC will effect only section B.
User codes up to 14 different user codes can be set in the system for different users for arming and disarming only (all are blank
from the factory). This way it is possible to differ between different users operations (details about used codes are
stored in the control panel internal events memory, the Comlink software or the monitoring station can access these
details).
Service code
is a code for installer to open programming mode for the control panel setting and testing (entering F 0 Service code).
If the control panel is split
, the user codes can be addressed to sections A or B in the programming mode.
Note: After 5 attempts to enter an invalid code a tamper alarm is triggered, indicated by LED “Tamper” and “C” on the display.
3. Controlling the system
Arming enter your access code or press the A button on the remote control. System will beep and will start exit delay count
down. You must leave the protected area during the exit delay.
Disarming enter your access code or press the B button on the remote control. The panel will beep twice and will disarm. When
you enter the protected area before disarming, the entrance delay count down will start. If disarming is confirmed
with three beeps, check the keypad indicators for information (alarm memory, failure, low battery etc.).
To stop alarm enter your access code or press the B button on the remote control.
Panic alarm entering F 7 before your code will trigger a silent panic alarm. This can also be triggered by the RC-22 panic button
or by pressing and holding of both buttons of the RC-11 remote control for 3 seconds.
