11
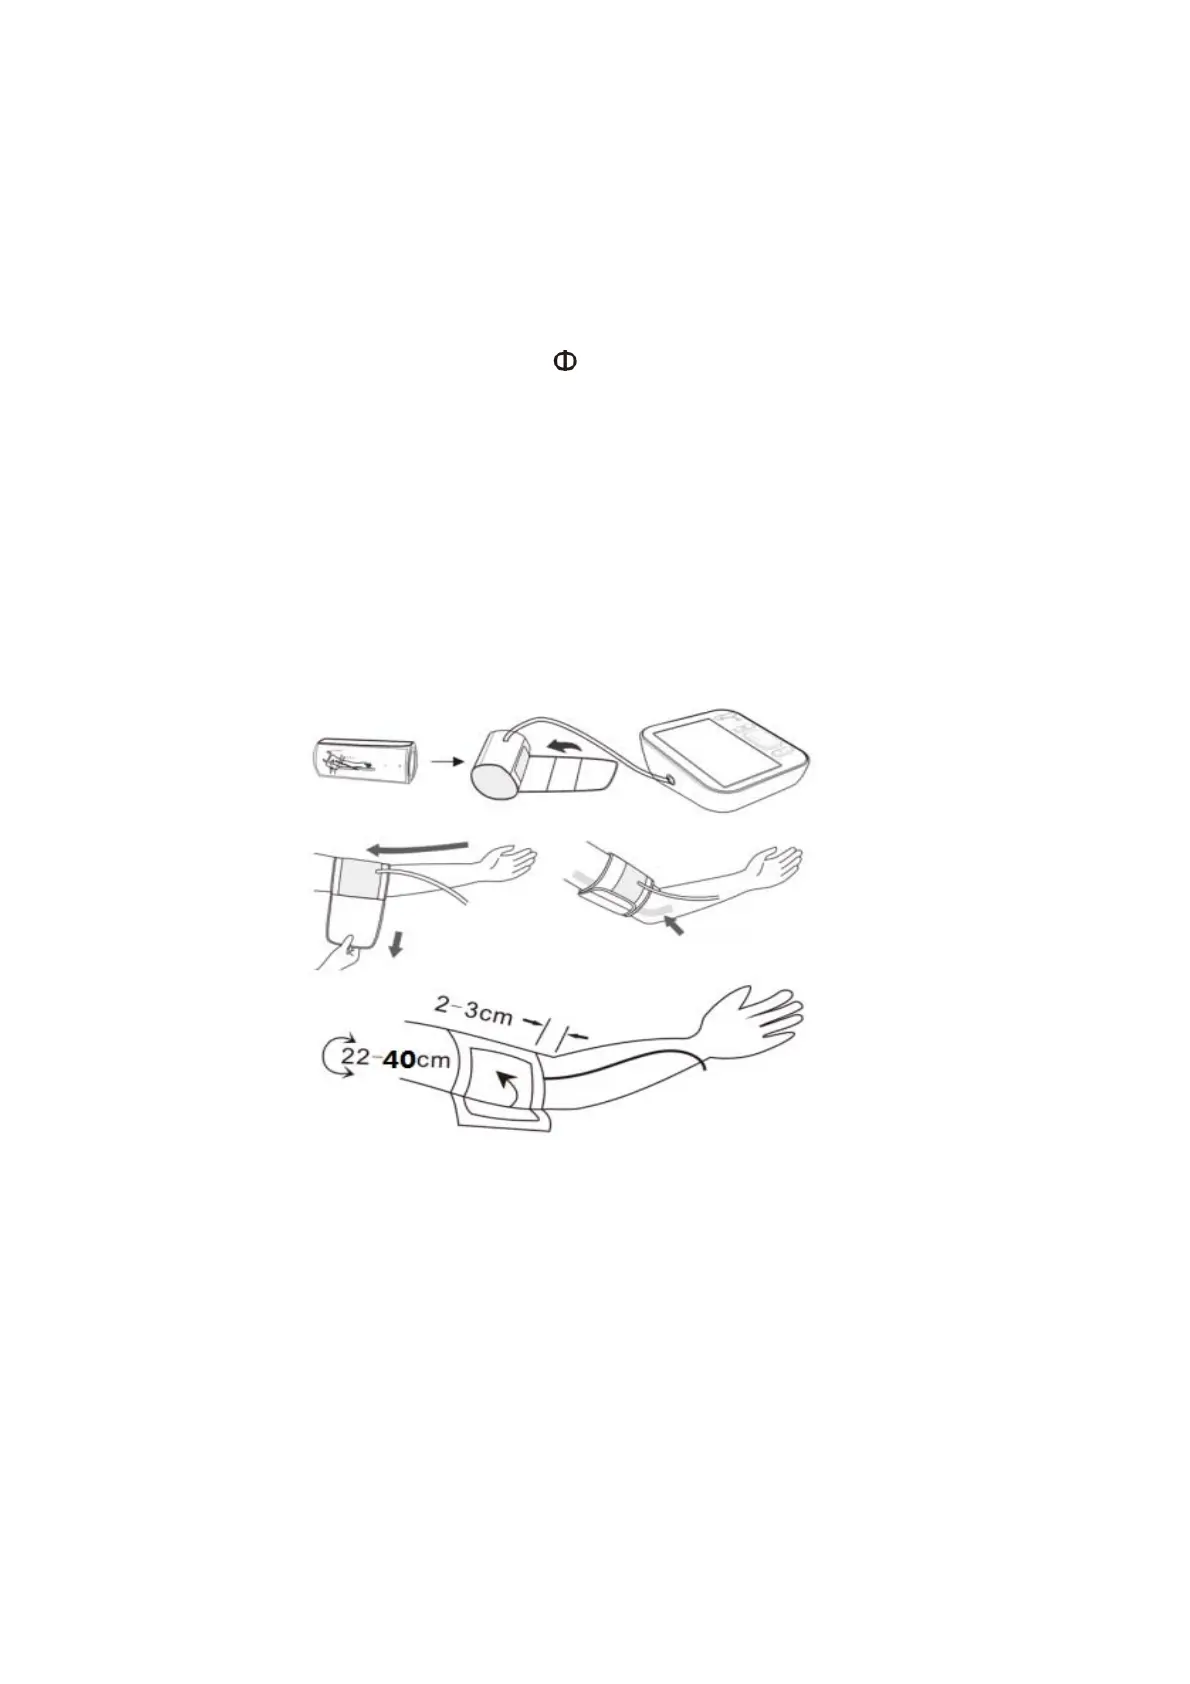
5.3. Fitting the Cuff
Please refer to picture-06
a) The cuff is preformed for easier use. R emove tight or bulky clothing from your upper arm.
b) Wrap the cuff around you r upper left arm. The rubber tube should be on the inside of your
arm extending downward to your hand. Make certain the cuff lies approximately 1/2” to 3/4” (1
to 2 cm) above the elbow. Important! The
on the edge of the cuff (Artery Mark) must lie
over the artery which runs down the inner s ide of the arm.
c) To secu re the cuff, wrap it around your arm and press the hook and loop closure together.
d) There should be little free space between your a rm and the cuff. You should be able to fit 2
fingers between your arm and the cuff. C uffs that don’t fit p rope rly result in false measurement
values. Measure your arm circumference if you are not sure of proper fit.
e) Lay your arm on a table (palm up ward) so the cuff is at the same height as your heart. Make
sure the tube is not kinke d.
f)Remain seated quietly for at least two minutes before you begin the measurement.
Picture-06
Change the cuff may result in unacceptable risks,the operator should pay attention to the
following:
• Only use Jamr au thorized cuffs, as those not approved for use with the device may provide
inaccurate measurements, injury, and/or damage the device.
• Do not force c uff connection into the opening.
• Do not forcefully bend the arm cuff or air tube. Do not fold tightly.
5.4 Measure Procedure
Refer to picture 07
The monitor is designed to take measurements and store the measurement values in memory