EasyManua.ls Logo

Jamr Technology BC31L - User Manual

Jamr Technology BC31L
14 pages
Print Icon
To Next Page IconTo Next Page
Loading...
薉俒䧭ⱃ勞餘㼓꬗⯕꬗HꜤ晜紺ⰻ곜兜鸑H⛼ⱗ 㽯㼄NN
Fully Automatic Upper Arm
Model Number: BC31L/BC31LT
USER’S MANUAL
Blood Pressure Monitor
Shenzhen Jamr Technology Co., Ltd.
A101-301, D101-201, Jamr Science & Technology Park, No. 2
Guiyuan Road, Guixiang Community, Guanlan Street, Longhua
District, Shenzhen 518100, PEOPLE'S REPUBLIC OF CHINA
Shanghai International Holding Corp. GmbH (Europe)
Eiffestrasse 80, 20537 Hamburg, Germany.
shholding@hotmail.com
Version Number:1.0
Question and Answer IconNeed help?

Do you have a question about the Jamr Technology BC31L and is the answer not in the manual?

Summary

Introduction and Intended Use

Warnings and Precautions

Covers safety warnings, precautions, and user guidance for safe operation of the device.

Important Reminders

Key notes for users regarding professional interpretation and usage limitations of the monitor.

Important Information on Blood Pressure

How Blood Pressure Arises

Explains the physiological factors influencing blood pressure levels.

Normal Blood Pressure Values

Details normal, high-normal, and hypertensive blood pressure ranges.

Components of Blood Pressure Monitor

Measuring Unit Description

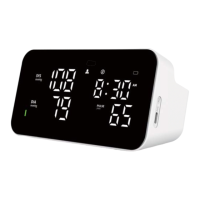
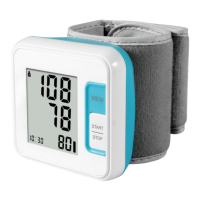
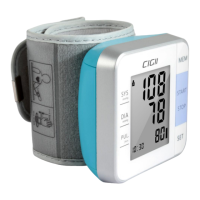
Details the physical components and ports of the blood pressure monitor.

LED Display Symbols

Explains the meaning of various symbols shown on the device's LED display.

Model Features and Functions

Outlines the key features and functionalities of the blood pressure monitor.

Using Your Monitor for the First Time

Battery Power and Charging

Explains how to check battery status and the charging process.

System Settings and Configuration

Guides users through setting voice, user ID, date, time, and volume.

Cuff Tube Connection

Instructions on how to properly connect the cuff tube to the monitor.

Measurement Procedure

Pre-Measurement Guidelines

Steps to follow before taking a blood pressure measurement for accuracy.

Cuff Fitting and Placement

Detailed instructions on how to correctly wrap and position the cuff.

Measurement Process

Step-by-step guide for performing a blood pressure measurement.

Error Handling and Indicators

Movement and Patient Position Errors

Explains how to handle movement errors and proper patient posture during measurement.

Irregular Heartbeat Detection

Describes the irregular heartbeat symbol and its significance.

Error Indicators and Solutions

Lists common error codes and their corresponding solutions for troubleshooting.

Memory Functions

Viewing Stored Measurements

Instructions on how to access and view past measurement records.

Deleting Stored Measurements

Guide on how to delete stored blood pressure and pulse data.

Measurement Control and Power

Discontinuing a Measurement

How to safely stop a blood pressure measurement in progress.

Using the AC Adapter

Instructions for connecting and using the AC adapter for charging.

Care and Maintenance

General Care Instructions

Guidelines for cleaning the device and cuff, and handling the tubing.

Accuracy Testing and Warranty

Recommendations for periodical accuracy checks and warranty information.

Technical Specifications and Compliance

Warranty and Service Information

Details the manufacturer's warranty period and terms.

Certifications and Standards

Lists the device standards and EMC compliances met.

Device Specifications

Provides key technical details like model, weight, display, and operating conditions.

FCC Statement

Information regarding compliance with FCC rules for radio frequency emissions.

EMC Declaration

Special precautions for EMC and guidance on installation and service.

Electromagnetic Compatibility Guidance

Electromagnetic Immunity

Guidance on immunity tests and compliance levels for electromagnetic environments.

Recommended Separation Distances

Specifies minimum distances for RF equipment to maintain device performance.

Electromagnetic Emission and Immunity

Electromagnetic Emission Standards

Details RF emissions classification and suitability for domestic environments.

Electromagnetic Immunity Tables

Provides detailed immunity test levels and recommended separation distances for RF equipment.

FCC Compliance and Radiation Exposure

FCC Statement Details

Explains FCC rules, conditions, and measures to correct interference.

Radiation Exposure Limits

States compliance with FCC radiation exposure limits for uncontrolled environments.

Overview

Fully Automatic Upper Arm Blood Pressure Monitor

Function Description

This device is a fully automatic digital blood pressure measuring device designed to measure systolic and diastolic blood pressure, as well as the pulse rate. It operates by wrapping a cuff around the upper arm, suitable for arm circumferences ranging from 22cm to 42cm. The device is intended for adults over 12 years old, particularly patients with hypertension or those requiring blood pressure monitoring. It can be used in medical facilities or at home, and is for indoor use only.

The device is not suitable for patients undergoing dialysis therapy or those on anticoagulant, antiplatelet, or steroid medications.

Usage Features

Before Measurement

To ensure accurate readings, avoid eating, smoking, and all forms of exertion directly before measurement. It is recommended to relax in an armchair in a quiet atmosphere for about ten minutes prior to taking a measurement. Remove any garment that fits closely to your upper arm. Always measure on the same arm, preferably the left.

Fitting the Cuff

Wrap the cuff around your upper left arm, ensuring the rubber tube extends downward to your hand on the inside of your arm. The cuff should be positioned approximately 2 to 3 cm above the elbow. Crucially, the artery mark on the edge of the cuff must align with the artery running down the inner side of the arm. Secure the cuff by wrapping it around your arm and pressing the hook and loop closure together. There should be a small gap, allowing two fingers to fit between your arm and the cuff. Improperly fitted cuffs can lead to inaccurate measurements. If unsure of the correct fit, measure your arm circumference. Lay your arm on a table with the palm upward, ensuring the cuff is at the same height as your heart. Prevent the tube from kinking.

Measurement Procedure

The device is designed to take and store measurements for two users, User ID 1 and User ID 2. Each user's measurements are stored separately.

  1. Positioning: Sit comfortably in a chair with your feet flat on the floor. Stretch your arm forward on the desk, keeping it relaxed with the palm upturned. Maintain a still position and avoid talking or moving during the measurement.
  2. Bluetooth Operation (for Bluetooth models only): If your model has Bluetooth, you can operate it via a smartphone app. Install the app from Google Play Store or Apple App Store, enable Bluetooth on your phone, and open the app. For first-time pairing, press the Memory button on the device; the Bluetooth symbol will flash. Follow the app's instructions for pairing. Once successfully paired, the Bluetooth symbol will stop flashing. Subsequently, Bluetooth will automatically search and connect when the device is powered on.
  3. On-Device Operation: Press the START/STOP button to turn on the device. All symbols will appear on the display, and the pump will begin to inflate the cuff. The increasing cuff pressure will be continuously displayed. If voice guidance is active, you can turn it off by pressing the mute button before inflation begins. After reaching an individual pressure, the pump stops, and the pressure gradually falls. The cuff pressure is displayed throughout the measurement. When your pulse is detected, the heart symbol on the display will blink. Upon completion, the measured systolic and diastolic blood pressure values, along with the pulse, will be displayed. These results remain on display until you turn off the device by pressing the START/STOP button. If no button is pressed for 60 seconds, the device will automatically switch off. The cuff self-checking symbol (a checkmark) will be displayed if the cuff position is correct. Otherwise, a wrong symbol (an "X") will appear, indicating that the cuff needs to be rechecked.
  4. Movement Error: If the Movement Error Symbol (a figure with an arrow) is displayed, it indicates body movement during measurement. Remove the cuff, wait 2-3 minutes, reapply the cuff, and take another measurement.
  5. Irregular Heartbeat Detector: The irregular heartbeat symbol (a heart with wavy lines) indicates that pulse irregularities were detected. In such cases, the result may deviate from your normal basal blood pressure, and the measurement should be repeated. Frequent appearance of this symbol (e.g., several times per week or sudden increase) warrants medical advice. This instrument is an oscillometric blood pressure monitor that also analyzes pulse frequency and is clinically tested. It serves to detect pulse irregularities at an early stage but does not replace a cardiac examination.
System Settings

Ensure sufficient battery power before adjusting settings.

  1. Voice Setting: In states requiring voice playback, the voice can be toggled on or off by pressing the mute button.
  2. User ID Setting: With the unit off, press the Users button to select User ID 1 or 2.
  3. Year/Month/Date/Hour System/Time/Volume Setting: With the unit off, long press the Memory button for more than 3 seconds to enter settings.
    • Year: When the year display flashes, press the Users button to increase the year continuously (up to 2049) or the Mute button to decrease it. Press the Memory button to confirm.
    • Month/Date: The initial display is 1/01. When the month flashes, use the Users button to increase or the Mute button to decrease. Press the Memory button to confirm. Repeat for the date.
    • Hour System: The initial hour system is 12-hour. Use the Users or Mute button to switch between 12-hour and 24-hour systems. Press the Memory button to confirm.
    • Time: When the hour display flashes, use the Users button to increase or the Mute button to decrease the hour. Press the Memory button to confirm. Repeat for the minute.
    • Volume: When "VOL" flashes, use the Users or Mute button to select volume 1, 2, 3, or OFF. Press the Memory button to confirm. The device will automatically switch off and save settings.
Memory Functions

The unit stores 120 measurements for each of two users, totaling 240 sets. Ensure you are viewing the correct user's measurements.

  1. Viewing Memory: With the unit off, press the Memory button. The monitor will display the User ID and an average of the last 3 measurements (or the first set if fewer than 3 exist). Each subsequent press of the Memory button will display values from the latest to the oldest. Pressing the Users button will display values from the oldest to the latest.
  2. Deleting Memory: In average value memory viewing mode (when the AVG. symbol is displayed), long press the Memory button for 3 seconds to delete all measurements for the current user. In single set memory viewing mode, long press the Memory button for 3 seconds to delete only the currently displayed measurement.
Discontinuing a Measurement

If a measurement needs to be interrupted for any reason (e.g., patient discomfort), press the Start/Stop button at any time. The device will immediately lower the cuff pressure automatically.

Using the AC Adapter

When the device is charging via the AC adapter (output d.c. 5V/1A with Type C connector), it cannot be turned on or used. Ensure the AC adapter and cable are undamaged. Plug the adapter cable into the AC adapter port on the right side of the blood pressure monitor, then plug the adapter into your electrical outlet. The device will recharge when connected.

Maintenance Features

Care and Maintenance

Wash hands after each measurement. If the device is used by multiple patients, wash hands before and after each use.

  • Environmental Protection: Do not expose the device to extreme temperatures, humidity, dust, or direct sunlight.
  • Cuff Handling: The cuff contains a sensitive air-tight bubble. Handle it carefully, avoiding twisting or buckling.
  • Cleaning: Clean the device with a soft, dry cloth. Do not use gas, thinners, or similar solvents. Spots on the cuff can be carefully removed with a damp cloth and soapsuds; 70% isopropanol can be used if necessary. The cuff with bladder must not be washed in a dishwasher, clothes washer, or submerged in water.
  • Tube Handling: Handle the tube carefully. Do not pull on it. Prevent the tubing from kinking and keep it away from sharp edges.
  • Physical Protection: Do not drop the monitor or treat it roughly. Avoid strong vibrations.
  • Servicing: Never open the monitor, as this will invalidate the manufacturer's warranty.
  • Disposal: Batteries and electronic instruments must be disposed of according to local regulations, not with domestic waste.
Accuracy Test

Sensitive measuring devices require periodic accuracy checks. It is recommended to have your device inspected by an authorized dealer annually.

Jamr Technology BC31L Specifications

General IconGeneral
Measurement MethodOscillometric
Measurement Range (Pressure)0-299 mmHg
Measurement Range (Pulse)40-199 beats/min
Cuff Size22-42 cm
DisplayLCD
Automatic Shut-offYes
Irregular Heartbeat DetectionYes
Power Supply4 x AA batteries or AC adapter

Related product manuals