10
Setup Instructions
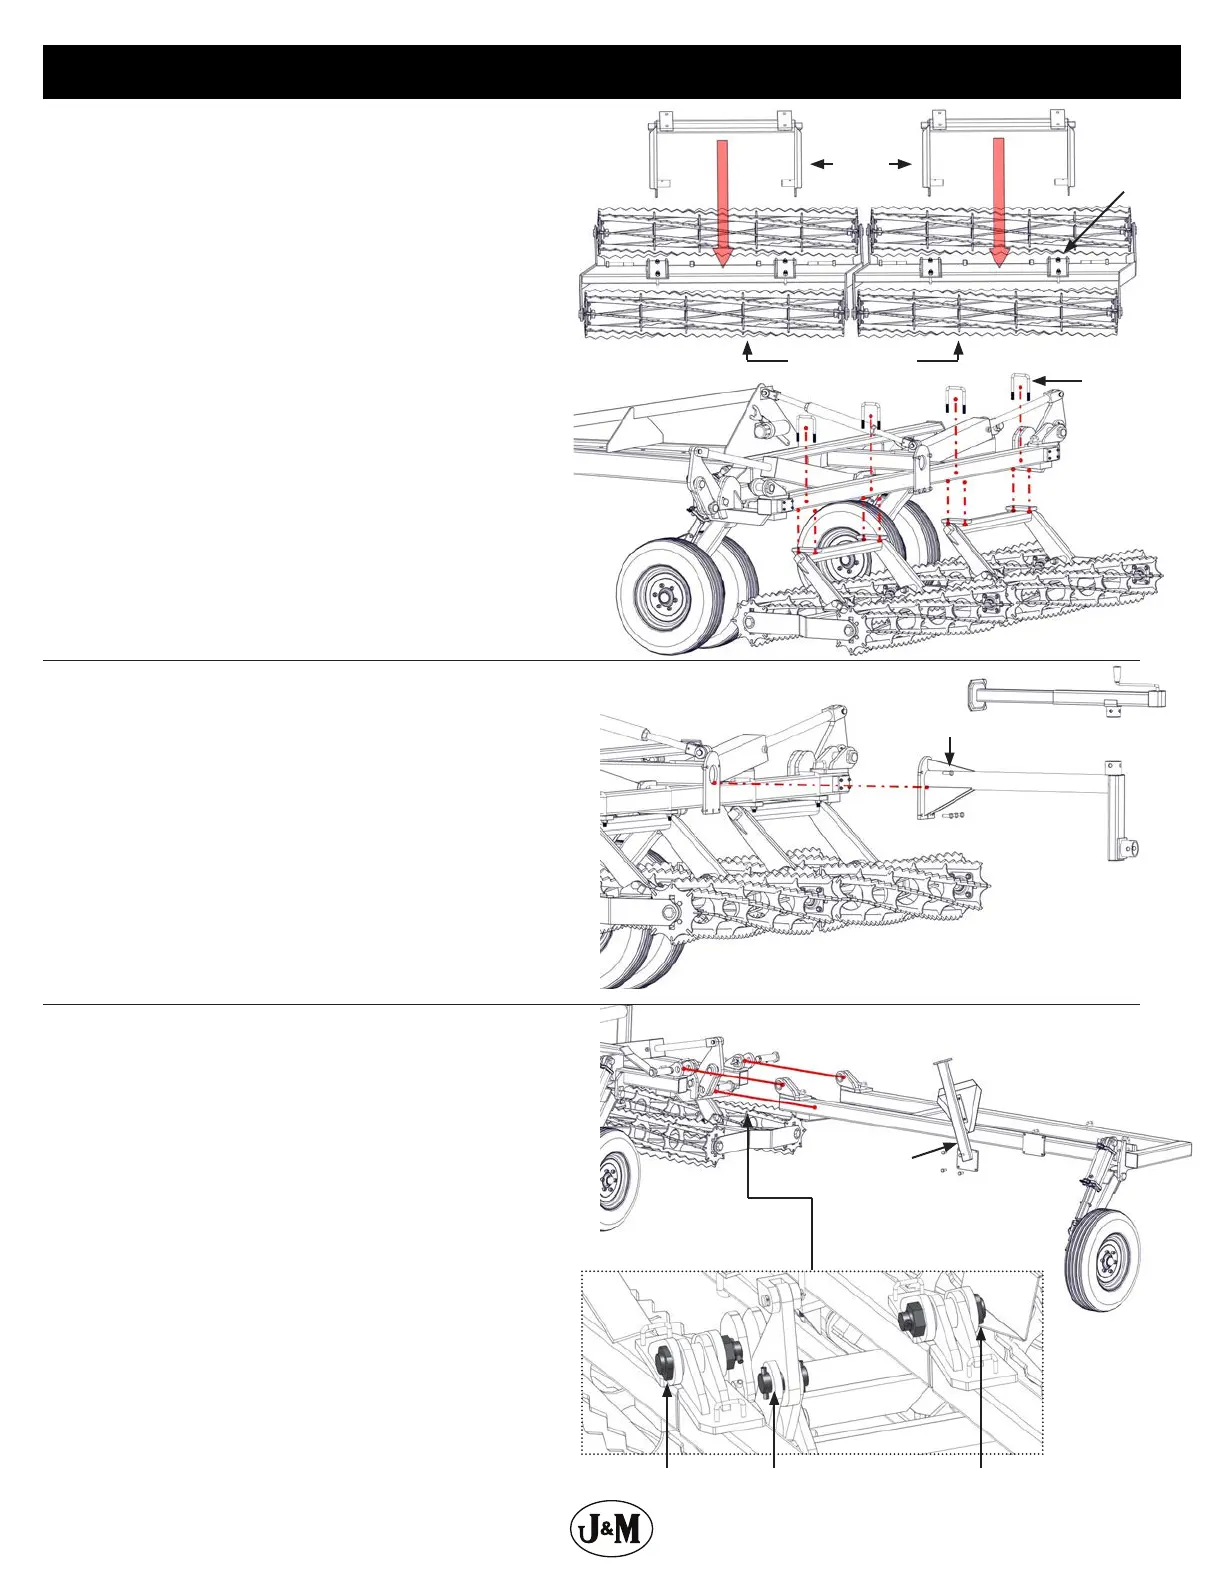
Base Unit Baskets
Attach the 3’ Heavy Torsion arms to the rolling basket. Secure
with 1” x 6-1/2” hex bolt and 1” nylon locking hex nut. Fasten
hardware once secured. (Rocker Pads may need installed. Use
4-1/8” x 4-1/2” x 5/8” U-Bolt and (2) 5/8” nylon locking hex
nuts.)
Make sure the baskets are symmetrically placed on
the Base Unit Main Frame and have a 1-1/2” clearance
between baskets.
NOTE: Be sure the basket assemblies with the 3” x 3” torsion
arms are secured to the Base Unit Main Frame. The rolling
basket assemblies for the side wings have a smaller 2-1/2” x
2-1/2” torsion arm.
Attach the torsion arm - rolling basket assembly to the main
frame. Secure each torsion arm with (2) 5/8” x 4” x 6” U-bolts
and a 5/8” centerlock hex nut. Fasten hardware once secured.
1-3/4” x 6-3/8” 4” Wing Pin 1-3/4”x 5”
Wing Frame
Wing Rest
Jack Stand Weldment
Jack Stand
1/2” x 1-1/2”
Rolling Basket
Torsion Arms
3” x 3”
5/8” x 4” x 6”
U-Bolts
Rocker Pad
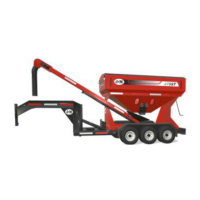
Wing Frame
Attach the Wing Frames to the Main Frame. For each wing
use:
• 1-3/4” x 6-3/8” Welded Pin
• 1-3/4”x 5” Welded Pin
• (2) 1-3/4” Hex Nuts
• 4” Wing Pin
• (4) Roll Pins
Once secured, fasten hardware.
Wing Rest
Attach a Wing Rest weldment to each wing. Secure using (4)
1/2” x 1-1/4” hex bolts and (4) 1/2” centerlock hex nuts.
Once secured, fasten hardware.
Jack Stand
Secure the Jack Stand Weldment to the Main Frame using (5)
1/2” x 1-1/2” hex bolts and (5) 1/2” centerlock hex nuts. Fasten
hardware once secured. Attach the jack stand to the support
arm using the supplied pin.