Page 10
ENGLISH
Jandy
®
VersaFlo
™
Integrated Bypass for JXi
™
& JXiQ
™
Pool and Spa Heater | Installation & Operation Manual
3.3 Connect at PCB
3.3.1 JXi Heater
1. Remove factory installed jumper from Bypass
Switch (J22).
2. Connect the 2 pin GR/B and B/BK at the board
position Bypass Motor (J21).
3. Connect the 2 pink wires to the 2 terminal
connector at board position Bypass Switch (J22)
polarity does not matter.
4. Replace zipties as needed.
3.3.2 JXiQ Heater
1. Carefully pass the harness through the low voltage
grommet on the raceway, see
Figure 14 (b)
.
2. Connect the quick connect 4 terminal connector
GR/BK, B/BK, PK, and PK at the board position
Bypass (27 & 28). See
Figure 13
(bypass).
3. Replace zipties as needed.
WARNING/
SHOCK HAZARD
Follow all applicable installation codes. Prior to
installation or performing any service, turn off all
switches and the main breaker in the pool/spa pump
electrical circuit. Failure to comply may cause a shock or
hazard resulting in severe personal injury or death. While
disconnecting and/or connecting any electrical wiring,
becareful not to damage or abrade any of the wiring.
Section 4. Bypass Physical
Connections
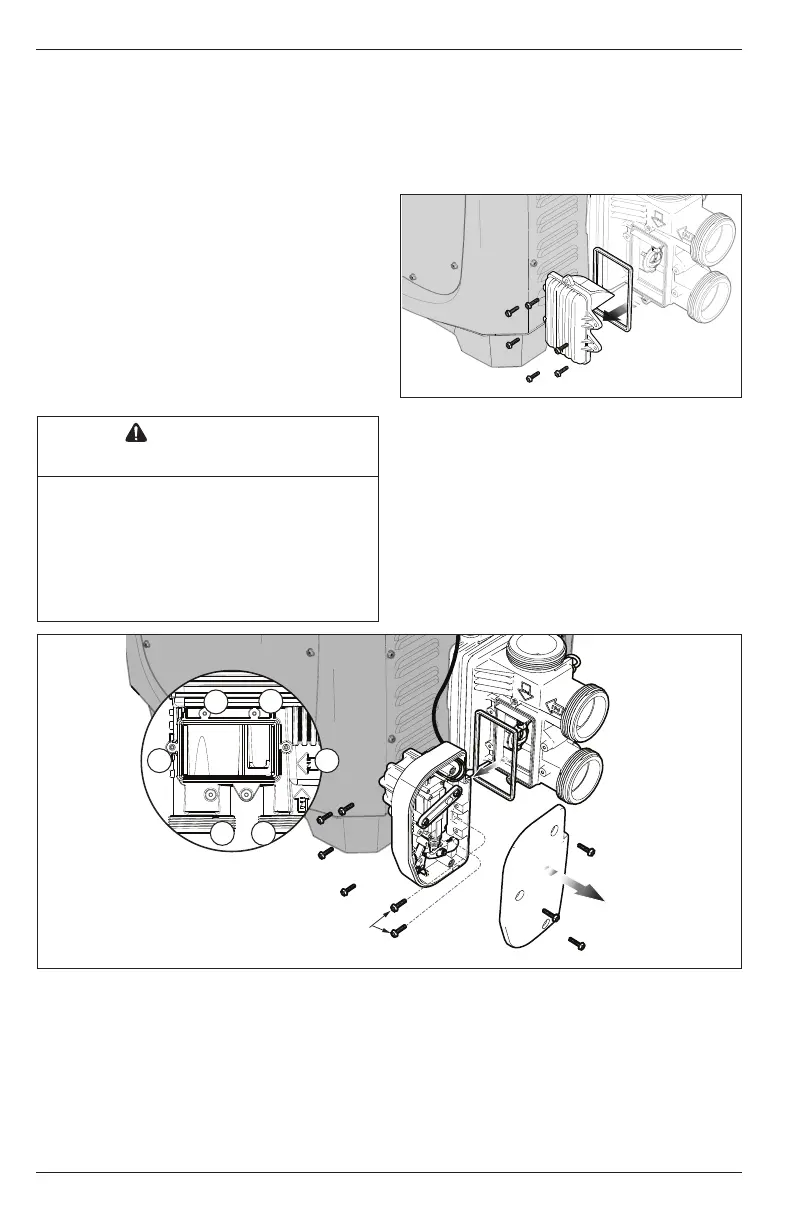
4.1 Remove Access Plate
1. Remove the six screws securing the access plate.
2. Remove the access plate and seal.
Figure 15. Remove Access Panel
4.2 Remove Bypass Assembly
1. Remove the three screws holding the bypass
cover in place.
2. Remove the six screws securing the bypass
assembly.
3. Remove the previously installed bypass and seal.
4. It is advised that the removed bypass and seal be
marked to ensure that they are not confused with
the replacement/upgrade equipment.
1
2
3
4
5
6
NOTE: Follow the torque pattern
when reassembling.
Use 5/16" torque wrench
on two interior screws
Figure 16. Install VersaFlo Assembly