Page 8
6. Plumb in the 1½ inch drain line. Adequate
drainage must be provided for the deck canister.
NOTE Proper drainage for the deck canister is critical
to avoid damage to the laminar jet assembly.
7. Verify the deck canister is level.
8. Place the adjustable deck lid collar back on the
canister. This collar allows the installer to make
fine adjustments when leveling the canister to
be flush with the deck's finished surface. Set the
collar at the finished deck level and pour the deck.
3.2 Out-of-Deck/Planter Box Installation
CAUTION
Do not install the Jandy laminar jet deck canister in
an area prone to run-off or fl ooding or on a
fl ammable surface.
NOTE The deck canister lid can only rotate
approximately 90 degrees to the left or the right.
Therefore, make sure that the deck canister is
positioned towards the desired target location
prior to completing the installation.
1. Dig the hole for the deck canister approximately
24 inches deep and 18 inches in diameter. This will
ensure enough room for positioning the canister
and laying out the plumbing. The dimensions
allow for the addition of a layer of pea gravel (1/8
to 1/4 size) for drainage, as well as room to pour
concrete around the outside of the canister for
stability.
canister marked “Electrical” (see Figure 6). Refer
to Section 5 for fiber optic installation.
NOTE Use one (1) of the two (2) electrical inlets,
located on either side of the deck canister,
which are provided for installation ease.
NOTE Proper drainage for the deck canister is critical
to avoid damage to the laminar jet assembly.
2. Lift up the lid and jet assembly and adjustable
deck lid collar from the deck canister.
NOTE To ensure that the canister stays upright while
installing and leveling the unit, place a 6 inch
length of 1 inch PVC pipe in the stake-up socket
feature located on the bottom of the canister
(see Figure 5).
3. Set the deck canister in the hole. The canister
should be approximately 1½-2 inches above the
finished grade in the planter.
NOTE Unlike the in-deck installation, the deck canister
cover cannot be fl ush with the fi nished grade.
It must sit slightly above the surface to prevent
water and debris from seeping into the canister.
4. Level the deck canister. To hold the canister in
place, position a 6 inch piece of 1 inch PVC pipe
in the construction support socket located on the
bottom of the canister (see Figure 5).
5. Plumb the incoming, filtered water supply to the
1 inch hub located on the bottom of the deck
canister marked “Inlet” (see Figure 6). The filtered
water supply must include a check valve (see
Figures 1 and 2).
6. Plumb the conduit for the fiber/LED cable to the
1 inch hub located on the bottom of the deck
canister marked “Electrical”. Refer to Section 5
for fiber optic installation.
7. Plumb in the 1½ inch drain line located on the
bottom of the deck canister. Adequate drainage
must be provided for the canister.
8. Fill in the hole surrounding the deck canister with
concrete or suitable backfill material for stability
in the ground.
9. Place the adjustable deck lid collar back on the
canister.
3.3 Pressure Test Water Lines
The unit is shipped ready for the pressure test with a cap
on the fl exible hose that is attached to the canister.
NOTE This cap can be used to winterize the system or
service the unit, if needed.
3.4 Flush Water Lines
It is important that prior to reinstalling the laminar jet
and deck canister lid, the installer must turn on the water
source and
fl ush the lines of any debris.
NOTE The fi nger screen is installed in the fi tting under the
cap. Remove the fi nger screen when fl ushing the
line and reinstall the screen when reinstalling the
cap or the jet assembly as shown in Section 6.1.
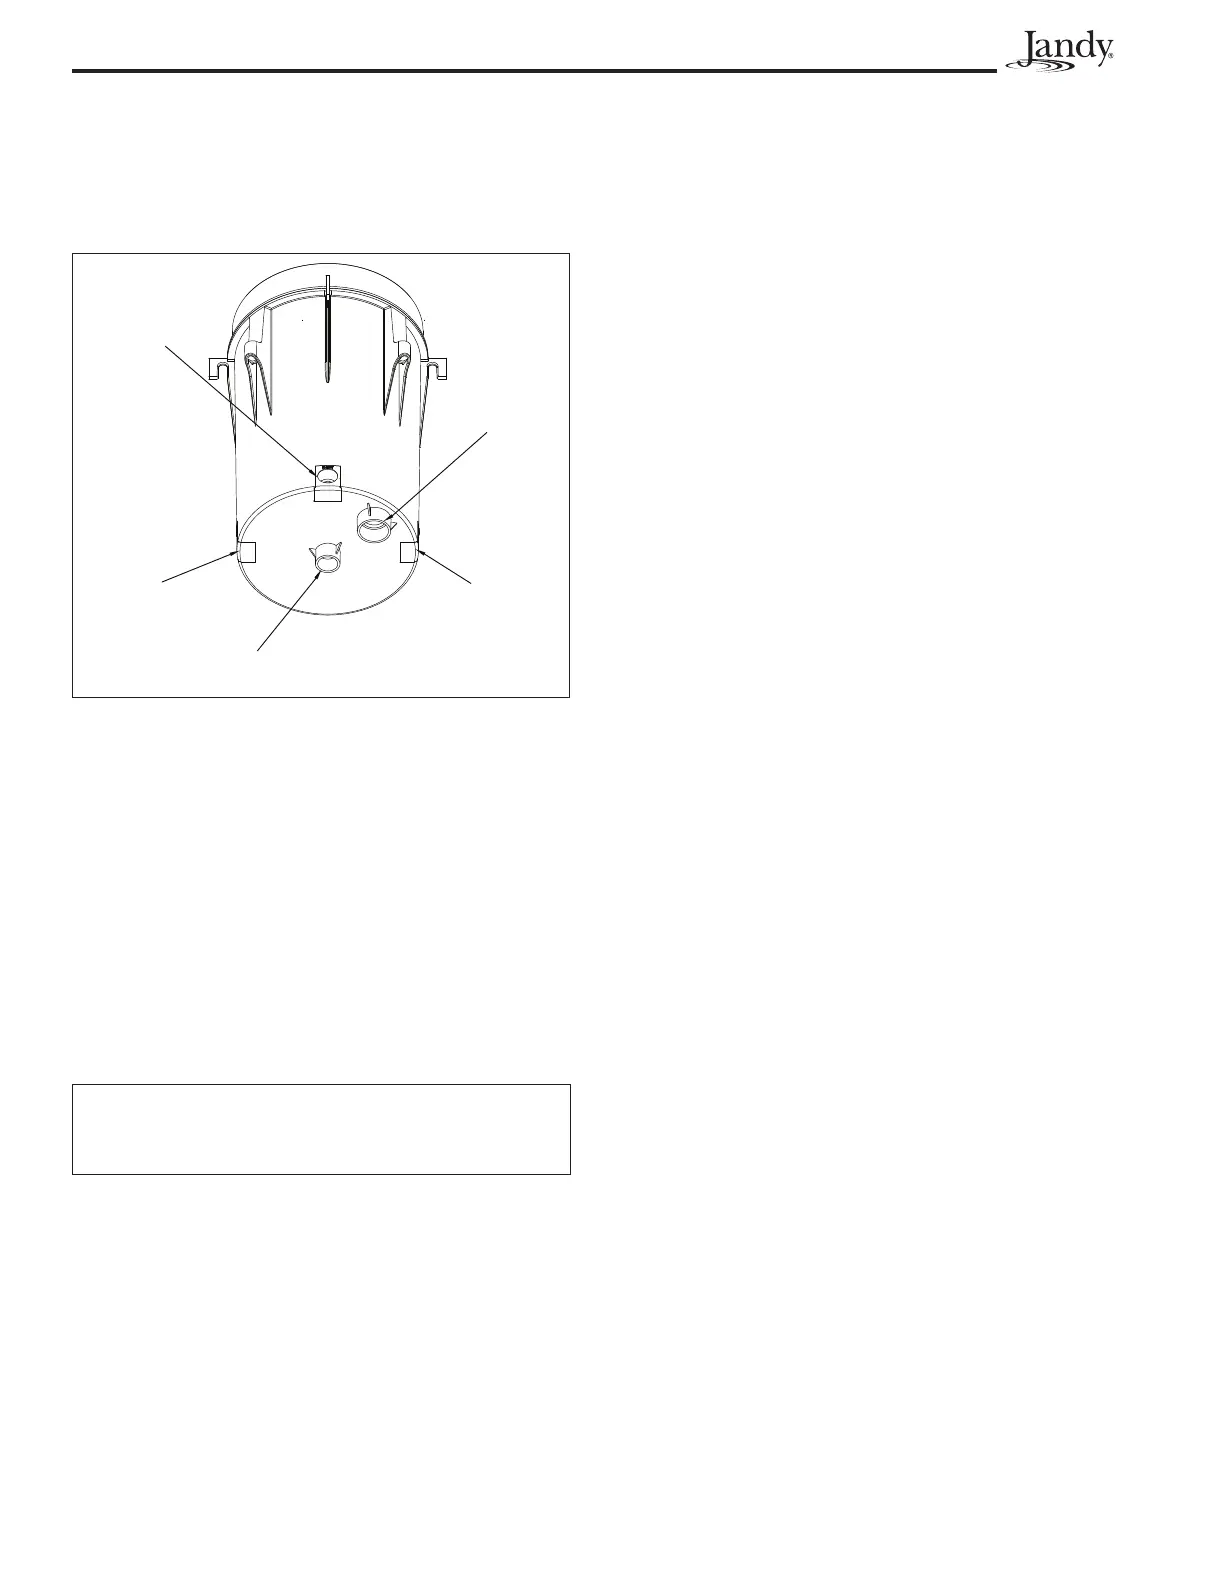
Figure 6. Deck Canister - Bottom View
1" Stake-Up
Socket Feature
1-1/2" Drain Port
1" Water Inlet
3/4" Electrical
Inlet (Optional)
3/4" Electrical
Inlet (Optional)