18
OPERATION - TIG (JM-352C ONLY)
Before starng any welding acvity ensure that you have suitable eye protecon and
protecve clothing. Also take the necessary steps to protect any persons within the welding
area.
TIG welding mode
Terms used: TIG – Tungsten Inert Gas, GTAW – Gas Tungsten Arc Welding.
TIG welding is an arc welding process that uses a non-consumable tungsten electrode
to produce the heat for welding.
The weld area is protected from atmospheric contaminaon by a shielding gas (usually
an inert gas such as argon or helium) and a ller rod matching the base material is
normally used, though some welds, known as autogenous welds, are carried out
without the need for ller wire.
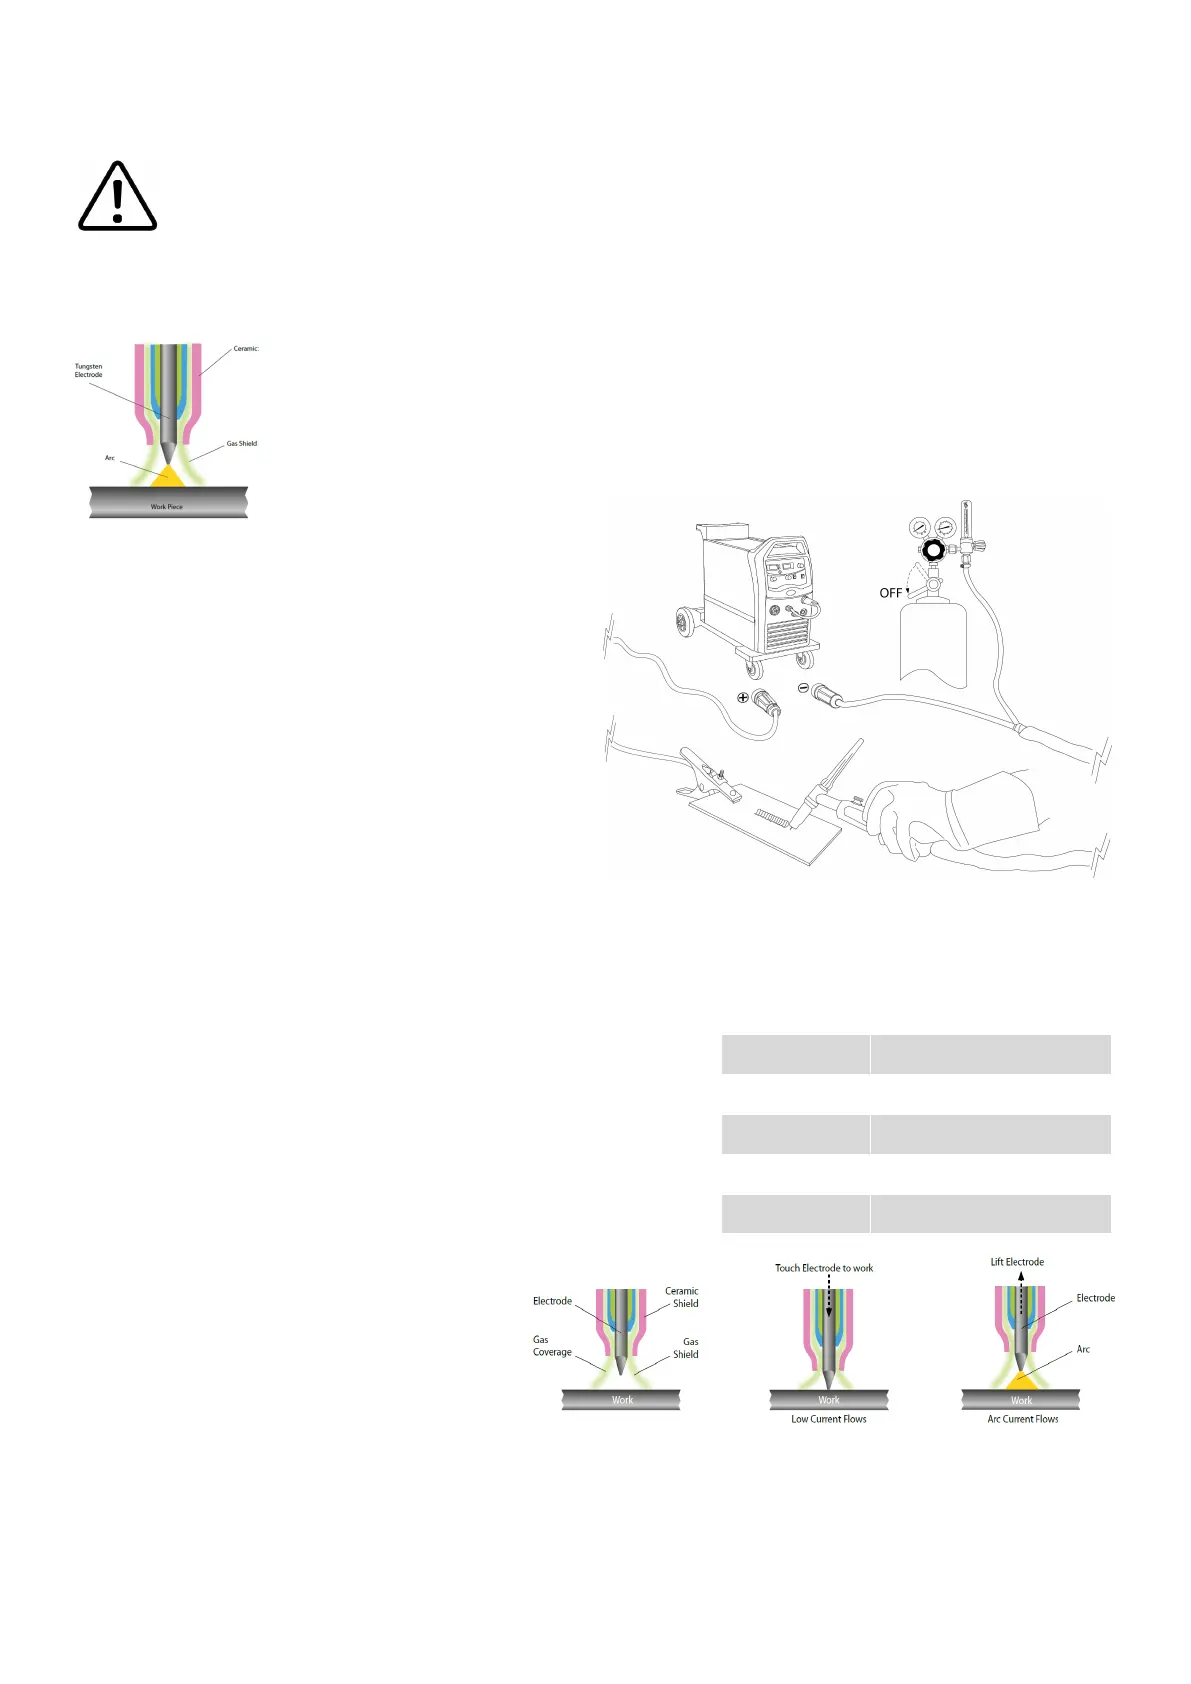
When the Jasic 352C is used in Li TIG mode, you
are required to use a ‘valve’ type TIG torch.
Insert the dinse cable plug of the TIG torch to the “-”
socket on the front panel of the machine and fully
ghten clockwise.
Insert the dinse cable plug for the work clamp into
the “+” socket on the front panel of the welding
machine and fully ghten clockwise.
Connect the TIG torch gas hose to the regulator or
owmeter located on the shield gas cylinder.
Before starng any welding acvity ensure that you have suitable eye protecon and protecve
clothing. Also take the necessary steps to protect any persons within the area.
Rotate the power switch on the back panel to “ON” and then select TIG by switching the welding mode
switch to TIG. Set the amperage on the machine suitable for the applicaon and tungsten being used (see
table).
Ensure you have adequate welding current according to the
thickness of the work and weld prep being carried out and ller
wire being used.
Open the gas valve of the cylinder and then open the gas valve
on the TIG torch and adjust the gas regulator to obtain the
desired ow rate.
The MIG 352C allows the tungsten to be in
direct contact with the work piece with
minimal current so as not to leave tungsten
deposits.
Oer the TIG torch tungsten to the material
to be welded and once contact has been
made (B) the tungsten can then be lied away 2-4mm from the work piece and the welding arc is then
established (C).
Once welding is complete, pull the TIG torch away from the weld area enough to stop the welding arc but
ensure you leave the torch in place to shield the weld with gas for a few seconds unl the preset post ow
gas turns o.
Tungsten Size DC – Electrode Negave
1.0mm 15 – 80A
1.6mm 70 – 150A
2.4mm 150 – 250A
3.2mm 250A – 400A
A B C