JasperMIDI guide
Building Choices
There are options to consider before you start construction.
• If using JasperMIDI as an internal option
in a Jasper or Wasp synthesizer, then
you can omit the 5V regulator, D1 and
C3 and the 8pin mini-din socket. The
PCB can be wired directly to the 5V rail
in the synth.
• If using JasperMIDI as an external unit,
but connected to a Jasper synth using a
mini-din cable, it can be powered from
the host with the LINKPWR jumper on
the PCB is bridged, and enabled on the
Jasper synth.
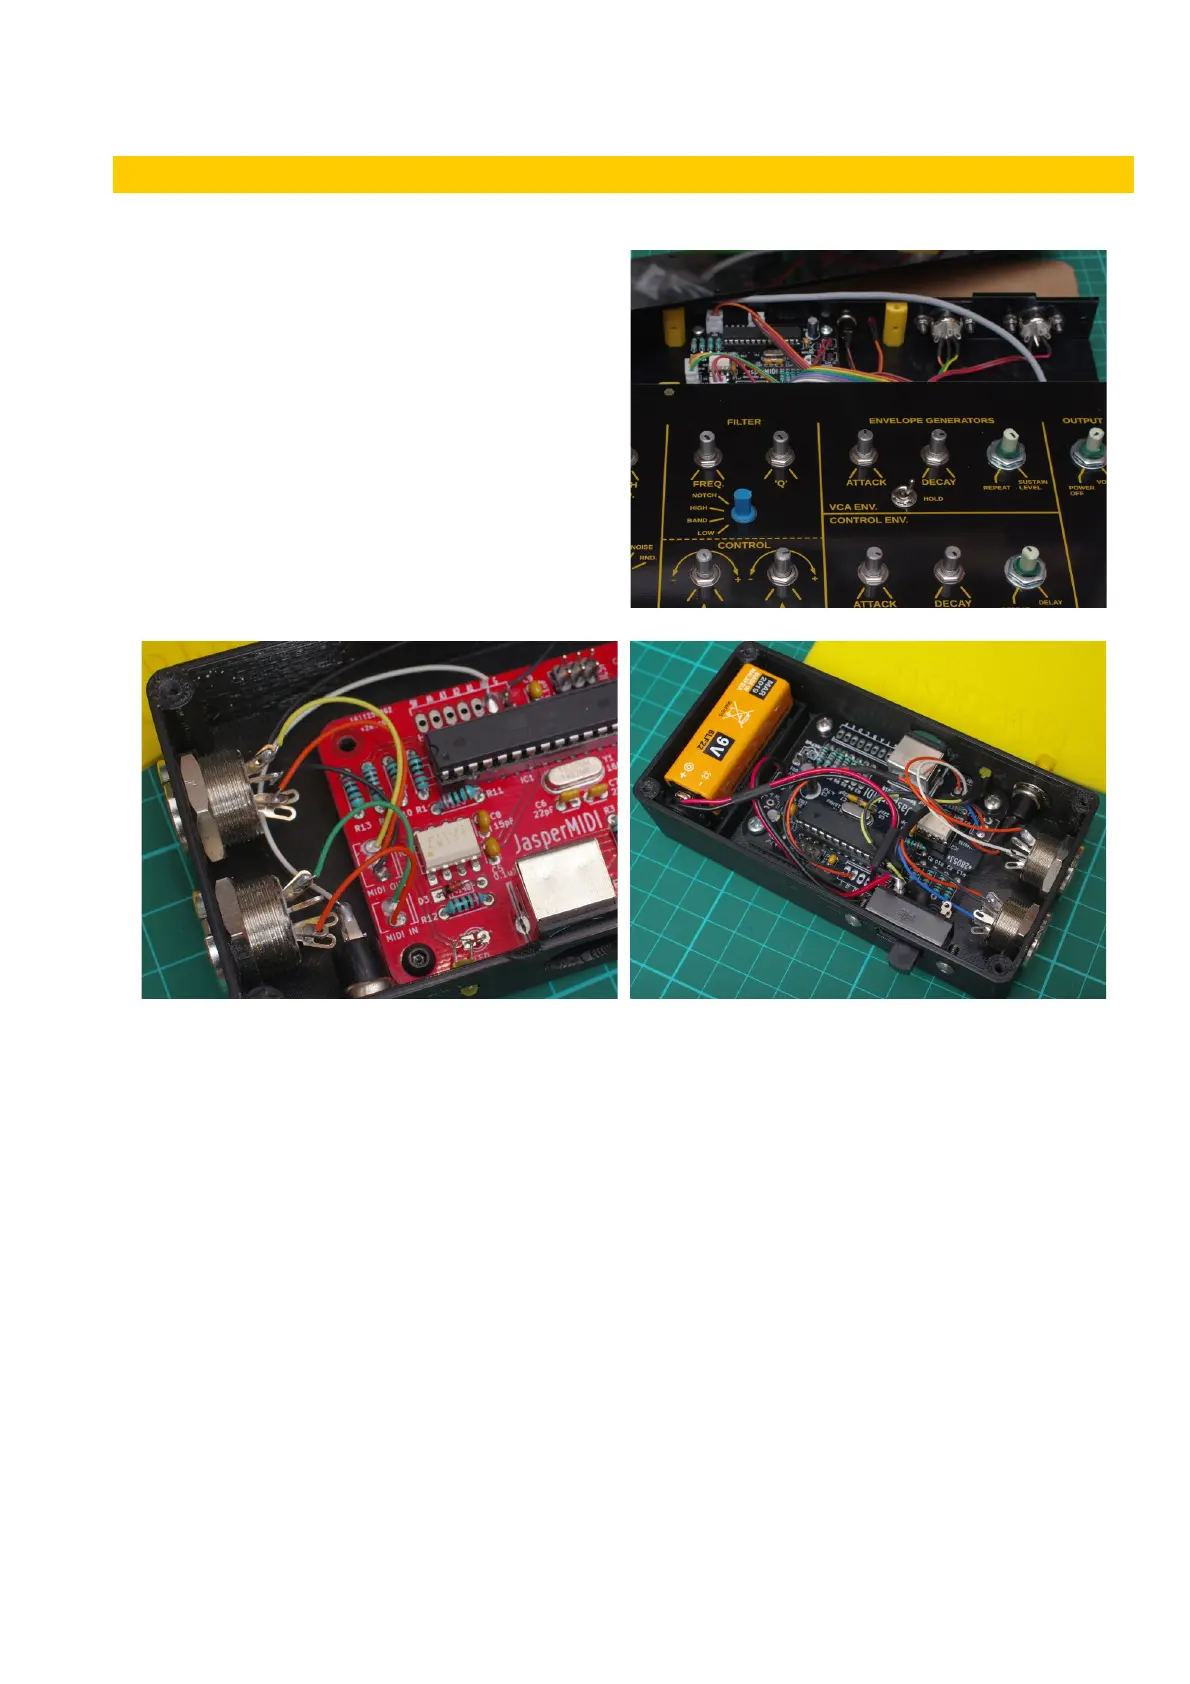
• Alternatively you can power the JasperMIDI separately with a battery or DC jack. In which
case do not solder the LINKPWR jumper. The version illustrated above right uses a 9V battery
connected to a sliding switch.
• If you only want MIDI input, then you can omit one of the 5 pin DIN sockets.
• If you are happy with only having JasperMIDI operate on MIDI channel 1, you can omit the
pushbutton switch.
• MTA100 or Molex KK connectors can be omitted and the socket and Link cables can be wired
directly to the PCB. This is useful if your enclosure is quite small.
• A 78L05 5V regulator can be used in place of the low drop-out MCP1702 5V regulator – but
you will need to twist its legs to match the pinout.
• If you wish to interface with vintage Wasp or Gnat synths, you can wire a 7pin full size DIN
socket to the Link header on the PCB.
• If you are not likely to be reprogramming your JasperMIDI microcontroller, you can omit the
2x3 pin header.
v1 Page 3 of 9 November 2017