TROUBLESHOOTING THE SLIDEOUT
If the slideout does not move when the slideout switch is depressed, follow these steps.
Check the auxiliary battery (customer supplied) for a full charge and good wire
connections.
Check the 12-volt fuse or circuit breaker.
Check for loose connections at the slideout motor.
If the slideout still will not operate, follow these steps.
If the slideout is extended, refer to the following section on overriding the specific
slideout system installed on your RV.
If the slideout is retracted, leave it in that position.
Contact your dealer or customer service for repair assistance.
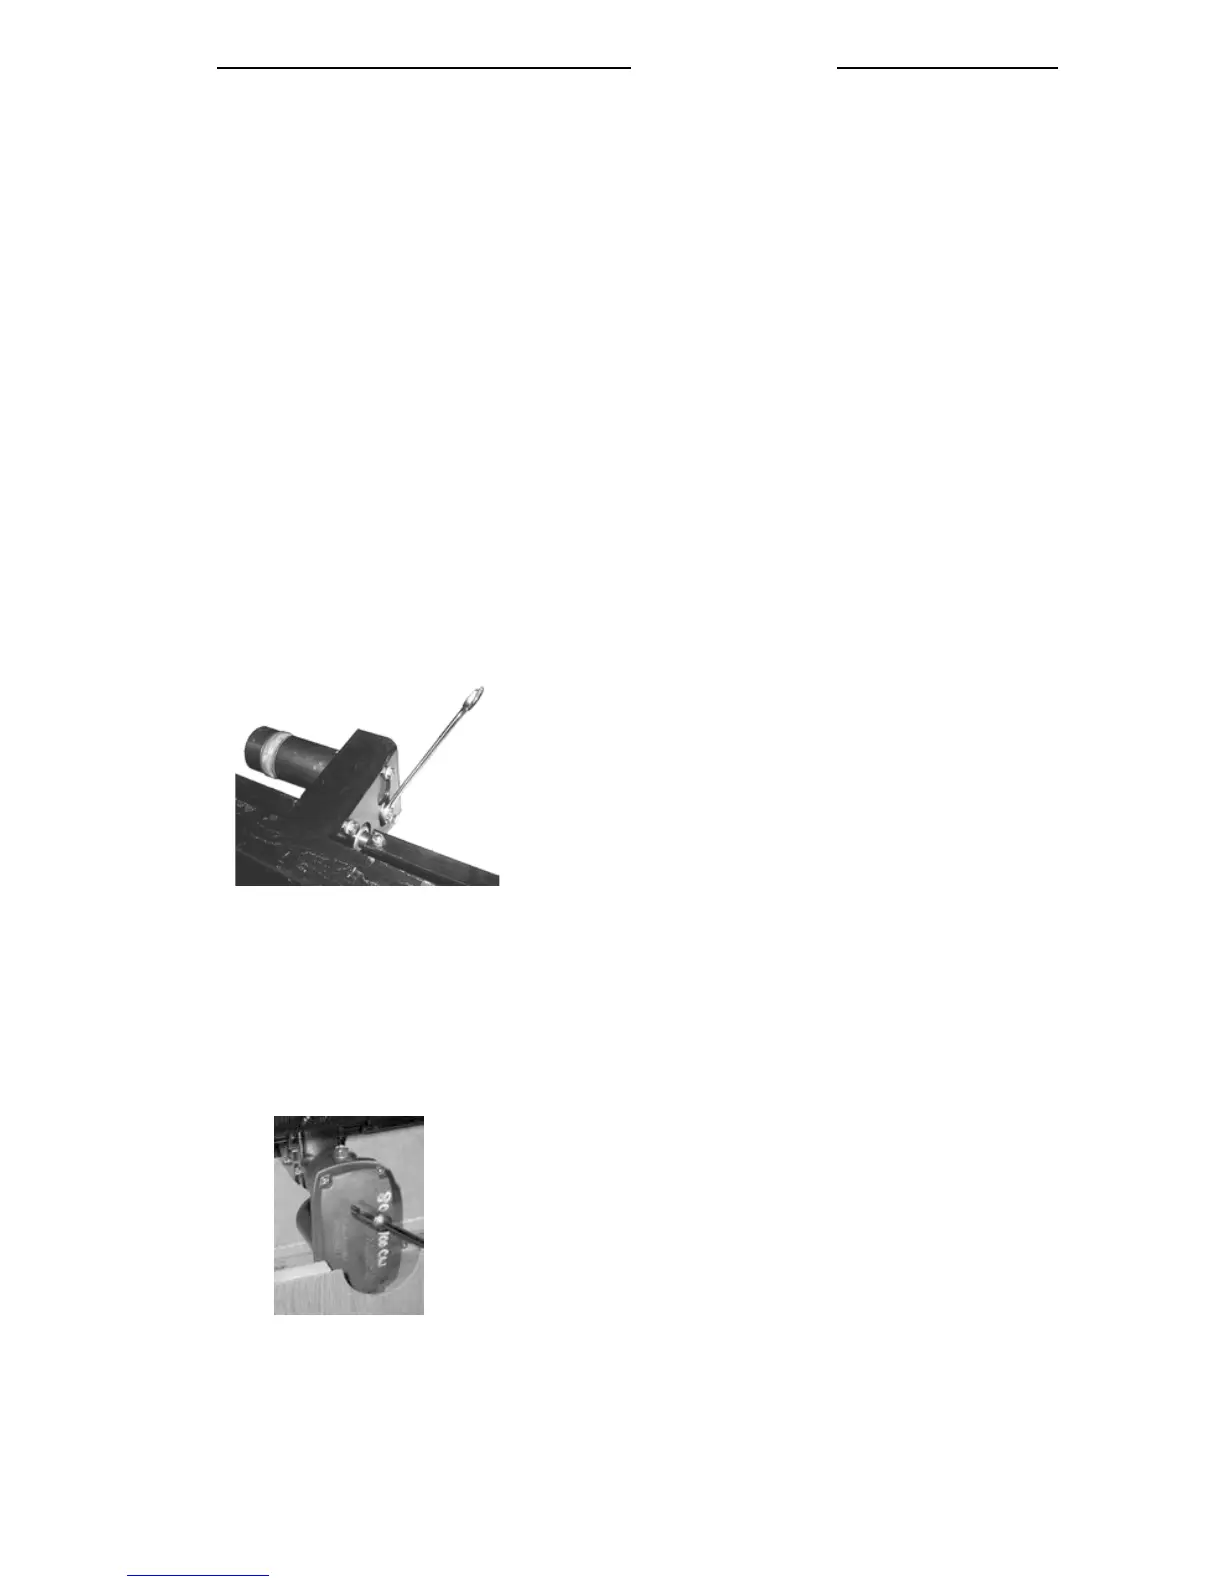
Dexter Chassis Group (DCG) Center Drive Slide override (flush floor models)
Disconnect the slideout motor brake wires from the power wires. Connect a 9 volt battery
harness to the motor brake wires Locate the manual advance crank nut on the backside of
the motor.
Crank the nut on the slideout motor with a 5/8” socket. With the 9 volt battery connected
to the motor brake crank the nut on the motor until the room is sealed. Once the slide is in
a closed position remove the 9 volt battery and harness.
DCG manual advance
crank nut
M-Tec rear bed/flush floor slideout override
In the event of a power failure or low battery, the slideout may be operated manually using
the manufacturer’s crank handle provided with your RV. The manual crank shaft is located
on the motor transmission housing. USE ONLY THE MANUFACTURER’S CRANK
HANDLE PROVIDED. Turn the crank clockwise to move the room “in”, counter-
clockwise to move the room “out”.