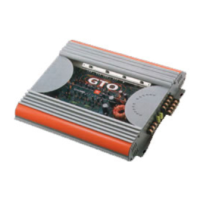
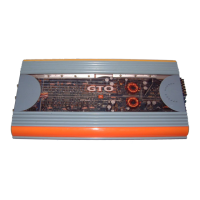
This document is a service manual for the JBL GX-A604, a 435-watt full-range 4-channel car power amplifier. It provides comprehensive information for installation, operation, troubleshooting, and maintenance of the device.
Function Description
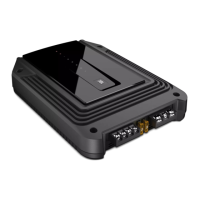
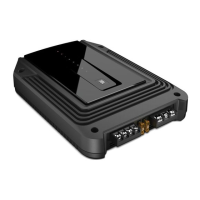
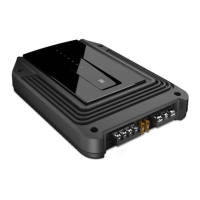
The JBL GX-A604 is a car audio amplifier designed to boost the audio signal from a source unit (like a car stereo head unit) and deliver it to speakers. As a 4-channel amplifier, it can power up to four individual speakers, or it can be configured for 3-channel or 2-channel operation to power a combination of speakers and subwoofers. The "full range" designation indicates its capability to amplify a wide spectrum of audio frequencies, making it suitable for driving various types of speakers, including tweeters, mid-range speakers, and subwoofers (when configured appropriately). With a power output of 435 watts, it is designed to provide significant volume and clarity to a car audio system.
The amplifier features various input and output connections to integrate with a car's audio system. It includes both line-level inputs (RCA jacks) for connection to a source unit's pre-amp outputs and speaker-level inputs for connection to a source unit's speaker outputs, offering flexibility in installation. Output terminals are provided for connecting speakers. Control features such as input mode selection, level controls, bass boost, and crossover filters allow for fine-tuning the audio output to match the specific speakers and listening preferences.
Usage Features
Installation and Connections:
The manual details the critical steps for connecting the amplifier to a vehicle's electrical system and audio components.
- Ground (GND) Connection: A minimum 10 AWG (5.3 mm²) wire should connect the amplifier's GND terminal directly to a solid, bare metal point on the vehicle's chassis. Proper grounding is essential for stable operation and to prevent noise. Sandpaper should be used to clear paint from the metal surface, and a star-type lock washer is recommended for a secure connection.
- Power (12V) Connection: A minimum 10 AWG (5.3 mm²) wire connects the amplifier's +12V terminal directly to the battery's positive (+) terminal. An in-line fuse holder, located within 18 inches (46 cm) of the battery, is required. For the GX-A604, a 50 A fuse is specified. The fuse should not be installed until all wiring is complete. Routing this wire requires using appropriate grommets when passing through the firewall or other sheet metal to prevent damage, which could lead to a vehicle fire.
- Remote Turn-On (REM) Connection (Optional): A smaller gauge wire (e.g., >#18 AWG or 0.82 mm²) connects the amplifier's REM terminal to the source unit's remote turn-on output or the vehicle's ACC power terminal. This allows the amplifier to turn on and off with the car's ignition or head unit.
- Speaker Connections: The manual provides diagrams for different speaker configurations:
- 4-Channel Operation: Connect front speakers to FL and FR (+) and (–) terminals, and rear speakers to RL and RR (+) and (–) terminals. Minimum speaker impedance is 2 ohms per channel. It is crucial to ensure that positive and negative speaker wires do not touch each other or other terminals to prevent short circuits and amplifier damage.
- 3-Channel Operation: Connect left and right speakers to FL and FR (+) and (–) terminals. Connect a subwoofer to the RL (+) and RR (–) terminals. The rear-channel Bass Boost control is recommended for subwoofer connections. Minimum speaker impedance is 2 ohms for left/right speakers and 4 ohms for the subwoofer. Two 2-ohm subwoofers can be connected in series to achieve the required 4-ohm impedance.
- 2-Channel Operation: Connect left and right speakers as shown in the diagram. Minimum speaker impedance is 4 ohms per channel.
- Input Connections:
- Line-Level Inputs (RCA): Connect the source unit's or processor's front and rear left and right outputs to the amplifier's inputs. For 3-channel operation, a "Y"-adapter may be needed to connect the source unit's subwoofer output to the amplifier's rear left and right input jacks. For 2-channel operation, only the front left and right input connections are used.
- Speaker-Level Inputs: The manual refers to a separate section for using speaker-level inputs, which are an alternative to line-level inputs when the source unit does not have RCA pre-amp outputs.
Controls and Adjustments:
The amplifier includes various controls to optimize audio performance:
- Input Mode Switch: This switch allows selection between 4-channel and 2-channel input modes, depending on how the source unit is connected.
- Level Controls: These controls adjust the input sensitivity of the amplifier to match the output voltage of the source unit. Proper setting of the input level is crucial to prevent distortion and maximize signal-to-noise ratio.
- Bass Boost: This feature allows for enhancing low frequencies, particularly useful for subwoofer applications. The manual advises setting the Bass Boost to "OFF" for GX-A604/GX-A602 in some troubleshooting scenarios. For GX-A3001, it suggests gradually increasing it while listening to bass-heavy music until distortion begins, then reducing it slightly.
- Crossover Controls (HP/LP/Flat): The amplifier features crossover filters (High Pass, Low Pass, Flat) and frequency adjustment. These controls allow specific frequency ranges to be sent to different speakers, optimizing sound quality and protecting speakers from frequencies they cannot reproduce effectively. For example, a High Pass filter can prevent low bass from reaching small full-range speakers, while a Low Pass filter directs only bass frequencies to a subwoofer. The manual refers to a dedicated section for setting these controls for 4-channel, 3-channel, and 2-channel operations.
Maintenance Features
The manual provides a troubleshooting section to help diagnose and resolve common issues, which can be considered a form of user-level maintenance.
Troubleshooting:
The troubleshooting guide addresses several common problems:
- No sound (Power LED is off):
- Check +12V and GND connections.
- Check if the fuse near the battery is blown and replace with an identical fuse.
- Check all amplifier fuses and replace if blown.
- If using the REM connection, check its proper connection to the audio system's remote turn-on wire or vehicle's ACC power terminal.
- No sound (Power LED is orange):
- Check all amplifier input and speaker connections.
- Ensure Level controls are not turned all the way down (counter-clockwise).
- Verify the vehicle audio system's source unit volume control is not turned all the way down.
- No sound (Protection LED is red):
- Confirm the vehicle's electrical system is supplying between 9V and 16V DC to the amplifier. Correct any out-of-range supply voltage.
- If the amplifier has overheated, wait for it to cool down before attempting to use it again.
- Disconnect all speakers and attempt to turn the amplifier on. If it turns on (Power LED orange), there is a short circuit in one or more speaker wires. Correct all shorts before reconnecting. If it still doesn't turn on (Protection LED red, Power LED off), contact an authorized JBL dealer.
- Sound only comes from some speakers:
- Check that the vehicle audio system's source unit's balance and fader controls are set to their center (midpoint).
- (GX-A604): Check that the amplifier's Mode Switch setting matches the input and speaker connections.
- Sound is too quiet:
- Ensure amplifier's Level controls are not turned too low. Refer to the "Set The Input Level" section for proper adjustment.
- Sound in front/rear speakers is distorted:
- Make sure the amplifier's Crossover Filter switch for distorted channels is set to HP (High Pass).
- Set the Crossover control for distorted channels to a higher setting.
- Check if distortion originates from the vehicle audio system's source unit.
- Sound in the subwoofer is distorted:
- (GX-A604, GX-A602): Set the Bass Boost switch to "OFF".
- (GX-A3001): Gradually increase Bass Boost while listening to bass-heavy music until distortion begins, then reduce slightly.
- Check if distortion originates from the vehicle audio system's source unit.
The manual emphasizes the importance of proper wiring and fuse installation to prevent damage to the amplifier and the vehicle. While it doesn't detail internal component replacement or advanced repairs, the comprehensive troubleshooting guide empowers users to address common operational issues before seeking professional service, thereby extending the life and optimal performance of the amplifier.