16
11. +/ - – These increment/decrement buttons have different functions, depending upon
whether a front panel button is flashing or not. If a front panel button is flashing, they are
used to increment or decrement the value of the selected parameter. (For example, if the
PRESET button is flashing, the +/- buttons step through the various equalization presets.)
If no front panel button is flashing, the +/- buttons adjust the overall system volume.
(Press the + button to increase system volume and the – button to decrease system
volume.)
In addition, by pressing both the + and – buttons at the same time, they can be used to alter
the brightness of all front panel buttons and the Meter Display. There are six settings; at
the lowest setting, all buttons and meter segments are completely off, and only the JBL
logo glows to indicate power.
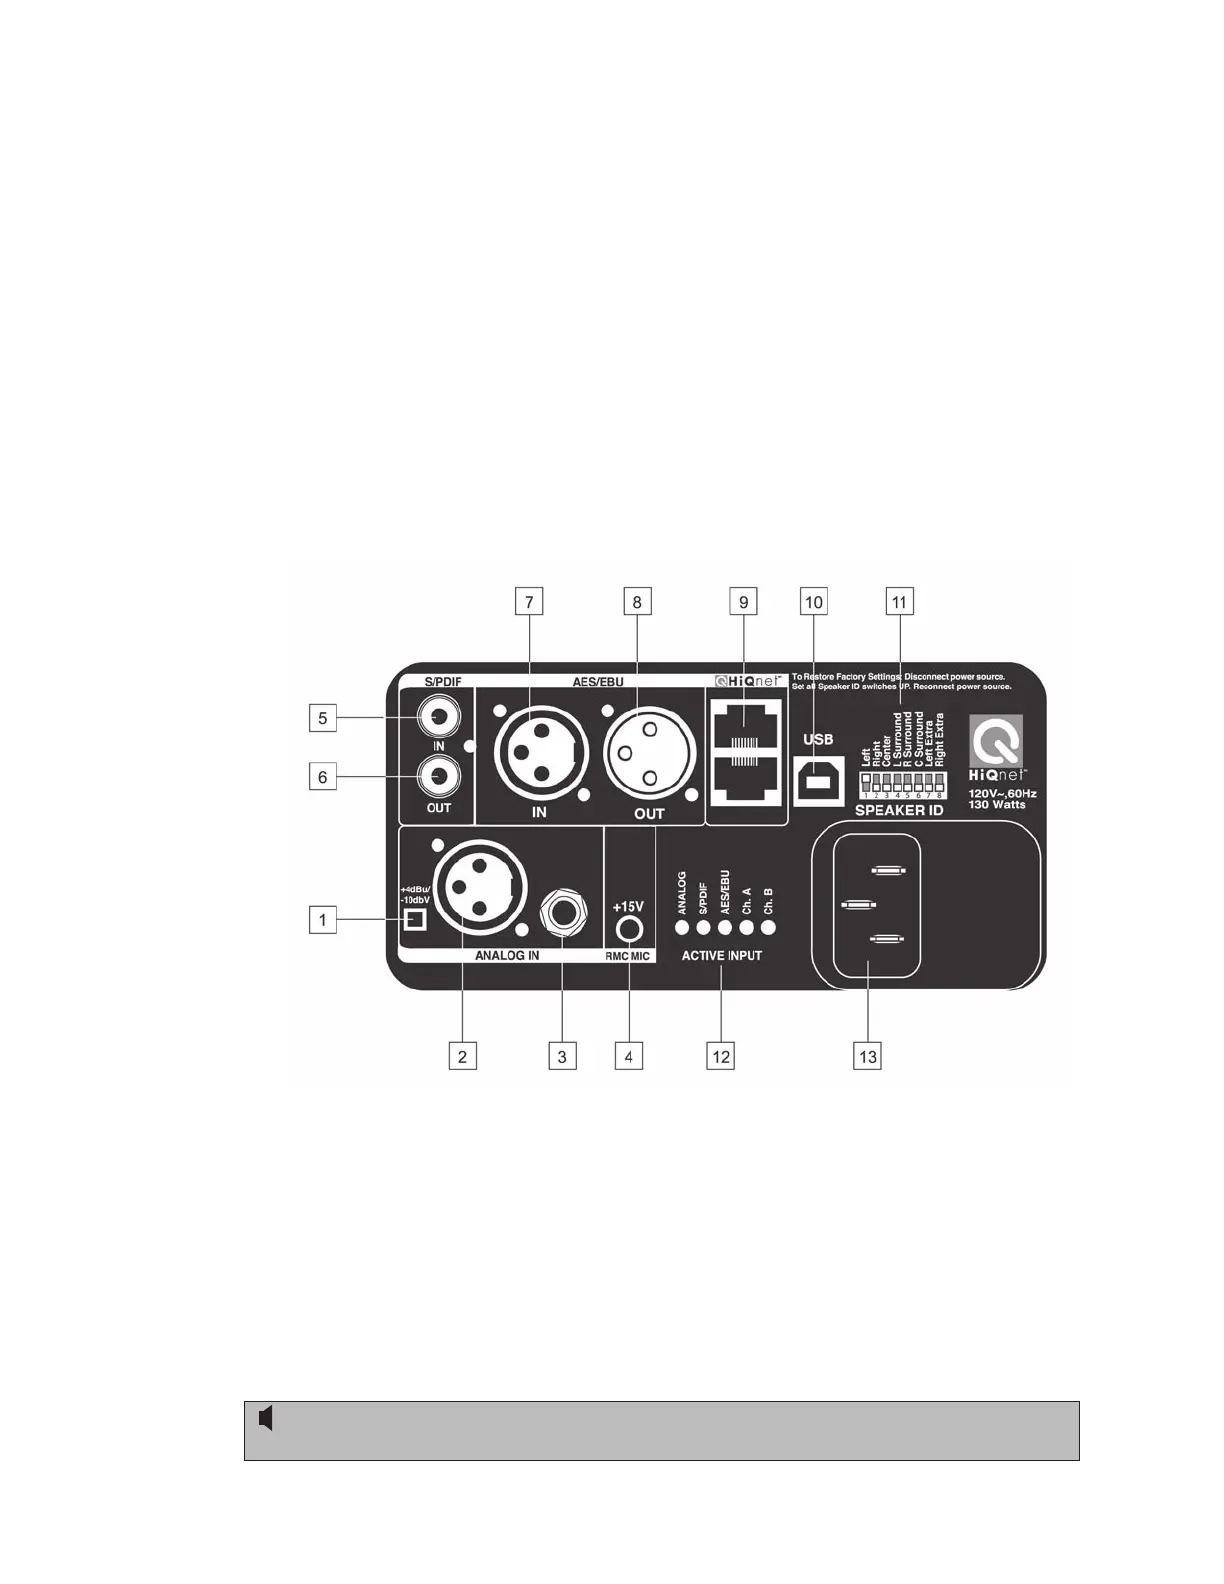
Rear Panel
LSR4328P/ LSR4326P Rear Panel
1. Input Sensitivity switch – In the OUT position, selects -10 dBV sensitivity for the analog
input. In the IN position (pressed in), selects +4 dBu sensitivity for the analog input.
2. Analog XLR Balanced input connector. Connect analog audio input signal here.
3. Analog ¼″ Balanced input connector. Alternatively, analog audio input signal can be
connected here. CAUTION: Use either the ¼″ or the XLR input, Do not
connect sources to both analog inputs simultaneously.
Positive voltage to Pin 2 of the XLR connector or the tip of the ¼″ jack will produce a
forward motion in the speaker cone. See Appendix C in this manual for wiring diagrams.
Reference - Rear Panel